Netgear GS752TS GS7xxTS-TPS Hardware Installation Guide - Page 30
Step 8: Managing the Switch using a Web Browser or the PC Utility, The GS728TS, GS728TPS, GS752TS - ip address
 |
View all Netgear GS752TS manuals
Add to My Manuals
Save this manual to your list of manuals |
Page 30 highlights
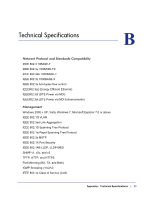
GS728TS, GS728TPS, GS752TS, and GS752TPS Smart Switch Hardware Installation Guide Step 8: Managing the Switch using a Web Browser or the PC Utility The GS728TS, GS728TPS, GS752TS, and GS752TPS Smart Switch contains software for viewing, changing, and monitoring the way it works. This management software is not required for the switch to work. The ports can be used without using the management software. However, the management software enables the setup of VLAN and trunking features and also improves the efficiency of the switch, which results in the improvement of its overall performance as well as the performance of the network. After powering up the switch for the first time, the Smart Switch can be configured using a Web browser or a program called Smart Control Center. For more information about managing the switch, see the Software Administration Manual on the Smart Switch Resource CD. Note: The switch is configured with a default IP address of 192.168.0.239 and a subnet mask of 255.255.255.0. 30 | Chapter 4. Installation
-
 1
1 -
2
-
3
-
4
-
5
-
6
-
7
-
8
-
9
-
10
-
11
-
12
-
13
-
14
-
15
-
16
-
17
-
18
-
19
-
20
-
21
-
22
-
23
-
24
-
 25
25 -
 26
26 -
 27
27 -
 28
28 -
 29
29 -
 30
30 -
 31
31 -
 32
32 -
 33
33 -
 34
34 -
 35
35 -
36
-
37
-
38
-
39
-
40
-
41
-
42
 |
 |