Nokia IP2255 Installation Guide - Page 101
release the lock., screw is on the opposite side of the NIC.
 |
View all Nokia IP2255 manuals
Add to My Manuals
Save this manual to your list of manuals |
Page 101 highlights
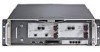
Replacing the Management NIC 4. Remove the NICs that occupy slot 3 and slot 4 directly above the management NIC. a. Loosen the two retaining screws on the front plate of the NIC. One screw is located behind the ejector and locking lever and the other screw is on the opposite side of the NIC. b. Press the red button on the ejector and locking lever on the NIC. to release the lock. c. Press or push the lever toward the outer edge of the appliance. Ejector and locking lever Push red button to disengage or engage lock Unscrew screw to release 10Base-SR X2 A L SLOT 1 A 10Base-SR X2 L RESET CONSOLE A L SLOT 2 Slot 3 Slot 4 Release or lock 10/100BaseT SLOT 3 into place 1 3 PCMCIA 10/100BaseT 2 1 1 2 SLOT 10/100/1000BaseT 2 4 5 4 3 6 5 4 6 SLOT 5 7 1 L 3 A 5 7 8 L A 7 L A 8 L A 5 7 IP2255 1 2 3 4 00062 d. Continue to press or push the lever outward until the NIC is released and extends slightly beyond the front panel of the appliance. e. Gently pull the NIC out from the slot and place it on a suitable, grounded work surface. Nokia IP2255 Security Platform Installation Guide 101
-
 1
1 -
2
-
3
-
4
-
5
-
6
-
7
-
8
-
9
-
10
-
11
-
12
-
13
-
14
-
15
-
16
-
17
-
18
-
19
-
20
-
21
-
22
-
23
-
24
-
25
-
26
-
27
-
28
-
29
-
30
-
31
-
32
-
33
-
34
-
35
-
36
-
37
-
38
-
39
-
40
-
41
-
42
-
43
-
44
-
45
-
46
-
47
-
48
-
49
-
50
-
51
-
52
-
53
-
54
-
55
-
56
-
57
-
58
-
59
-
60
-
61
-
62
-
63
-
64
-
65
-
66
-
67
-
68
-
69
-
70
-
71
-
72
-
73
-
74
-
75
-
76
-
77
-
78
-
79
-
80
-
81
-
82
-
83
-
84
-
85
-
86
-
87
-
88
-
89
-
90
-
91
-
92
-
93
-
94
-
95
-
 96
96 -
 97
97 -
 98
98 -
 99
99 -
 100
100 -
 101
101 -
 102
102 -
 103
103 -
 104
104 -
 105
105 -
 106
106 -
107
-
108
-
109
-
110
-
111
-
112
-
113
-
114
-
115
-
116
-
117
-
118
-
119
-
120
-
121
-
122
-
123
-
124
 |
 |
