Panasonic BL-C10A Network Camera - Page 57
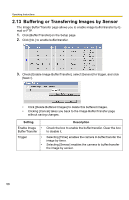
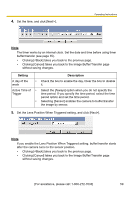
Notes, Setting, Description, Saving the settings of Image Buffer/Transfer or Date and Time. - update
 |
UPC - 037988809738
View all Panasonic BL-C10A manuals
Add to My Manuals
Save this manual to your list of manuals |
Page 57 highlights
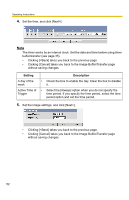
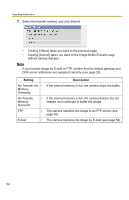
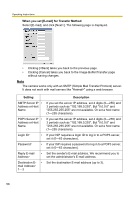
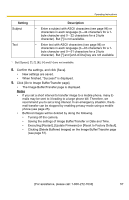
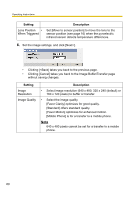
Operating Instructions Setting Subject Text Description • Enter a subject with ASCII characters (see page 96) or characters in each language (0-44 characters for a 1byte character and 0-22 characters for a 2-byte character). But ["] is not available. • Enter text with ASCII characters (see page 96) or characters in each language (0-63 characters for a 1byte character and 0-31 characters for a 2-byte character). But ["] and [end-of-line] key are not available. *1 But [Space and [>] are not available. 8. Confirm the settings, and click [Save]. • New settings are saved. • When finished, "Success!" is displayed. 9. Click [Go to Image Buffer/Transfer page]. • The Image Buffer/Transfer page is displayed. Notes • If you set a short interval to transfer image to a mobile phone, many E- mails may be sent to it leading to a large phone bill. Therefore, we recommend you to set a long interval. In an emergency situation, the Email transfer can be stopped by enabling privacy mode using a mobile phone (see page 25). • Buffered images will be deleted by doing the following. • Turning off the camera. • Saving the settings of Image Buffer/Transfer or Date and Time. • Executing [Restart], [Update Firmware] or [Reset to Factory Default]. • Clicking [Delete Buffered Images] on the Image Buffer/Transfer page (see page 51). [For assistance, please call: 1-800-272-7033] 57
-
 1
1 -
2
-
3
-
4
-
5
-
6
-
7
-
8
-
9
-
10
-
11
-
12
-
13
-
14
-
15
-
16
-
17
-
18
-
19
-
20
-
21
-
22
-
23
-
24
-
25
-
26
-
27
-
28
-
29
-
30
-
31
-
32
-
33
-
34
-
35
-
36
-
37
-
38
-
39
-
40
-
41
-
42
-
43
-
44
-
45
-
46
-
47
-
48
-
49
-
50
-
51
-
 52
52 -
 53
53 -
 54
54 -
 55
55 -
 56
56 -
 57
57 -
 58
58 -
 59
59 -
 60
60 -
 61
61 -
 62
62 -
63
-
64
-
65
-
66
-
67
-
68
-
69
-
70
-
71
-
72
-
73
-
74
-
75
-
76
-
77
-
78
-
79
-
80
-
81
-
82
-
83
-
84
-
85
-
86
-
87
-
88
-
89
-
90
-
91
-
92
-
93
-
94
-
95
-
96
-
97
-
98
-
99
-
100
-
101
-
102
-
103
-
104
 |
 |