Panasonic BL-C10A Network Camera - Page 59
Select the [Always] option when you do not specify the, time period. If you specify the time period
 |
UPC - 037988809738
View all Panasonic BL-C10A manuals
Add to My Manuals
Save this manual to your list of manuals |
Page 59 highlights
4. Set the time, and click [Next>]. Operating Instructions Note The timer works by an internal clock. Set the date and time before using timer buffer/transfer (see page 35). • Clicking []. Note If you enable the Lens Position When Triggered setting, buffer/transfer starts after the camera turns to the sensor position. • Clicking [
-
 1
1 -
2
-
3
-
4
-
5
-
6
-
7
-
8
-
9
-
10
-
11
-
12
-
13
-
14
-
15
-
16
-
17
-
18
-
19
-
20
-
21
-
22
-
23
-
24
-
25
-
26
-
27
-
28
-
29
-
30
-
31
-
32
-
33
-
34
-
35
-
36
-
37
-
38
-
39
-
40
-
41
-
42
-
43
-
44
-
45
-
46
-
47
-
48
-
49
-
50
-
51
-
52
-
53
-
 54
54 -
 55
55 -
 56
56 -
 57
57 -
 58
58 -
 59
59 -
 60
60 -
 61
61 -
 62
62 -
 63
63 -
 64
64 -
65
-
66
-
67
-
68
-
69
-
70
-
71
-
72
-
73
-
74
-
75
-
76
-
77
-
78
-
79
-
80
-
81
-
82
-
83
-
84
-
85
-
86
-
87
-
88
-
89
-
90
-
91
-
92
-
93
-
94
-
95
-
96
-
97
-
98
-
99
-
100
-
101
-
102
-
103
-
104
 |
 |
Operating Instructions
[For assistance, please call: 1-800-272-7033]
59
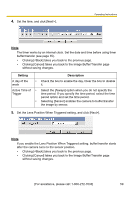
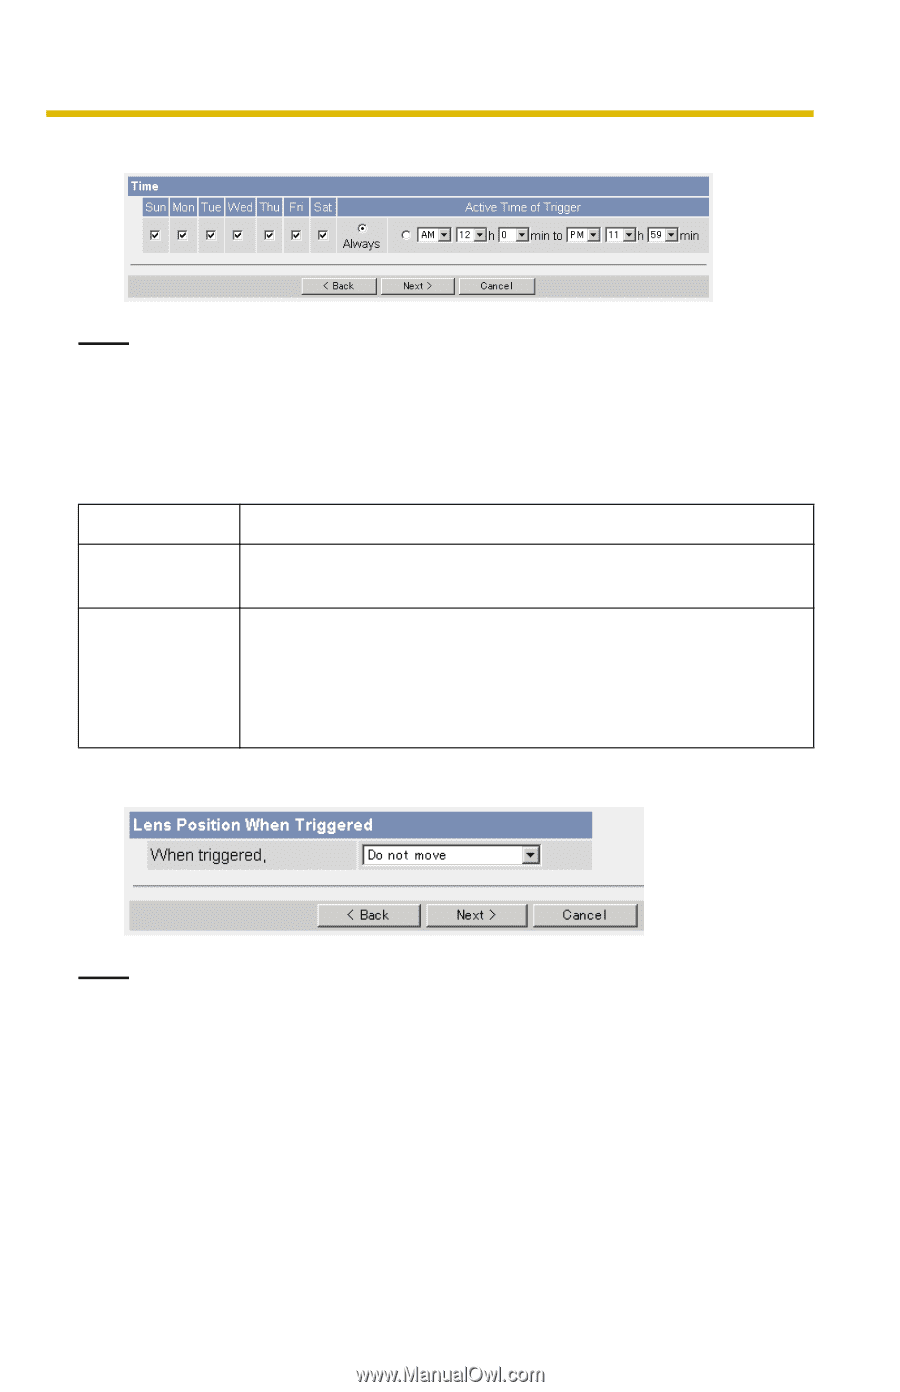
4.
Set the time, and click [Next>].
Note
The timer works by an internal clock. Set the date and time before using timer
buffer/transfer (see page 35).
•
Clicking [<Back] takes you back to the previous page.
•
Clicking [Cancel] takes you back to the Image Buffer/Transfer page
without saving changes.
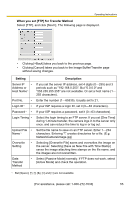
5.
Set the Lens Position When Triggered setting, and click [Next>].
Note
If you enable the Lens Position When Triggered setting, buffer/transfer starts
after the camera turns to the sensor position.
•
Clicking [<Back] takes you back to the previous page.
•
Clicking [Cancel] takes you back to the Image Buffer/Transfer page
without saving changes.
Setting
Description
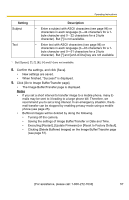
A day of the
week
•
Check the box to enable the day. Clear the box to disable
it.
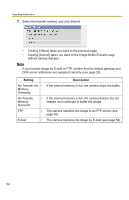
Active Time of
Trigger
•
Select the [Always] option when you do not specify the
time period. If you specify the time period, select the time
period option and set the time period.
•
Selecting [Sensor] enables the camera to buffer/transfer
the image by sensor.