Pentax Optio E50 Operation Manual - Page 64
Taking Pictures with Customized Settings, Selecting the Recorded Pixels
 |
UPC - 898887001315
View all Pentax Optio E50 manuals
Add to My Manuals
Save this manual to your list of manuals |
Page 64 highlights
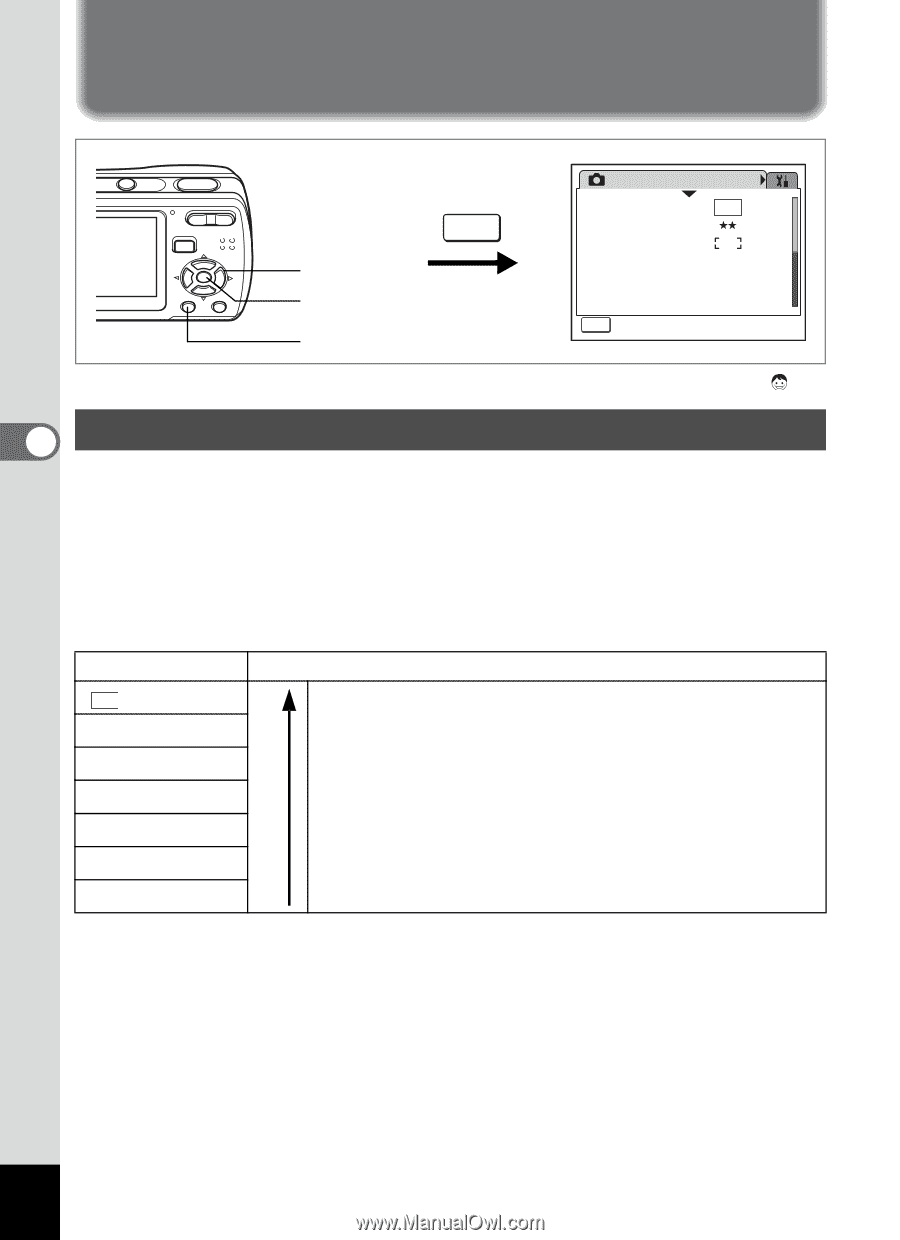
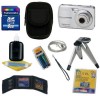
Taking Pictures Taking Pictures with Customized Settings Rec. Mode 1/2 2, 3, 4 5 1, 6 MENU Recorded Pixels Quality Level AF Mode Sensitivity EV Compensation Movie 8M Auto ±0 MENU Exit Available in b R A q < I i \ c E 4 Selecting the Recorded Pixels Select Recorded Pixels for still pictures according to how the images will be used. The larger the number of recorded pixels the higher the quality of images, but the file size becomes larger. The selected Quality Level also affects the size of the image file. (p.64) Recorded Pixels Recorded Pixels 8M 3264×2448 f 2592×1944 g 2304×1728 h 2048×1536 i 1600×1200 l 1024×768 m 640×480 Clearer Use For printing high quality photos or A4-size pictures, or editing images on a PC. For making postcard-size prints. For posting on a website or attaching to e-mail. 1 Press the 3 button in A mode. The [A Rec. Mode] menu appears. 2 Use the four-way controller (23) to select [Recorded Pixels]. 62
-
 1
1 -
2
-
3
-
4
-
5
-
6
-
7
-
8
-
9
-
10
-
11
-
12
-
13
-
14
-
15
-
16
-
17
-
18
-
19
-
20
-
21
-
22
-
23
-
24
-
25
-
26
-
27
-
28
-
29
-
30
-
31
-
32
-
33
-
34
-
35
-
36
-
37
-
38
-
39
-
40
-
41
-
42
-
43
-
44
-
45
-
46
-
47
-
48
-
49
-
50
-
51
-
52
-
53
-
54
-
55
-
56
-
57
-
58
-
 59
59 -
 60
60 -
 61
61 -
 62
62 -
 63
63 -
 64
64 -
 65
65 -
 66
66 -
 67
67 -
 68
68 -
 69
69 -
70
-
71
-
72
-
73
-
74
-
75
-
76
-
77
-
78
-
79
-
80
-
81
-
82
-
83
-
84
-
85
-
86
-
87
-
88
-
89
-
90
-
91
-
92
-
93
-
94
-
95
-
96
-
97
-
98
-
99
-
100
-
101
-
102
-
103
-
104
-
105
-
106
-
107
-
108
-
109
-
110
-
111
-
112
-
113
-
114
-
115
-
116
-
117
-
118
-
119
-
120
-
121
-
122
-
123
-
124
-
125
-
126
-
127
-
128
-
129
-
130
-
131
-
132
-
133
-
134
-
135
-
136
-
137
-
138
-
139
-
140
-
141
-
142
-
143
-
144
-
145
-
146
-
147
-
148
-
149
-
150
-
151
-
152
-
153
-
154
-
155
-
156
-
157
-
158
-
159
 |
 |