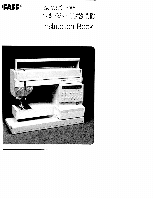
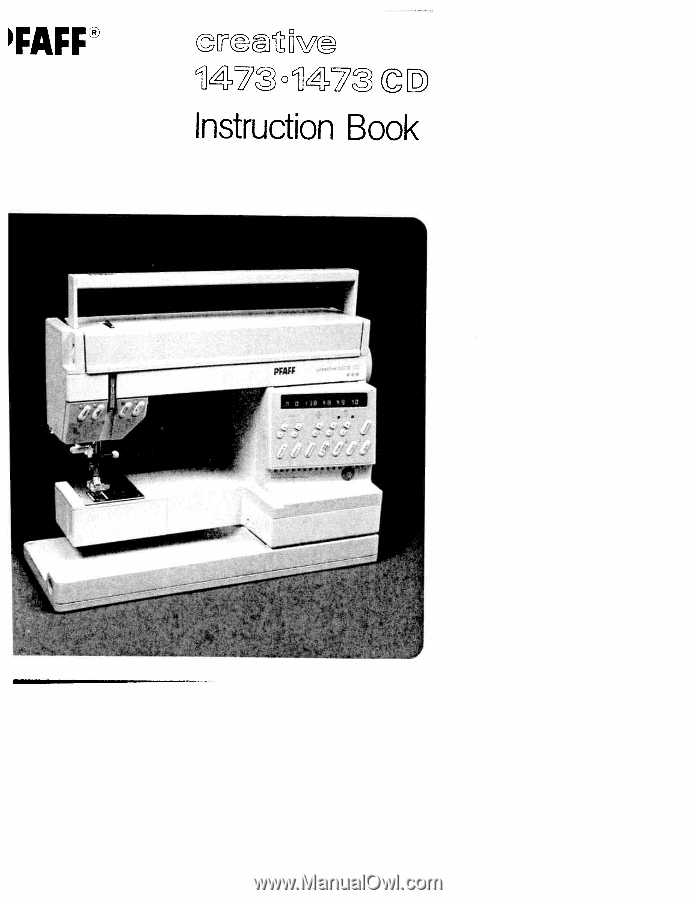
Pfaff creative 1473 Owner's Manual
Pfaff creative 1473 Manual
 |
View all Pfaff creative 1473 manuals
Add to My Manuals
Save this manual to your list of manuals |
Pfaff creative 1473 manual content summary:
- Pfaff creative 1473 | Owner's Manual - Page 1
- C') C 0-I- o o - Pfaff creative 1473 | Owner's Manual - Page 2
cord whenever you have to leave the machine or want to clean it, oil it or change mechanical and accessory parts. c) Be sure to use only a 15-watt light bulb in the sewing lamp. d) The drive belt must never be adjusted by anyone but an authori zed Pfaff agent. "ome safety rules valid for United - Pfaff creative 1473 | Owner's Manual - Page 3
. As a creative fashion designer you will no doubt have further questions regarding sewing problems now and then. If so, simply contact your PFAFF dealer. They will be pleased to help you whenever you wish. To make full use of the numerous tea tures of the machine, please read this instruction book - Pfaff creative 1473 | Owner's Manual - Page 4
4 - Pfaff creative 1473 | Owner's Manual - Page 5
10 Connection socket for the Creative Designer 1473 CD 11 Work support with accessory box and accessory compartment 12 Sewing foot holder with sewing foot 13 Needle holder with retaining screw 14 Bobbin thread monitor 15 "Needle down" key 16 "Sew-slow" key 17 Presser bar lifter 18 "Reverse" key - Pfaff creative 1473 | Owner's Manual - Page 6
stitch, reverse middle needle position For all sewing work requiring special needle positions. For sewing continuously in reverse, if you do not position For serging, appliquéing, inserting lace and basting with fringe foot. C ii '' Zigzag stitch from right needle position Same as program - Pfaff creative 1473 | Owner's Manual - Page 7
' Stretch blind stitch For invisible hemming in elastic materials (securing edges). 18 Light buttonhole For buttonhole sewing. Max.wk in mm S S 6 5,5 1 9 Button sewing For sewing on buttons. 6 20 Edge binding stitch Closed '' overlock stitch 2 '- Tricotpatching stitch Pullover stitch - Pfaff creative 1473 | Owner's Manual - Page 8
Description '8 Light buttonhole 7.0 to 16 mm i I 5(J-\ Light buttonhole 7.Oto44mm Application Max.wldthN in mm For sewing buttonholes in blouses, shirts and linen. ---.- For sewing buttonholes in bed linen. 1' 51 Stretch buttonhole, reinforced For buttonholes in open-weave fabrics. 1 52 - Pfaff creative 1473 | Owner's Manual - Page 9
lengthwise For darning thin damaged areas. I 1 59 Darning program For darning holes. lengthwise and crosswis& Stretch triple- 1 60 zigzag stitch For sewing elastic tapes in sportswear and ' bathing wear (high-stretch seam for light knitted fabrics). Stretch triple stitch elastic stitch For - Pfaff creative 1473 | Owner's Manual - Page 10
888° w1e AA% oooç •JfJo M2 888 •OOOOo 000 -w LMCk QQ-QQ 0000oo S2c*k% - Pfaff creative 1473 | Owner's Manual - Page 11
UrU3 >o)c C Sl51 Ni (D Gb) (D - Pfaff creative 1473 | Owner's Manual - Page 12
___ _ C.' 'I 0 I. 0 II N> I' - - Wa) 'a *00 x*xi - Pfaff creative 1473 | Owner's Manual - Page 13
___ ____- Description Application dth in mm 30-69 90-1 63 1 71-1 77 5053 60,61,63 Embroidery stitch programs Scalloping edge decoration For fancy seams, ornaments, borders embroideries. Programs 162 a, 162 b and and 163 are filling-out stitches for large areas. For table linen, serviettes - Pfaff creative 1473 | Owner's Manual - Page 14
N Electrical connection Lift off the cover and fold down the carrying handle. Compartment A is for storing the foot control, mains lead and instruction book. Open cover 2. 11io° Connect the mains lead. 10 - Pfaff creative 1473 | Owner's Manual - Page 15
Pull the power lead out of the foot control. Plug the foot control lead into connec tion socket 31 and place the foot con trol on the ground. 4 Press main switch 9, the sewing lamp then goes on. •11 - Pfaff creative 1473 | Owner's Manual - Page 16
4 OCD CD C) > CD a CD CD C CD C) r C/) D C 3 D C a D t CO CC) C CD c3C 0 0 CO CD D C CD ;0 Z CD CD a CD 3 CD C) CD - Pfaff creative 1473 | Owner's Manual - Page 17
4 CD CD C 0 D 0V •00 00 0. CD 0. C 0. CD CDCJ) CD 3CD - Pfaff creative 1473 | Owner's Manual - Page 18
guide 40, into bobbin winder tension A and around finger B. Now pass the thread to bobbin winder 25 and wind it a few times clockwise around the bobbin. Press the bobbin to the right. Then turn on the main switch, press the foot on. 14 Engaging the sewing action: hold the hand wheel firmly - Pfaff creative 1473 | Owner's Manual - Page 19
on the dual feed. Set needle at top position. Place bobbin on bobbin winder 25. Disen gage sewing action. Pull the needle thread under the sewing foot to the rght and through guide 44 (into open ng A and around finger B. see Ilustra liOn) Wind the thread a few times 'lockwise around the bobbin - Pfaff creative 1473 | Owner's Manual - Page 20
IN Inserting the bobbin: insert bobbin so that the thread unwinds as shown (A), pull thread through slot (B) and Out of opening (C). Checking the bobbin thread tension: with a brief, sharp upward movement of your hand the bobbin must slip downwards (turn screw D to the left for weaker tension and to - Pfaff creative 1473 | Owner's Manual - Page 21
4 Inserting the bobbin case: switch off main switch 9, lift latch A and push the bobbin case fully onto pin 8. Cutout C must face upwards. 4 Thread reel sizes: for small spools use the small or medium unwinding disc D, for large spools use large unwinding disc E. \ 17 - Pfaff creative 1473 | Owner's Manual - Page 22
off main switch 9. Set needle at top position. Raise sewing foot. Pull the thread as shown by the arrow into groove A, to the left past guide C, from below into slot B, into take-up lever 41. back to slot B and into the right-hand guide on the needle holder. 4 Place the needle thread behind hook - Pfaff creative 1473 | Owner's Manual - Page 23
Swir q hr oor inn hoid ii there ji r aquost needle P1 ;c thre 1(1 iii hook t n blow Swing threader to rear, releasing thread at same time, and when the threader has moved upwards. pull tb thread fully through the needle eye 19 - Pfaff creative 1473 | Owner's Manual - Page 24
t) C 4 C) 0 0 CD CD CD 0 0 CD c) J ac) -- rCD I zt C 0 CDDO CD. D CDCCD -c :7 zr5ciD) CD - Pfaff creative 1473 | Owner's Manual - Page 25
I Dual feed This prevents shifting of the material plies during sewing. Raise the sewing foot before engaging or disengaging if. I To engage: push top feed 43 down wards to lock it in place. To disengage: unlock top feed by pushing - Pfaff creative 1473 | Owner's Manual - Page 26
-in dual feed. When two or more fabric layers are fed simultaneously through conven tional sewing machines, there is always the possibility of slippage. The exclusive Pfaff solution ist built-in dual feed, a walking foot that simul taneously feeds the fabric from above as the feed dog moves it from - Pfaff creative 1473 | Owner's Manual - Page 27
£ 4 Swing work support 11 against the machine arm. Switch off main switch 9. Now place the material under the sewing foot. -T' -. F ) To place extra thick materials below the presser foot, raise presser bar lifter 17 higher and hold until fabric is in correct sewing position. ()1) - Pfaff creative 1473 | Owner's Manual - Page 28
4 Switch on main switch 9, have material cover needle hole (see illustration B) and lower the sewing foot onto it by pressing presser bar lifter 17 down wards. Position A of lever 17 is for darning. 4 Press the pedal. The harder you press, the faster the Creative sews. 24 - Pfaff creative 1473 | Owner's Manual - Page 29
39 A = setting mark Important! In order to obtain good sewing results it is important to check the following: 1. that the thread tension. This is checked with a wide zigzag stitch (program 10). Sew a short seam. The thread interlace ,,hould lie exactly between the two material plies. Range - Pfaff creative 1473 | Owner's Manual - Page 30
Raising the presser bar lifter: When you have finished a seam the needle must be fully raised. Then raise presser bar lifter 17. Removing the work from the machine and cutting the threads: Remove the material to the rear and pull the threads in sewing direction into thread cutter 37 in order to cut - Pfaff creative 1473 | Owner's Manual - Page 31
battery back-up. When the is switched on again, program 0m0id(dslteraipgohstitsiotintc)hapwpiteharnse. eAdllleprinogram combinations entered into any memory are retained automatically. If a program is entered during sewing, it will not machine become effective until the is stopped and the foot - Pfaff creative 1473 | Owner's Manual - Page 32
. For more details please see pages 78-97. Reverse sewing: Press key 18 before you start sewing. Indicator light D lights up and the machine sews back wards permanently. If you press the key during sewing, the light will not go on and the machine will sew back wards as long as the key is pressed - Pfaff creative 1473 | Owner's Manual - Page 33
of dual feed, needle thread tensions and sewing feet for each pro gT2o1rnhalemyasbe.boesveecthttiahnneggskeeadyresw. iiTtnhhdeikceapytrseodgwrihanimcdhsishpcaalavnye an program ming. During free programming lets you design store them your own patterns and in the Creative computer. 29 - Pfaff creative 1473 | Owner's Manual - Page 34
_____ __ EJflL prog a - 4 Program selection: When the Creative is switched on, pro gram -00- appears in display 21. Enter the required number in program dis play 22 using programming keys 21, The alphabet - Pfaff creative 1473 | Owner's Manual - Page 35
--.,-J I - orog - Li I ? I&&&& Stitch length and pattern length setting: Keys 7 have two functions: 1 Selection of stitch length for pro grams in which display A does not light up The stitch length ranges from 0 to 6 mm For some of the programs the stitch length is limi ted. 2. Selection of - Pfaff creative 1473 | Owner's Manual - Page 36
Balance, or correction of reverse stitches The balance control is used for correc ting pattern- or program combinations which are sewn with a slight shift owing to influences by the type of material or working method used. The stitch length of the reverse stit ches of a pattern is corrected from - 7 - Pfaff creative 1473 | Owner's Manual - Page 37
Storing program combinations: The creative computer contains 16 M memories, MO to M 15. A maximum press key 6 again. Press memory key 30 to sew the pro grams entered from the beginning. By pressing the foot control the machine sews the combination from the beginning as well. Cancelling a program - Pfaff creative 1473 | Owner's Manual - Page 38
and both function and indicator are switched oft. Key 29 has a second function for straight stitch sewing with a roundhole needle plate and straight stitch foot (special accessories). If the machine is in program 00 and you press key 29, indicator C lights up and the computer programming function - Pfaff creative 1473 | Owner's Manual - Page 39
now switched off. Progr. 145 57 ', 39 37 37 37 11111111111 11111 I I p109 I "0 0 /9 Single pattern setting: Push "single pattern" key 27. Display E lights up. The machine sews a program or a program combination and ties off beginning and end of the seam. If the key 27 is pressed while - Pfaff creative 1473 | Owner's Manual - Page 40
feet. Press key 6 and hold it. The recom mendations appear in the display beneath the three symbols on the computer: - A: dual feed engaged disengaged E B: needle thread tension C: number of sewing foot (standard accessories) Recommendations made in this book may differ from those in the machine - Pfaff creative 1473 | Owner's Manual - Page 41
- Pfaff creative 1473 | Owner's Manual - Page 42
-u 00C N 0 0< a.. - 0 0) (0 I\ N j O (0 (0 - Pfaff creative 1473 | Owner's Manual - Page 43
.htaTheoeliftoctwloheotarankdtgostewhuepnthpfearotorbnttuhttteoatotftnrhtohhenoetll.eeft Fitting sewing foot: lower the presser bar lifter with the foot positioned so that pins A snap into grooves B. N C and D are for attaching accessories. E is the sewing foot screw. -I 39 - Pfaff creative 1473 | Owner's Manual - Page 44
D 4 - CD -o (T --0oo 0 0 - Pfaff creative 1473 | Owner's Manual - Page 45
bobbins in the accessory box. Sewing feet (normal accessories) OA Normal sewing toot 1A Fancy stitch foot for dual feed 2A Fancy stitch foot (not for dual feed) 3 4 Blind stitch and overlook foot Zipper and edge sewing foot 5A Buttonhole foot 6 Darning foot 7 Hemming foot 8 Edge guide I 41 - Pfaff creative 1473 | Owner's Manual - Page 46
and the parts in the sewing hook area with a soft brush. Clean the bobbin thread monitor as instructed on page machine is main tenance-free and must not be oiled. \ Changing the light bulb: • Disconnect the mains plug. Close the hinged top cover and swing up the carrying handle. Insert the edge guide - Pfaff creative 1473 | Owner's Manual - Page 47
by a quarter turn. (The fuse type is F2A.) 110-volt machines have no fuse. 4 Changing the bafteries Switch on the machine, so that the memories are not lost when the batte ries are changed, and tilt the machine over backwards. A battery compart ment is installed in the base. Lift cover B at - Pfaff creative 1473 | Owner's Manual - Page 48
purpose only. They can only be used at stitch widths up to 6 mm. Accessory Part No. Sewing Operation - Appliqué toot --- - - -- 93 042 941-91 For appliqué work Binder (remove sewing foot holder) 98 053 484-91 For binding edges with tape -h---. I ------ Cording toot - Pfaff creative 1473 | Owner's Manual - Page 49
\ *i r1 C,' I ji '/ , j ( - Pfaff creative 1473 | Owner's Manual - Page 50
for embroidering and sewing with the Pfaff Creative 1473 • Before you begin, first try sewing on a piece problem materials, you can achieve better sewing results with the left needle position. • Exact stitching of edges is facilitated by the marking guide lines on the needle plate or by an edge guide - Pfaff creative 1473 | Owner's Manual - Page 51
a round-hole needle plate and a straight sewing foot with round needle hole can produce good sewing results (special accessories). Sewing aid for thick seams In order to ensure uniform feeding at the begin ning of the seam, we recommend supporting the sewing foot with a piece of material of the same - Pfaff creative 1473 | Owner's Manual - Page 52
wI Sewing tips for different materials Woollen fabrics: well balanced stitch length and tension. Batiste: and 2.5 mm. Knitted or crocheted needle thread tension materials: and elastic sew with seams. light Machine-embroidery motif embroideries set lighter, i. e. lower than silk: the the - Pfaff creative 1473 | Owner's Manual - Page 53
thread or basting thread For trying on a garment, we recommend securing the parts previously with basting stitches. Place the workpiece under the sewing foot. Sew one stitch. After that, pull the material by the required stitch length to the rear. Repeat this procedure until basting is completed - Pfaff creative 1473 | Owner's Manual - Page 54
4 L- 11 grog T L 0- Luffin iii píOg o && h Straight stitch ro hñ L 3-5 OA PckfspPlcPwPStukemeteenCrolhrrrfnoreaeynaaooatoeaoayctrlgsttigtr2peentdggeitsgrhterie9ocsgfrrarahoaerar.oaatsim7eiitnmrpninmamrT.tadetowgolipshsiRo0lssse0stotuopr0eeni0oit1aorotstnl3sa. - Pfaff creative 1473 | Owner's Manual - Page 55
___ 12?2 Stretch triple straight stitch prog 04 05 H 3-5 OA Program 04 is stretch triple straight stitch at 1.5 mm to 4.5 mm. Program 05: is stretch triple straight stitch at 3 to 6 mm (Fig. 4). Both programs can be sewn in dif ferent needle positions. Elastic straight stitch seams you need ( - Pfaff creative 1473 | Owner's Manual - Page 56
Thread: sewing thread sewing a top-stitch seam along lapel anc pocket edges or sewing an ornamental seam For this, normal sewing foot we recommend and the round- • hole needle Before you plate (special accessory and facing baste or border edg it down. Sew o the right side of the fabric with - Pfaff creative 1473 | Owner's Manual - Page 57
cz cD Change of needle position with straight stitch Through adjustment of the needle (needle posi tion), certain sewing easier. For example, if work can be carried you wish to stitch at a out nar row margin such as on zippers, you select the collars - Pfaff creative 1473 | Owner's Manual - Page 58
** 7s) c;D (Th - Pfaff creative 1473 | Owner's Manual - Page 59
, using the edge of the sewing foot as a guide (Fig, 1). Double lap seam sewn with the felling foot (spe cial accessory) 2 If two lines of foot. The ridge is folded down in the foot and stitched down along the edge. Pull both fabric plies apart lightly during sewing (Fig. 3). • Two felling feet - Pfaff creative 1473 | Owner's Manual - Page 60
01 01 - Pfaff creative 1473 | Owner's Manual - Page 61
. 0 shows how the fabric is drawn into the hem mer foot scroll with the aid of the stitched-down threads. Fig. 2 shows how the fabric edge is fed into the hemmer foot scroll. Hold the fabric tight as you guide it during sewing. Make sure the fabric con 2 tacts the edge of the right - Pfaff creative 1473 | Owner's Manual - Page 62
/ / F 3 3inding edges with :he roll hemmer Jz_j w_--- - Roll hemmer (special accessory) ise the roll hemmer foot for hemming nylon, tn ot and chiffon, Begin by stretching the fabric to ee which way the edge curls. This is the side to ,hich - Pfaff creative 1473 | Owner's Manual - Page 63
about 15 cm of thread hang ing. The next two or three seams can be sewn at about sewing-foot Finally take hold of width. all underthreads and pull them. By this means gather yourself. you determine the amount Please do not use fine threads, - Pfaff creative 1473 | Owner's Manual - Page 64
foot (special accessory) First mark the starting line for the shirred seams on the underside of the fabric. Insert the needle at the seam beginning point and place an elastic thread around the needle. Insert the elastic thread in the groove of the sewing foot in use. Lower the presser foot and sew - Pfaff creative 1473 | Owner's Manual - Page 65
fabric in the foot cutout (Fig. 1). Lightly stretch the outer fabric during sewing; by this means you determine the degree of gathering. How to disengage the foot: Raise the presser bar lifter. Disengage the sewing foot. Press up and hold the presser bar lifter and remove the sewing foot to the rear - Pfaff creative 1473 | Owner's Manual - Page 66
. most suitable fabrics are nylon, satin, batiste J fine-knit fabrics. The amount of gathering can determined by testing on a piece of waste nc. Sew the seams at about foot width. Tie off seams on the reverse fabric side at the begin g and end of the seams (Fig. 1). here are several parallel seams - Pfaff creative 1473 | Owner's Manual - Page 67
- Pfaff creative 1473 | Owner's Manual - Page 68
- Pfaff creative 1473 | Owner's Manual - Page 69
[ L1[z_z-zLrz ii 3 Stitch-width: as required Serge the raw edge with the required zigz stitch. The material enters at the red marking c the sewing foot (Fig. 2). • Preparation of the sewing foot (overlock foi No. 3) Turn screw "A" fully to the front. The red mark "I is then on the right - Pfaff creative 1473 | Owner's Manual - Page 70
: 130/705 H 80 or 130/705 H SKF 80 AJith faggotting stitch it is possible to sew a highly lastic seam with hem-stitching effect. Tack over he edges to be sewn and place them under the ewing foot with a clearance of 3 mm (Fig. 3). )ver-stitch using program 29. The needle must enetrate the - Pfaff creative 1473 | Owner's Manual - Page 71
Gather the fabric to the waist size using straight stitch. Push the part prepared in this way between the elastic tape and pin it firmly. Stitch ç crosswise seams, belt-loops and similar things we recommend supporting the sewing foot with correspondingly thick piece of material (se page 47). - Pfaff creative 1473 | Owner's Manual - Page 72
a) 01 - Pfaff creative 1473 | Owner's Manual - Page 73
Closing- and serging seams prog - E1 - H L 2328 - 3-5 OA,3 Seams which are not ironed open can be sewn together and This method serged in one workstep. is fast, very durable and suitable for mTryeohanuent yPceafldaanfisfftefiCaecsrrceiellnayottsisvimenelgaet1cea4trn7itdah3lessoe. - Pfaff creative 1473 | Owner's Manual - Page 74
stitch prog 23 -- k Knit-edge foot (special accessory) Jeedle: 70 or 80 ashioned knit parts can easily be sewn together vith a --i; - 26 3-5 3 - - ititch length 3.0 mm lace the raw edges under the sewing foot, as hown in Fig. 2. Make sure the needle stitches just eyond the fabric edge, - Pfaff creative 1473 | Owner's Manual - Page 75
___Hll-3i0A 1 2 Overlock stitch I ((1 ---- -- prog With the overlock stitch it is possible to decorative hem edges. Tack over the hem facing to the right side and, as Fig. 1 and 2 make or the show, overcast the open edge. Honeycomb stitch jzrT ___i - Honeycomb stitch means of securing is - Pfaff creative 1473 | Owner's Manual - Page 76
2 Iastic stitch or verlock stitch 13a 147. KK3-50A 'verlap the material edges by 1.5 cm and over titch each edge with: Program 13a Stitch length 0.5 mm (Fig. 2) as shown by Fig. 1 Program 147 Stitch width 4.5 mm Stitch length 3.0 mm )ver-stitch the raw edge in such a way that the arrow side runs - Pfaff creative 1473 | Owner's Manual - Page 77
-i.amthnPadsdutbesrhaaisbgttihehatesitsfitbnioitlncpddhleaiedncsge,b(Fiilfniegrdn.eigqn1tug)h.iwroeivdsee. rTahtnheden - a - Edge-binding with the binder Sewing foot: Program: Stitch length: Binder (special accessory) 00 2.5 mm, (Fig. a) or Program: Stitch width: Stitch length: 10 - Pfaff creative 1473 | Owner's Manual - Page 78
edge. Place the fabric -J inder the .he folded blindstitch foot and sew, making sure fabric edge runs along edge guide 'B' of the blindstitch foot (Fig. 1 t 2a). 3efore you start blindstitching, adjust described above (Fig. 2b). • Then start hemming, following the instructions given above. 71 - Pfaff creative 1473 | Owner's Manual - Page 79
__- 2 1 Darning with elastic stitch ron a - 13a 3-5 OA - Dsastlriieetgpchhentnleyodeviodnevegredirtlowatnopithttchhoaeevseomsrnizaeietn. byEoeefaflocathrsheteisciet das(taFmimitgc.hashg1s)oe.eudalmdasrjeuaass,t Inserting patches -' 13a KK3-5 OA Stitch length: 0.5 mm Needle position: - Pfaff creative 1473 | Owner's Manual - Page 80
seam is ow memorized in the computer. The Pfaff Crea ive then automatically stitches over the lamaged 159 when key 18 is pressed, he machine will stitch over the darning area :rosswise to darn a larger area we recommend to ise buttonhole foot 5A. The darning program iust be repeated several times - Pfaff creative 1473 | Owner's Manual - Page 81
{j 00 2-3 6 Feed dog: lowered Presser bar lifter: in darning position Sewing-cotton: embroidering and darning thread Darning position (Fig. 1>: Lower presser bar lifter "A', pushing it back slightly until mending you can place the damaged part of the fabric in an embroidery hoop - Pfaff creative 1473 | Owner's Manual - Page 82
into the thread guide (Fig. 1). lace the wool thread under the darning foot. tart at the top left and place the wool thread ack and forth across the damaged area (Fig. 2). hen cut the wool thread and sew over the rows of iool thread with zigzag stitches or an elastic titch seam (Fig - Pfaff creative 1473 | Owner's Manual - Page 83
_1 I VL - Pfaff creative 1473 | Owner's Manual - Page 84
?&i ,,t *0•-Us4 'Oew C 76B - Pfaff creative 1473 | Owner's Manual - Page 85
at the right (Fig. 1). Place the open zipper under the foot so that its right-hand guide edge moves along the zipper teeth (Fig. 3). By changing the needle position (see page 53) the zipper can be stitched in at a narrow depth. Sew about half the seam at the required depth, leave the needle - Pfaff creative 1473 | Owner's Manual - Page 86
the zipper. The zipper teeth move ong the right-hand guide edge (Fig. 1). Shortly afore you reach the end of the seam, leave the aedle down in the material, raise the sewing foot id open the zipper. Then lower the foot again id sew the seam to the end. Close the zipper. ld the right - Pfaff creative 1473 | Owner's Manual - Page 87
the display. Select the length of the but tonhole using stitch-length keys 7 (Fig. 1). The machine will automatically sew the selected but tonhole. Before beginning the buttonhole pull the runner of the buttonhole foot fully to the front. For the following buttonholes it is best to lift the fabric - Pfaff creative 1473 | Owner's Manual - Page 88
iatically, press key 19 again. (Same sewing Se uence as described on page 78). The flashing ash will then have disappeared. ote: you interrupt sewing at the reduced sewing peed by releasing the foot control, the 'ill return to the normal speed when machine you start ewing again. \- ji 5 79 - Pfaff creative 1473 | Owner's Manual - Page 89
of 22mm and a buttonhole width of 4 5mm appear in the display. Select the length of the buttonhole using stitchlength keys 7 (Fig. 1). The machine will automati cally sew the selected buttonhole. Before beginning the buttonhole pull the runner of the buttonhole toot fully to the front. Changing the - Pfaff creative 1473 | Owner's Manual - Page 90
next buttonhole fully auto atically, press key 19 again. (Same sewing se uence as described on page 80). The flashing ash will then have disappeared. ote: you interrupt sewing at the reduced sewing Deed by releasing the foot control, the machine 'ill return to the normal speed when you start ewing - Pfaff creative 1473 | Owner's Manual - Page 91
Now, only the left upper segment of the buttonhole symbol is flashing (Fig. 3). The machine then automatically sews the first bartack and the return seam (Fig 2b). Shortly before the end of the seam the machine sews slowly, stitch by stitch, in order to draw attention to the last bartack. One zigzag - Pfaff creative 1473 | Owner's Manual - Page 92
of bric plies in order to maintain the same button )le length as on the three-ply buttonhole strip. ate: r sewing buttonholes on knitted or very thin aterials we recommend sewing foot No. 1 A id dual feed. the buttonhole seams do not coincide, press e-otf/buttonhole" key 19 to switch from fully - Pfaff creative 1473 | Owner's Manual - Page 93
buttonhole width of 4.5mm appear in the display. Select the required length of buttonhole with stitch-length keys 7 (Fig. 1). The machine automatically sews the selected buttonhole. Before beginning the buttonhole pull the runner of the buttonhole toot fully to the front. Correcting a buttonhole If - Pfaff creative 1473 | Owner's Manual - Page 94
the next buttonhole fully auto atically again, press key 19. (Sewing sequence described on page 84). The flashing dash has en disappeared. 7 you interrupt sewing at the reduced sewing eed by releasing the foot control, the machine II return to the normal speed when you start wing again. e next page - Pfaff creative 1473 | Owner's Manual - Page 95
• Before beginning the buttonhole pull the run ner of the buttonhole foot fully to the front. • Sew the first buttonhole seam at the length required (Fig. 2a). machine then automatically sews the first bartack and the return seam (Fig. 2b). Shortly before the end of the seam the machine sews slowly - Pfaff creative 1473 | Owner's Manual - Page 96
0) - -4 ao 0 -- 0(DO C 0z I-fl - Pfaff creative 1473 | Owner's Manual - Page 97
the display. Select the required length of buttonhole with stitch-length keys 7 (Fig. 1). The machine automatically sews the selected buttonhole. Before beginning the buttonhole pull the runner of the buttonhole foot fully to the front. For the fabric a following buttonholes it is best to lift - Pfaff creative 1473 | Owner's Manual - Page 98
the right of program iow sews slowly just before the seam. When both seams are 152. end the The machine of the second same length, 6 NisNfpiolyeltoeer:udetubinyrnterertrolueaptshtiensgenwtohirnemgfaolaotstptcheoeendtrroewld,hutechneedymosuaecwshtiiannrget sewing again. or programmable stretch - Pfaff creative 1473 | Owner's Manual - Page 99
Before beginning the buttonhole pull the runner of the buttonhole foot fully to the front. • Sew the first buttonhole seam at the length required (Fig. 2a 3). The machine then automatically sews the first bartack and the return seam (Fig. 2b). Shortly before the end of seam the machine sews slowly, - Pfaff creative 1473 | Owner's Manual - Page 100
toot No. 1 A d dual feed. the buttonhole seams do not coincide, press a-off/buttonhole' key 19 to switch from fully tomatic to semi-automatic during sewing; one gment flashes (Fig. 3) and you can determine ur own second bartack. hen key 19 is pressed again the buttonhole pro ammed before is sewn - Pfaff creative 1473 | Owner's Manual - Page 101
L Various buttonhole bartacks Round buttonholes and eyelet buttonholes can be sewn with three different bartack designs. Round buttonhole or with wedge tack Program 153 a This bartack design is very suitable for buttonholes in trousers and casual wear Round buttonhole or with lengthwise - Pfaff creative 1473 | Owner's Manual - Page 102
4 ) Pt t '4 (0 $ 1 t hi - Pfaff creative 1473 | Owner's Manual - Page 103
b, C 5A Sewing thread: embroidery and darning thread Key: press "slow sewing" For round buttonholes with different bartack designs please see table 1). The machine will automati cally sew the selected buttonhole. Before beginning the buttonhole pull the runner of the buttonhole foot fully to - Pfaff creative 1473 | Owner's Manual - Page 104
1A and dual feed. lote: you interrupt sewing at the reduced sewing peed by releasing the foot control, the machine ,ill return to the normal speed when you start ewing again. Vhen you are working in the bartack determining node and have selected bartack design "a", you ave to press the "tie-off - Pfaff creative 1473 | Owner's Manual - Page 105
c T E 3± 5A Sewing thread: embroidery and darning thread Key: press "slow sewing" Eyelet buttonholes with different tack designs: (see table on page 1). The machine will automatically sew the selected but tonhole. Before beginning the buttonhole pull the runner of the buttonhole foot fully to - Pfaff creative 1473 | Owner's Manual - Page 106
. 1 A and dual feed. Iote: you interrupt sewing at the reduced sewing peed by releasing the foot control, the machine vill return to the normal speed when you start ewing again. When you are working in the bartack determining node and have selected bartack design "a", you ave to press the "tie-off - Pfaff creative 1473 | Owner's Manual - Page 107
• pull the buttonhole runner fully to the froni and lower the sewing foot. • Before you start sewing press "slow sewing' key 16 (Fig, 6). • Sew the first buttonhole seam. • When the machine starts sewing slowly (at the beginning of the curve), take the gimp thread from the left of ridge "A", • pull - Pfaff creative 1473 | Owner's Manual - Page 108
0) - Pfaff creative 1473 | Owner's Manual - Page 109
dog: dropped (prog 11) - Place the button on the mark made on the fabric beforehand and push the fabric with the button under the sewing foot holder or sewing foot (Fig. 2). Turn the hand wheel towards you and adjust the position of the button so that the needle stitches into its left hole. Lower - Pfaff creative 1473 | Owner's Manual - Page 110
1.0 I. 9 - Pfaff creative 1473 | Owner's Manual - Page 111
Then con tinue threading the machine, as usual. Do not twist the two threads. Thread each thread separa tely through thread guides and the needle eye (Fig the cording foot with 5 grooves, the large cording tongue and the neces sary double needle are used. If you wish to sew several cordings - Pfaff creative 1473 | Owner's Manual - Page 112
needle thread and bottom threads to the rear nder the cording foot. Move the detachable 'ork support against the machine. Choose a imp thread of the same colour as the outer recommend sing the edge guide. Adjust the edge guide to the quired width. Guide the material so that fold .jns along the edge - Pfaff creative 1473 | Owner's Manual - Page 113
mm (for cording) Trace the design on the reverse side of Sew along the outline of the design on the wrong side (Fig. 1). Trim the excess material close to the contour seam (Fig. 2). Second workstep Sew design. Place three layers of tissuE paper under the fabric and sew along the edges a the design - Pfaff creative 1473 | Owner's Manual - Page 114
go i £ - Pfaff creative 1473 | Owner's Manual - Page 115
3-5 OA,4 • Edge guide Seams stitched on articles red by adjusting the guide accordingly. Trace the seam line for the first seam on the fabric or guide the quilting gauge along seam or the traced seam line. For each subsequent seam, guide the gauge finger along the preceding line of stitching (Fig. - Pfaff creative 1473 | Owner's Manual - Page 116
v - Pfaff creative 1473 | Owner's Manual - Page 117
sewn on at a narrow margin with straight stitch. The material underneath the lace is opened at the middle and ironed to one side. Second workstep Sew over the lace edge on both sides with small, dense zigzagstitches from the face side, Cut off the remaining material on the reverse side (Fig - Pfaff creative 1473 | Owner's Manual - Page 118
- Pfaff creative 1473 | Owner's Manual - Page 119
blouses and other garments with embroidery motifs made on your Pfaff Creative. Transfer the pattern onto the face side of the fabric width: 4.5 mm. • Pattern length: 20. • Push the "single pattern' key. • Sew the petals, including those of the ha flower. Fifth workstep: flower centre (dot) • Program - Pfaff creative 1473 | Owner's Manual - Page 120
the following programs: Centre motif: 104 Side motif: 53 irst workstep: centre motif Select program 104. t Sew the programmed stitch pattern. 3econd workstep: side motifs , Select program 53, Sew the programmed both sides of the centre stitch pattern along motif. The second side motif can be - Pfaff creative 1473 | Owner's Manual - Page 121
Single motif: 62 First workstep: centre motif • Select program 39. • Needle in down position. • Sew the programmed stitch pattern. Shortly before you reach the end of the seam, press the "tie-off/ red mark on the let side of the sewing foot. Repeat this process until the motif is closed. 112 - Pfaff creative 1473 | Owner's Manual - Page 122
. Instead of straight stitch it is also possible to use zigzag stitch or some other program to over-stitch the double seam. This method of sewing is commonly used for joining parts of diffe rent colours (e. g. patchwork>. 113 - Pfaff creative 1473 | Owner's Manual - Page 123
n \J\i - Pfaff creative 1473 | Owner's Manual - Page 124
nice trimming, especially on sheer, soft materials. Fold over the fabric edge once along the line which is to be decorated. During sewing the blindstitches draw inthefabric edge at regular intervals, thus producing a shell- edge effect. The stronger the needle thread ten sion, the more - Pfaff creative 1473 | Owner's Manual - Page 125
(wings) prog 10 ftoLJ 2-3 j9 e Fdn Stitch width: 1.5 Stitch length: 0.5 Fringe foot: (special accessory) Second workstep (body) b3 iztz- F_ Pattern length: as required Key: single pattern First workstep (wings) • First sew a fringe seam as a trial, using a piece of scrap material. During - Pfaff creative 1473 | Owner's Manual - Page 126
the fabric edges with the program descri bed above The needle must penetrate very closely to the edge where the threads were drawn. When sewing the second seam, ensure that the cross threads are always tied off parallel (Fig. 1). Hem-stitching turned-in hem edges prog 165 -- -3+ - - 2A Stitch - Pfaff creative 1473 | Owner's Manual - Page 127
, ounces and frills or for finishing edges. For this owing job no threads must be drawn out of the abric. Sew at sewing-foot width along the fabric dge, using the edge of the sewing foot as a guide. Then carefully trim the excess material along the iemstitching with a small scissors (Fig. 5). 4 117 - Pfaff creative 1473 | Owner's Manual - Page 128
popular ornamentation. The patterns illustrated can be made on your Pfaff Creative in a very short time by combining all kinds of stitches : 117 • Stitch width: 5.0 mm • Press the "single pattern" key. • Sew the leaf motifs slightly curved, starting at the stem. Fourth workstep: eyelets • Program: - Pfaff creative 1473 | Owner's Manual - Page 129
II I. •, • 1 2 Eyelet embroidery with the eyeletting plate (special accessory) prog -- I L - 2-3 removed Key: 28 pattern mirror Feed dog: dropped Presser bar lifter: in darning position (page 74) Sewing thread: embroidering and darning thread Fitting the eyeletting plate: Insert - Pfaff creative 1473 | Owner's Manual - Page 130
above shows a pretty ring of flow ers. For this type of embroidery it is very important to guide the embroidery hoop evenly and steadily. Here are the instructions for sewing the different motifs: Motif 1: 2 worksteps 1st workstep:program lii reverse pattern stitch width 2 mm 2nd workstep:program - Pfaff creative 1473 | Owner's Manual - Page 131
___-- I ewing monograms with ie embroidery foot prog 101262 read: embroidering/darning thread ear the programmed tch pattern chosen. sew monograms on terry cloth, pin the paper .ttern onto the fabric and sew along the traced times with a narrow zigzag stitch. Then sew er the contours of the monogram - Pfaff creative 1473 | Owner's Manual - Page 132
50 6.0 60 6.0 70 6.0 80 6.0 90 Pattern mirroring If you wish to sew a program in reverse, push "mir ror key" 28 in addition to the selected program (Fig. 2). Single patterns Various sewing work such as monogram, figures or embroidery motifs can be sewn - Pfaff creative 1473 | Owner's Manual - Page 133
stitches and monograms Compiling various programs from 00 to 177 • The Creative computer has 16 M-memories, from M 0 to M 15. • memory is pre-selected, all programs are stored in memory M 0. • When the machine is switched off, the stored programs are maintained. • When the capacity of the memories - Pfaff creative 1473 | Owner's Manual - Page 134
by pressing the key me m + 48 for program entry. The program numbers appear in display 21. • When you have entered all program combina tions, the machine is ready to sew. Single patterns If you wish to sew only one pattern sequence or just one pattern, press the key • "Single pattern" 27. The - Pfaff creative 1473 | Owner's Manual - Page 135
AM QO AM , QO F..) (71 - Pfaff creative 1473 | Owner's Manual - Page 136
4 I m I I I I I I I I I I I I I I prog I 3 4 r± prog I I I 1 1 11181] () I o &&& 1n°& L All programs and program combinations can be altered to any length or width and entered in the computer. ft fl°fl \- 4 Changing the stitch length Before the last program entry for a fancy pattern the - Pfaff creative 1473 | Owner's Manual - Page 137
'1 I ' & itii a '4 4 4 it it' 4,, HI batIaIi S - Pfaff creative 1473 | Owner's Manual - Page 138
push key 6 "display". The storec program runs through in display 21. You can stop the program run by pushing key 6 a second timE (Fig, 3). When sewing is started, or when memory key 30 i pressed, the display returns to the beginninç again. Changing the pattern length at the same stitch density - Pfaff creative 1473 | Owner's Manual - Page 139
1\) 0 F') CD - Pfaff creative 1473 | Owner's Manual - Page 140
You can give free rein to your creativity by combi ning various patterns. The ornamental borders illustrated on this page and described below are intended as a stimulus to your imagination. • For sewing ornamental borders we recom mend using the fancy-stitch sewing foot No. 2A. • Place tissue paper - Pfaff creative 1473 | Owner's Manual - Page 141
- Pfaff creative 1473 | Owner's Manual - Page 142
Push "mem+" key48 • Push key 27 "single pattern" • Push key 15 "needle down" • Sew the entered program along the traced lines. 3 Second workstep, middle motif • Select program 45 Sew the pattern at sewing-foot width along the fancy seam sewn before. Third workstep, final motif • Select program (156 - Pfaff creative 1473 | Owner's Manual - Page 143
"twin needle" key 29; this limits the stitch ith and prevents the needle from striking the edle plate. sewing, use two reels of thread of different lours. Place one reel on each reel pin and cure it in in the usual way, threading each needle sepa ely. See threading instructions on page 102. I .q - Pfaff creative 1473 | Owner's Manual - Page 144
You will find numerous ways of expressing your creative talent by varying or rearranging the reverse straight- , 2 x 02 and enter them in the computer by pressing "mem-t-" key 48 each time • Sew the stored program. Stitch combination 2 consists of the following programs: 38, 03 (Fig. 2) • Before - Pfaff creative 1473 | Owner's Manual - Page 145
(31 - Pfaff creative 1473 | Owner's Manual - Page 146
9C[ - Pfaff creative 1473 | Owner's Manual - Page 147
, zi F V > L_,J -' - Pfaff creative 1473 | Owner's Manual - Page 148
i iii ptog 1 /) "I I 2 Programming letters and numbers With the Pfaff Creative you can choose four different types of lettering and three between different number characters. For sewing monograms and texts we recommend to press "slow sewing" key 16. :ciA :aA :o :bA :bO :A :o These are - Pfaff creative 1473 | Owner's Manual - Page 149
- Pfaff creative 1473 | Owner's Manual - Page 150
"Prog" 22 (right, plus) enter the letters (Fig. 2):D:F by pressing "rn em +" key 48 each time • Push 'single pattern" key 27 • Sew the stored program (Fig. 3). Sewing numbers aO • Select program :ao Program numbers as described under letters. When these letters and figures are sewn at the max, width - Pfaff creative 1473 | Owner's Manual - Page 151
Fig. 1) At key "Prog" 22 (right, plus) enter the letters: (Fig. 2) J_0 UR_NAL by pressing "m em +" key 48 each time Push 'single pattern" key 27 Sew the stored program (Fig. 3). Sewing numbers EbO Select program = b 0 Program numbers as described under letters. 3 AIR 11AIL, 4 141 - Pfaff creative 1473 | Owner's Manual - Page 152
/) [ L:II Il II iLIj prog I () / 1 III Outline alphabet, sewing outlined letters ZcA Example: • Before PARIS programming, select a free M-memory • time • Push "single pattern" key 27 • Sew the stored program (Fig, 3). Sewing numbers EcO • Select program :co Program numbers as described under - Pfaff creative 1473 | Owner's Manual - Page 153
k 4, $ '$t 4i I14 'I 4$ 1 ' I3 4 $I I I 0) I 1•' 4' Lii 14E N' t S $1' I I tI 4 - Pfaff creative 1473 | Owner's Manual - Page 154
I rniiiiiiiiiiiij Proc () [u 1 I I .1111111111117 proc - . - Pfaff creative 1473 | Owner's Manual - Page 155
re input, depending on the size of spacing quired (Fig. 1). Spacings are proç-ammed the same way as dot quick-selection ewing hyphens xample:PFAFF-CREATIVE Press right "prog" keys 22 until the dash is dis played in the right length (Fig. 2) 3 Press'mem-i-"key48(Figs.2and3) Input the rest - Pfaff creative 1473 | Owner's Manual - Page 156
M memory again. To divide the text, select one M memory after the other with each part of the text. The machine will stop after each line. Before sewing, mark the beginning of the text on the fabric. After sewing, cut the joining threads between let ters, figures and spacings (Fig. 1). If you wish - Pfaff creative 1473 | Owner's Manual - Page 157
I - Pfaff creative 1473 | Owner's Manual - Page 158
__ II!IIIIIIIIIII!Iij prog I 9 $74 ooo& 1 2 Correcting characters with the balance key Sometimes, letters or words may shift, depending on the fabric used. This can be corrected with the balance key (Fig. 2). Words or texts can only be corrected together. The letter or figure last entered - Pfaff creative 1473 | Owner's Manual - Page 159
+ I )' A 4 4 A I 148 A - Pfaff creative 1473 | Owner's Manual - Page 160
14 44 '4.,'...It,.n.4 ...., 4 4 t 4 i4 4*4 •a%*4 4*.,i*.fl,*4' 4 4 4; 44 '4 6 .4.1 It 71' '4 4,, ,44 '.*444 .7' '44 flt 1h441'I . - Pfaff creative 1473 | Owner's Manual - Page 161
-,sslfrhslluohatalcirlonentlplcwiaoymdsrhlt-eunhopwiserniteeenixoogrfngrpsns,tkitormisaetnop.rsieraeassslCgtisbacioteutrelhoncossagiuhoslugdcose1tae-hfris5fsves.yy8tntaiWeoiti'ancladsuraghhnrebtytdoahlcemnnliipon1oddfotr5goethet9irsaisinsf.lncpssclgToeekrf?nonhmeoenddeayr 16 'sew slowly". - Pfaff creative 1473 | Owner's Manual - Page 162
design and sew your own pattern. • Draw the cross-stitch pattern on graph paper (see Fig. 1). • Before beginning to sew, mark the sewing between adjoining patterns. • When sewing is begun the needle always ent ers in the middle of the foot. The red dot on the Creative, instead of by hand. 1;n - Pfaff creative 1473 | Owner's Manual - Page 163
pro M3 gram according to pattern. Third workstep • Push the pattern start key. • Select program 71. • M4 Push the single pattern key. Sew the individual patterns according to design. When the programmed memories are no longer required, they can be cancelled by pressing "mem-" key. 151 - Pfaff creative 1473 | Owner's Manual - Page 164
. • Push "memory" key. The border is now stored in the computer. Second workstep Call off the programmed M-memory for each workstep and sew according to the design. When the M-memories are no longer required they can be cancelled with 'rn em -" key. Border 2 consists of the following programs: 70 - Pfaff creative 1473 | Owner's Manual - Page 165
+" key48. Enter programs 2 x 70 4 x 71 in the computer by pressing "mem+" key each time. Sew the stored program at both sides. By pressing "memory" key 30 and "pattern mirror" key you will save yourself the trouble of turning the material. The programmed memory can be cleared again after the work is - Pfaff creative 1473 | Owner's Manual - Page 166
4 consists of the following programs: 70. 71, 71i First workstep (centre motif) • Mark the centre-line on the material. • Select program 71 and sew along the marked line. Second workstep • Select a free M-rnemory. • Push "mem+" key 48. • Enter programs 2 x 70 1 x 71 in the computer by pressing key - Pfaff creative 1473 | Owner's Manual - Page 167
I • A cn C), - Pfaff creative 1473 | Owner's Manual - Page 168
they are stored in sequence (for preparation see page 150). For M-memory programs M 3 to M 10 the arrow indicating the sewing direction is replaced by symbol U = sewing direction. First workstep • Select a free M-memory. Ml Ml • Press "mem+" key48 • Enter programs 1 x 71, mirror I x 70 1 x 71 1 x 70 - Pfaff creative 1473 | Owner's Manual - Page 169
in the computer by pressing 'rn em +" key each time. L_J Push "memory" key. • Push "single pattern" key. Now your pattern is stored. Second workstep: sewing a pattern • Mark the beginning point on the material. Select an M 1 memory and recall the follo wing M-rnemories in sequence and - Pfaff creative 1473 | Owner's Manual - Page 170
U' I - Pfaff creative 1473 | Owner's Manual - Page 171
- Pfaff creative 1473 | Owner's Manual - Page 172
. 130/70511-PS 75, 90 130/705 H-SKF 70, 110 -zE -.-- Medium ball point Heavy ball point Stretch-fabric needle developed especially for Pfaff. Particularly suitable for delicate stretch and knitted fabrics. Wide-meshed corsetry, Lycra, Simplex and Lastex. 130/705 H-J 90-110 Acute round point - Pfaff creative 1473 | Owner's Manual - Page 173
6mm 2.0 mm 2.5mm 3.0mm 4.0mm Suitable for Medium-wide cording Wide cording Extra wide cording Extra-wide cording Decorative designs sewn with twin needles Before you start sewing, turn the handwheel fabric properly. In this way, needle breakage and can check to make sure the be largely prevented - Pfaff creative 1473 | Owner's Manual - Page 174
goocFquality thread. Insert new needle and push it up as far as it will go. Insert new needle. Refer to needle table. Let machine feed the fabric. Only guide the material lightly. When inserting the bobbin case, push it in as far as it will go. Check upper and lower tensions. Use - Pfaff creative 1473 | Owner's Manual - Page 175
be taken in the area round the second sensor. sor to the right behind the hook. 8. Machine does not sew the program entered Switch the machine off, wait about 30 seconds, then switch it on again. Again enter the desired program rsetuentrodseswrwittihctcheh 9. sewing off the foot. master 163 - Pfaff creative 1473 | Owner's Manual - Page 176
164 - Pfaff creative 1473 | Owner's Manual - Page 177
start, setting Presser bar litter Sewing feet Sewing foot changing Single pattern setting Special accessories Spool fitting Stitch length and pattern length setting Stitch width setting T Thread trimmer Twin-needle sewing U Upper threading Utility stitch programs w Work support and accessories - Pfaff creative 1473 | Owner's Manual - Page 178
Index Sewing instructions A Alphabet, outline 142 Alphabets and numbers, programming 138 finding Fringes 63 52 162, 163 115 G Gathering with elastic thread 59 Gathering with shirring foot 60 Gathering, straight stitch 58 H Hem-stitching Hemmer Hems, securing with twin-needle Honecomb - Pfaff creative 1473 | Owner's Manual - Page 179
edge verlockstitch verlockstitch with edge thread 66, 67 67, 68, 69 68 67 S Serging seams 66 Serging with zigzag stitch and overlock foot 62 Sewing with twin-needle 52 Shell edging 114 Smocking with elastic threads 61 Spacing between two words 144 Spacing mark 144 Special marks 141 - Pfaff creative 1473 | Owner's Manual - Page 180
-
 1
1 -
 2
2 -
 3
3 -
 4
4 -
 5
5 -
 6
6 -
 7
7 -
8
-
9
-
10
-
11
-
12
-
13
-
14
-
15
-
16
-
17
-
18
-
19
-
20
-
21
-
22
-
23
-
24
-
25
-
26
-
27
-
28
-
29
-
30
-
31
-
32
-
33
-
34
-
35
-
36
-
37
-
38
-
39
-
40
-
41
-
42
-
43
-
44
-
45
-
46
-
47
-
48
-
49
-
50
-
51
-
52
-
53
-
54
-
55
-
56
-
57
-
58
-
59
-
60
-
61
-
62
-
63
-
64
-
65
-
66
-
67
-
68
-
69
-
70
-
71
-
72
-
73
-
74
-
75
-
76
-
77
-
78
-
79
-
80
-
81
-
82
-
83
-
84
-
85
-
86
-
87
-
88
-
89
-
90
-
91
-
92
-
93
-
94
-
95
-
96
-
97
-
98
-
99
-
100
-
101
-
102
-
103
-
104
-
105
-
106
-
107
-
108
-
109
-
110
-
111
-
112
-
113
-
114
-
115
-
116
-
117
-
118
-
119
-
120
-
121
-
122
-
123
-
124
-
125
-
126
-
127
-
128
-
129
-
130
-
131
-
132
-
133
-
134
-
135
-
136
-
137
-
138
-
139
-
140
-
141
-
142
-
143
-
144
-
145
-
146
-
147
-
148
-
149
-
150
-
151
-
152
-
153
-
154
-
155
-
156
-
157
-
158
-
159
-
160
-
161
-
162
-
163
-
164
-
165
-
166
-
167
-
168
-
169
-
170
-
171
-
172
-
173
-
174
-
175
-
176
-
177
-
178
-
179
-
180
 |
 |
—
C’)
C
0—I-
o
o