Pfaff creative 1473 Owner's Manual - Page 164
Cross-stitch, borders
 |
View all Pfaff creative 1473 manuals
Add to My Manuals
Save this manual to your list of manuals |
Page 164 highlights
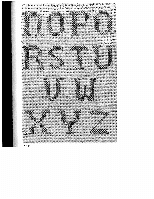
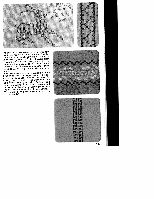
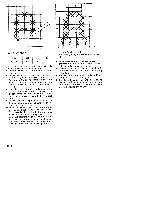
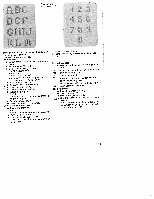
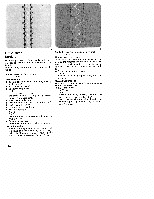
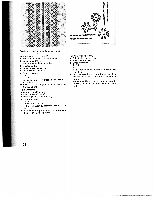
Cross-stitch borders Depending on the kind of work, the illustrated bor ders can be sewn in plain colours or in colourcom binations. Mark the beginning line for the border on the fabric. Border 1 consists of the programs: 70, 71, 71i First workstep • Select a free M-memory before programming. (middle motif) • Push"mem+"key48 • Select the programs: 1 x 71 1 x 71i, pattern mirror 28 and enter them in the computer by pressing "mem+" key each time. • Push "memory" key 30. • Select the next free M-memory (edge motif). • Push "mem+" key48. • Push the pattern start key • Select the programs: 1 x 70 3 x 71 and enter them in the computer by pressing "mem+" key. • Push "memory" key. The border is now stored in the computer. Second workstep Call off the programmed M-memory for each workstep and sew according to the design. When the M-memories are no longer required they can be cancelled with 'rn em -" key. Border 2 consists of the following programs: 70,, 71, 72 First workstep: centre motif Mark the pattern design for the centre motif in dots on the material. The distance between two points is approximately 2.5 cm and the height approximately 1.3 cm. Connect the dots with lines. • Select the following program. 1 x 72 Sew the selected program along the pre drawn line. Second workstep: edge • Select a free M-memory before programming. • Push "mem+" key48. • Enter programs: 1 x 70 mirror 2 x 71 in the computer by pressing "mem+" key each time. Sew the stored program. The 2nd side can be sewn without turning the material by pressing "memory" key 30 "pattern mirror" key 28. 152
-
 1
1 -
2
-
3
-
4
-
5
-
6
-
7
-
8
-
9
-
10
-
11
-
12
-
13
-
14
-
15
-
16
-
17
-
18
-
19
-
20
-
21
-
22
-
23
-
24
-
25
-
26
-
27
-
28
-
29
-
30
-
31
-
32
-
33
-
34
-
35
-
36
-
37
-
38
-
39
-
40
-
41
-
42
-
43
-
44
-
45
-
46
-
47
-
48
-
49
-
50
-
51
-
52
-
53
-
54
-
55
-
56
-
57
-
58
-
59
-
60
-
61
-
62
-
63
-
64
-
65
-
66
-
67
-
68
-
69
-
70
-
71
-
72
-
73
-
74
-
75
-
76
-
77
-
78
-
79
-
80
-
81
-
82
-
83
-
84
-
85
-
86
-
87
-
88
-
89
-
90
-
91
-
92
-
93
-
94
-
95
-
96
-
97
-
98
-
99
-
100
-
101
-
102
-
103
-
104
-
105
-
106
-
107
-
108
-
109
-
110
-
111
-
112
-
113
-
114
-
115
-
116
-
117
-
118
-
119
-
120
-
121
-
122
-
123
-
124
-
125
-
126
-
127
-
128
-
129
-
130
-
131
-
132
-
133
-
134
-
135
-
136
-
137
-
138
-
139
-
140
-
141
-
142
-
143
-
144
-
145
-
146
-
147
-
148
-
149
-
150
-
151
-
152
-
153
-
154
-
155
-
156
-
157
-
158
-
 159
159 -
 160
160 -
 161
161 -
 162
162 -
 163
163 -
 164
164 -
 165
165 -
 166
166 -
 167
167 -
 168
168 -
 169
169 -
170
-
171
-
172
-
173
-
174
-
175
-
176
-
177
-
178
-
179
-
180
 |
 |
