Pfaff creative 1473 Owner's Manual - Page 107
buttonhole, runner, fully, froni, Round, buttonholes, threads
 |
View all Pfaff creative 1473 manuals
Add to My Manuals
Save this manual to your list of manuals |
Page 107 highlights
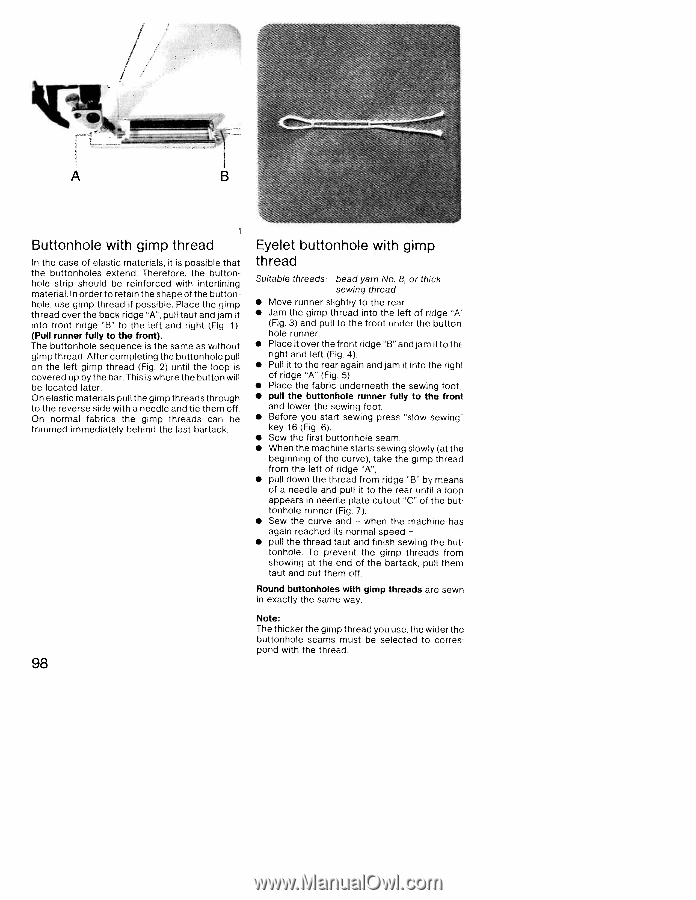
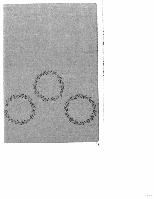
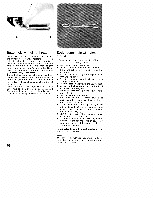
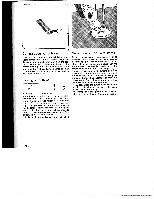
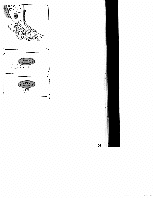
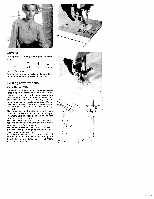
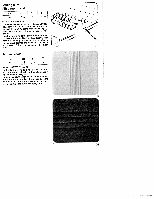
/ F B Buttonhole with gimp thread In the case of elastic materials, it is possible that the buttonholes extend. Therefore, the button hole strip should be reinforced with interlining material. In order to retain the shape of the button hole, use gimp thread if possible. Place the gimp thread over the back ridge "A', pull taut and jam it into front ridge 'B" to the left and right (Fig. 1). (Pull runner fully to the front). The buttonhole sequence is the same as without gimp thread. After completing the buttonhole pull on the left gimp thread (Fig. 2) until the loop is covered up by the bar. This is where the button will be located later. On elastic materials pull the gimp threads through to the reverse side with a needle and tie them off. On normal fabrics the gimp threads can be trimmed immediately behind the last bartack. 98 Eyelet buttonhole with gimp thread Suitable threads: bead yarn No. 8, or thick sewing thread • Move runner slightly to the rear. • Jam the gimp thread into the left of ridge "A' (Fig. 3) and pull to the front under the button hole runner. • Place it over the front ridge 'B' and jam it to th€ right and left (Fig. 4). • Pull it to the rear again and jam it into the righi of ridge "A" (Fig. 5). • Place the fabric underneath the sewing foot, • pull the buttonhole runner fully to the froni and lower the sewing foot. • Before you start sewing press "slow sewing' key 16 (Fig, 6). • Sew the first buttonhole seam. • When the machine starts sewing slowly (at the beginning of the curve), take the gimp thread from the left of ridge "A", • pull down the thread from ridge "B" by means of a needle and pull it to the rear until a loop appears in needle plate cutout "C" of the but tonhole runner (Fig. 7). • Sew the curve and - when the machine has again reached its normal speed - • pull the thread taut and finish sewing the but tonhole. To prevent the gimp threads from showing at the end of the bartack, pull them taut and cut them off. Round buttonholes with gimp threads are sewn in exactly the same way. Note: The thicker the gimp thread you use, the wider the buttonhole seams must be selected to corres pond with the thread.
-
 1
1 -
2
-
3
-
4
-
5
-
6
-
7
-
8
-
9
-
10
-
11
-
12
-
13
-
14
-
15
-
16
-
17
-
18
-
19
-
20
-
21
-
22
-
23
-
24
-
25
-
26
-
27
-
28
-
29
-
30
-
31
-
32
-
33
-
34
-
35
-
36
-
37
-
38
-
39
-
40
-
41
-
42
-
43
-
44
-
45
-
46
-
47
-
48
-
49
-
50
-
51
-
52
-
53
-
54
-
55
-
56
-
57
-
58
-
59
-
60
-
61
-
62
-
63
-
64
-
65
-
66
-
67
-
68
-
69
-
70
-
71
-
72
-
73
-
74
-
75
-
76
-
77
-
78
-
79
-
80
-
81
-
82
-
83
-
84
-
85
-
86
-
87
-
88
-
89
-
90
-
91
-
92
-
93
-
94
-
95
-
96
-
97
-
98
-
99
-
100
-
101
-
 102
102 -
 103
103 -
 104
104 -
 105
105 -
 106
106 -
 107
107 -
 108
108 -
 109
109 -
 110
110 -
 111
111 -
 112
112 -
113
-
114
-
115
-
116
-
117
-
118
-
119
-
120
-
121
-
122
-
123
-
124
-
125
-
126
-
127
-
128
-
129
-
130
-
131
-
132
-
133
-
134
-
135
-
136
-
137
-
138
-
139
-
140
-
141
-
142
-
143
-
144
-
145
-
146
-
147
-
148
-
149
-
150
-
151
-
152
-
153
-
154
-
155
-
156
-
157
-
158
-
159
-
160
-
161
-
162
-
163
-
164
-
165
-
166
-
167
-
168
-
169
-
170
-
171
-
172
-
173
-
174
-
175
-
176
-
177
-
178
-
179
-
180
 |
 |