Pfaff creative 1473 Owner's Manual - Page 89
Changing, buttonhole, width, Correcting, Linen, buttonholes, Adapting, lengths, balance
 |
View all Pfaff creative 1473 manuals
Add to My Manuals
Save this manual to your list of manuals |
Page 89 highlights
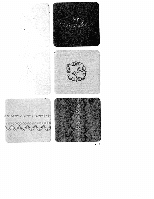
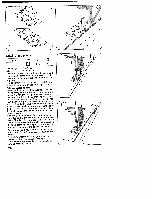
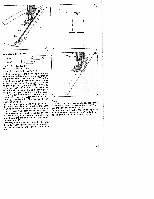
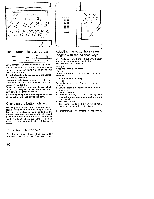
I-1 p109 () - _i_o o & /,o/ n no 3 Linen buttonholes (fully automatic) prog-- ( 150 E Sewing thread: Embroidery and darning thread Mark the location of the buttonhole. Try out a but tonhole on a piece of waste material and choose the buttonhole size. 21 buttonhole lengths are stored in the compu ter, from 7,0 to 44 mm. On program selection a programmed buttonhole length of 22mm and a buttonhole width of 4 5mm appear in the display. Select the length of the buttonhole using stitchlength keys 7 (Fig. 1). The machine will automati cally sew the selected buttonhole. Before beginning the buttonhole pull the runner of the buttonhole toot fully to the front. Changing the buttonhole width For every type of fabric, the corresponding but tonhole width can be determined up to 5.5 mm. For heavy materials select a wide buttonhole and for light materials a narrow one. With stitch width keys 8, you determine the required buttonhole width. The length of the cut changes automati cally (Fig. 5). A buttonhole width of 4.5 mm is stored. Adapting the buttonhole seam lengths with the balance keys With 'balance" keys 5 the left buttonhole seam length can be adapted to the right one. Sew a sample buttonhole first. Example: If the left seam Is too short (Fig, 4a) Select balance +1 to +3 with key, or more if required. If the left seam is too long (Fig. 4b) Select balance -1 to -2 with key, or more if required. • Sew the first buttonhole seam at the required length and • the first bartack. • Press balance keys 5, "+" or"-", and adjust the second buttonhole seam length to the first one (Figs. 4a, 4b). • Sew last bartack. The change made in this way will be main tained for the following buttonholes. For programmable linen buttonholes see page 82. Correcting a buttonhole If a buttonhole does not turn out well, cancel it by pressing "pattern start" key 26 and sew it again. 80
-
 1
1 -
2
-
3
-
4
-
5
-
6
-
7
-
8
-
9
-
10
-
11
-
12
-
13
-
14
-
15
-
16
-
17
-
18
-
19
-
20
-
21
-
22
-
23
-
24
-
25
-
26
-
27
-
28
-
29
-
30
-
31
-
32
-
33
-
34
-
35
-
36
-
37
-
38
-
39
-
40
-
41
-
42
-
43
-
44
-
45
-
46
-
47
-
48
-
49
-
50
-
51
-
52
-
53
-
54
-
55
-
56
-
57
-
58
-
59
-
60
-
61
-
62
-
63
-
64
-
65
-
66
-
67
-
68
-
69
-
70
-
71
-
72
-
73
-
74
-
75
-
76
-
77
-
78
-
79
-
80
-
81
-
82
-
83
-
 84
84 -
 85
85 -
 86
86 -
 87
87 -
 88
88 -
 89
89 -
 90
90 -
 91
91 -
 92
92 -
 93
93 -
 94
94 -
95
-
96
-
97
-
98
-
99
-
100
-
101
-
102
-
103
-
104
-
105
-
106
-
107
-
108
-
109
-
110
-
111
-
112
-
113
-
114
-
115
-
116
-
117
-
118
-
119
-
120
-
121
-
122
-
123
-
124
-
125
-
126
-
127
-
128
-
129
-
130
-
131
-
132
-
133
-
134
-
135
-
136
-
137
-
138
-
139
-
140
-
141
-
142
-
143
-
144
-
145
-
146
-
147
-
148
-
149
-
150
-
151
-
152
-
153
-
154
-
155
-
156
-
157
-
158
-
159
-
160
-
161
-
162
-
163
-
164
-
165
-
166
-
167
-
168
-
169
-
170
-
171
-
172
-
173
-
174
-
175
-
176
-
177
-
178
-
179
-
180
 |
 |
