Pioneer AVH-P7480DVD Owner's Manual
Pioneer AVH-P7480DVD Manual
 |
View all Pioneer AVH-P7480DVD manuals
Add to My Manuals
Save this manual to your list of manuals |
Pioneer AVH-P7480DVD manual content summary:
- Pioneer AVH-P7480DVD | Owner's Manual - Page 1
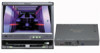
Before Using This Product AV Receiver/DVD Player with 7.0 inch Display ENGLISH Owner's Manual AVH-P7480DVD This product conforms to CEMA cord colors. - Pioneer AVH-P7480DVD | Owner's Manual - Page 2
Main Features of DVD Player 15 Care of Discs 16 • Precaution Detaching and Replacing the Front Panel 17 • Theft Protection Key Finder 18 • DVD Player • Setting the Remote Control for AV Receiver Operation • Setting the Remote Control for DVD Player Operation Using the Remote Control 21 - Pioneer AVH-P7480DVD | Owner's Manual - Page 3
DVD Player (Control with AV Receiver 49 Basics 49 Operation at the Function Menu Screen (DVD, Video CD 50 • Accessing the DVD Function Menu (DVD, Video CD) • Exit from the DVD Function Menu (DVD, Video CD) Operating Each Function 51 • Repeat Play • Pause • PGM button Operation at the Function - Pioneer AVH-P7480DVD | Owner's Manual - Page 4
Output Operating with the Information Display of a CD 89 • Searching for a Desired Track • Controller 102 Setting the Time 103 Adjusting the Display Position 103 Changing the Pattern of Plate 104 Changing Initial Settings of DVD Player Remote Control Code Type (REMOTE CODE SELECT 118 3 - Pioneer AVH-P7480DVD | Owner's Manual - Page 5
131 • Setting the Dipswitches • Using it as a Navigation System Remote Control Troubleshooting 133 Terms 137 Installation 139 Connecting the Units 139 • Connecting the Power Cord of AV Receiver • Connecting the Power Cord of DVD player • Connecting to a Sold Separately Power Amp • Speaker Input - Pioneer AVH-P7480DVD | Owner's Manual - Page 6
hearing. Guard against this by setting your equipment at a safe level BEFORE your hearing adapts. To establish a safe level: • Start your volume control at a low setting. • Slowly increase the sound until you can hear it comfortably and clearly, and without distor- tion. Once you have established - Pioneer AVH-P7480DVD | Owner's Manual - Page 7
If you experience difficulty in operating the system or reading the display, please park safely before making adjustments. 7. Do not attempt to install or service your display by yourself. Installation or servicing of the display by persons without training and experience in electronic equipment and - Pioneer AVH-P7480DVD | Owner's Manual - Page 8
the Remote Control for DVD Player Operation" on page 20.) The tuner frequencies on this product are allocated for use in North America. Use in other areas may result in improper reception. This product features a "Virtual Theater" Graphical User Interface which is referred to in this manual as - Pioneer AVH-P7480DVD | Owner's Manual - Page 9
This product is NTSC system compatible. When connecting an external component to this product, be sure the component is compatible with the same video systems. If it is not, images will not be correctly reproduced. Output Setting of the DVD Player When using a DVD Player for the first time, make the - Pioneer AVH-P7480DVD | Owner's Manual - Page 10
park your car in a safe place and apply the parking brake, the picture appears on the screen. When Using a Display connected to Rear Video Output This product's Rear video output is for connection of a display to enable passengers in the Rear seats to watch the Video or DVD. WARNING • NEVER install - Pioneer AVH-P7480DVD | Owner's Manual - Page 11
appear on the display. 1. Turn the ignition switch OFF. 2. Press the RESET button. Use a pen tip or other pointed instrument. Note: • After completing connections or when you want to erase all memorized settings or return the unit to its initial (factory) settings, switch your engine ON or set the - Pioneer AVH-P7480DVD | Owner's Manual - Page 12
be erased and must be repro- grammed. After-sales Service for Pioneer Products Please contact the dealer or distributor from where you purchased Multi-CD Player The available functions of the 50-Disc Type Multi-CD Player are described in this manual. Note that other 50-Disc Type Multi-CD Player - Pioneer AVH-P7480DVD | Owner's Manual - Page 13
This Product Discs Compatible with this Product Features of This Player Compatible with DVD, Video CD and CD Formats DVD, Video CD and CD discs that display the logos shown below can be played back on this player. For more information on discs compatible with this player, refer to the table below - Pioneer AVH-P7480DVD | Owner's Manual - Page 14
This Product Precaution: • Playback of DVD-Audio and CD-ROM discs is not possible. This player can only playback discs bearing the marks shown on page 12. • DVDs that have incompatible region numbers (see page 138) cannot be played on this player. The region number of the player can be found on the - Pioneer AVH-P7480DVD | Owner's Manual - Page 15
1 Chapter 1 Chapter 2 Title 2 Chapter 1 Chapter 2 DVD Video CD and CD On CDs and Video CDs, the contents are divided into tracks. One track usually corresponds to one song. On some discs, tracks may also feature an index. With Video CDs featuring PBC (Playback Control), you can use a menu to - Pioneer AVH-P7480DVD | Owner's Manual - Page 16
Features of DVD Player You can play back DVDs, Video CDs (PBC compatibility) and CDs. Repeat Play Still Image & Frame-By-Frame Playback Slow Motion Playback Multi-Aspect Multi-Audio Multi-Subtitle Multi-Angle Video CDs featuring Macrovision Corporation and other rights owners. Use of this copyright - Pioneer AVH-P7480DVD | Owner's Manual - Page 17
in use. • Keep discs out of direct sunlight and high temperatures. • Do not affix labels or apply chemicals to discs. • Condensation may collect inside the player when using the heater in cold weather, interfering with playback. Turn it off for an hour or so and wipe damp discs with a soft cloth - Pioneer AVH-P7480DVD | Owner's Manual - Page 18
the Front Panel Theft Protection The front panel of the DVD player is detachable to discourage theft. When the front panel is clipping it into place. Align the groove on the bottom of the front panel with the guide on the main body, and clip in. Precaution: • When replacing the front panel, avoid - Pioneer AVH-P7480DVD | Owner's Manual - Page 19
Key Finder DVD Player The following diagram shows the display when it is deployed. !1 Before Using This Product !2 !3 q w ert y u i o !0 q Disc loading slot w POWER button e Eject button r PLAY/PAUSE (6) button t STOP (7) button y PREVIOUS (4) button u NEXT (¢) button i V.SOURCE button o RGB - Pioneer AVH-P7480DVD | Owner's Manual - Page 20
for AV Receiver Operation To operate this system's AV Receiver, set the remote control's operation mode switch to "AUDIO". q u w i o e !0 r !1 !2 !4 t y !3 q Joystick w Remote control operation mode switch e TA button r PGM button t 5/∞/2/3 buttons y DISPLAY button u RETURN button - Pioneer AVH-P7480DVD | Owner's Manual - Page 21
Setting the Remote Control for DVD Player Operation To operate this system's DVD Player, set the remote control's operation mode switch to "DVD". Before Using This Product q i w o e !0 r !1 t !2 y !3 !4 !7 u !5 !8 !6 q NEXT/PREV button w Joystick e Remote control operation mode - Pioneer AVH-P7480DVD | Owner's Manual - Page 22
or longer. • Do not attempt to recharge the batteries supplied with remote control. • Do not mix new and used batteries. • In the event of battery leakage, wipe the remote control completely clean and install new batteries. • We recommended using alkaline batteries as replacements. • When disposing - Pioneer AVH-P7480DVD | Owner's Manual - Page 23
be closed after approximately 6 seconds. When the ignition switch is turned ON again (or turned to ACC), the display will be deployed automatically. * Installing the front panel will automatically deploy the display. (Refer to page 17.) • The automatic close/open mode can be switched ON/OFF. (Refer - Pioneer AVH-P7480DVD | Owner's Manual - Page 24
Operation of the Display Screen Angle Adjustment The angle of this product's screen continues changing as long as you keep pressing the ANGLE button. • Adjust the screen to an easily viewable angle. Precaution: • If you can hear the display knocking against your vehicle's console or dashboard, - Pioneer AVH-P7480DVD | Owner's Manual - Page 25
Operation of the Display Closing the Display • Turn the vehicle's engine OFF. The display will be automatically closed by the automatic close/open mode. If the display does not close automatically, press the OPEN/CLOSE button. Note: • When closing the display, check to make sure that it has closed - Pioneer AVH-P7480DVD | Owner's Manual - Page 26
be memorized for the AV, VCR and RGB video. In addition, different settings can also be memorized for a component (AV) connected to the AV-BUS input. • The it may appear differently. • Remember that using the wide mode feature of this system for commercial or public viewing purpose may constitute an - Pioneer AVH-P7480DVD | Owner's Manual - Page 27
to the previous video source. Note: • If you select the "AVM" video select setting in the display setting menu, video is locked to RGB. (See page 120.) 7 Switching to AV and VCR You can switch between video from a component connected to the DVD player's video input (VCR) and video from the built-in - Pioneer AVH-P7480DVD | Owner's Manual - Page 28
set in the DVD player. * When no disc is set in the CD player. * When no disc is set in the MD player. * When the AUX (auxiliary input), VIDEO and Speaker Input are set to OFF. (See pages 124, 125.) • When this product's blue/white lead is connected to the car's Auto-antenna relay control ter- minal - Pioneer AVH-P7480DVD | Owner's Manual - Page 29
"Source Screen" to hear/view playback of normal audio/video sources. • You can select the Pioneer Navigation Unit only when that unit is switched on. • You can select the TV Tuner Unit only when connecting it to this product. (The video source selected with the TV Tuner is displayed.) • To select - Pioneer AVH-P7480DVD | Owner's Manual - Page 30
Theater Quick Tour Virtual Theater Quick Tour Move the joystick up to move in virtual space to the Spectrum Analyzer Room. The spectrum analyzer features a graph indicating the frequency of the sound currently in play. When the power is turned on, the Center Room screen is displayed automatically - Pioneer AVH-P7480DVD | Owner's Manual - Page 31
. Either use the joystick to select the Return option in that rooms screen, then click the joystick, or simply press the RETURN button on the remote controller. In either case, you are brought back to the Center Room. Click the joystick Click the joystick means to press the center of the joystick - Pioneer AVH-P7480DVD | Owner's Manual - Page 32
the DISPLAY button on this remote control unit you can show the title list, make changes to the Source Plate Information Screen, etc. Switching the Information Screen In the following, the Multi-CD Player is used as an example of source. 7 Multi-CD Player Pressing the DISPLAY button switches - Pioneer AVH-P7480DVD | Owner's Manual - Page 33
« No Plate • For televisions, the Source Plate Display disappears after about 8 seconds. 7 DVD Player Source Plate Display « No Plate 7 CD Player Source Plate Display « Flip-Down Plate Display « No Plate 7 MD Player Source Plate Display « No Plate • Each press of the DISPLAY button switches the - Pioneer AVH-P7480DVD | Owner's Manual - Page 34
to the sound from the current source. Switch the power to your navigation unit ON before performing operations. (Refer to the navigation manual.) • Select the "NAVI" by pressing the V.SEL button. Note: • You can select the Pioneer Navigation Unit only when that unit is switched on. • If, while "NAVI - Pioneer AVH-P7480DVD | Owner's Manual - Page 35
the Video Source You can enjoy video and audio entertainment from external components connected to video input. Switch the power to your video unit ON before performing operations. (Refer to the video unit manual.) • Select "Video" by pressing the SOURCE button. Selecting the BGTV, BGVTR You can - Pioneer AVH-P7480DVD | Owner's Manual - Page 36
display is connected to the AV Receiver. Switch the power to your video unit ON before performing operations. (Refer to the video unit manual.) • Press rear display will only display audiovisual sources (i.e. DVD player, TV Tuner, etc.). Audio only sources (MD, CD, FM/AM Tuner) cannot be heard from - Pioneer AVH-P7480DVD | Owner's Manual - Page 37
Adjusting the Picture You can independently adjust Video, DVD and TV Tuner unit picture quality. You can also make adjustments to the picture quality when viewing with the car courtesy light ON or OFF, and store both settings in memory. 1. Select the desired source (picture) by pressing the SOURCE - Pioneer AVH-P7480DVD | Owner's Manual - Page 38
and Seek Tuning You can select the tuning method by changing the length of time you press the 2/3 button. Manual Tuning (step by step) Seek Tuning Less than 0.5 seconds More than 0.5 seconds Note: • If you continue pressing the button for longer than 0.5 seconds, you can - Pioneer AVH-P7480DVD | Owner's Manual - Page 39
Operation at the Function Menu Screen Accessing the Tuner Function Menu 1. Press the MENU button. The main menu icons whirl down, with "Function" highlighted in green. 2. Click the joystick. The Tuner Function Menu appears, offering you the following options: 7 FM Tuner Function Menu Local Seek - Pioneer AVH-P7480DVD | Owner's Manual - Page 40
Built-In Tuner Operating Each Function Best Stations Memory (BSM) The BSM function stores stations in memory automatically. Select the band before performing operations. (See "Band" on page 37.) 1. Check to see "BSM" is currently highlighted. If not, select that option by moving the joystick. "BSM" - Pioneer AVH-P7480DVD | Owner's Manual - Page 41
green. 2. Click the joystick. Each click toggles the PTY/Frequency. PGM button You can create a shortcut for BSM or Local Mode. If you want to control the function of one of these, without needing to go to the Function Menu each time, do the following: 1. Select "PGM" by moving the joystick - Pioneer AVH-P7480DVD | Owner's Manual - Page 42
Built-In Tuner Display the Flip-Down Plate • Press the DISPLAY button. Each press of the DISPLAY button changes the Source Plate and Flip-Down Plate in the following order: Source Plate = Preset Frequency List = Radio Text Display = No Plate Examples Source Plate Radio Text Display (FM band) - Pioneer AVH-P7480DVD | Owner's Manual - Page 43
Using the RDS Functions This product features a tuner with RDS functions. RDS (Radio broadcast Data System) is a system that transmits broadcast station information together with FM programs. You get display of Program Service Name and PTY (Program Type ID code), tuning to stations broadcasting a - Pioneer AVH-P7480DVD | Owner's Manual - Page 44
Using the RDS Functions Searching the PTY 1. Press the MENU button. The main menu icons whirl down, with "Function" highlighted in green. 2. Click the joystick. The Tuner Function Menu appears. 3. Select "Seek Select Mode" by moving the joystick. "Seek Select Mode" is highlighted in green. 4. Click - Pioneer AVH-P7480DVD | Owner's Manual - Page 45
PTY Alarm The PTY Alarm function automatically lets you hear broadcasts of emergency announcements concerning natural disasters and other emergencies, regardless of the source you are listening to. • If the tuner receives a radio alarm code, "ALARM" is indicated in the display, and the tuner - Pioneer AVH-P7480DVD | Owner's Manual - Page 46
for a TP station (a station that broadcasts traffic information). Activating/Deactivating the TA Function 1. Tune in a TP station by pressing the 2/3 button. The Car icon lights when the tuner is tuned to a TP station. 2. Press the MENU button. The main menu icons whirl down, with "Function - Pioneer AVH-P7480DVD | Owner's Manual - Page 47
, the tuner automatically seeks out the TP station with the strongest signal in the current area 10 seconds after the Car icon disappears from the display. (During seek operation, Car icon disappears.) • Only TP stations are tuned in during the Seek Tuning mode when the "Traffic" indicator is ON - Pioneer AVH-P7480DVD | Owner's Manual - Page 48
Using the RDS Functions Radio Text This tuner can display Radio Text data transmitted by RDS stations, such as station information, the name of the currently broadcast song and the name of the artist. Note: • When an RDS station is received, the "RDS" indicator lights. • When Radio Text is received - Pioneer AVH-P7480DVD | Owner's Manual - Page 49
Storing Radio Text in memory 1. Perform "Radio Text display" steps 1-3, and then select the Radio Text you want to store in memory. 2. Press one of buttons 1 - 6 for 2 seconds to store the desired Radio Text. (e.g. Press button 4 for 2 seconds.) The Radio Text is stored in memory under the selected - Pioneer AVH-P7480DVD | Owner's Manual - Page 50
images cannot be seen on screen while driving, all functions of the DVD player can be operated. (Audio can be heard.) • You can use DVD player to play DVDs, Video CDs, and CDs. • The AV Receiver may not be available to operate the DVD player momentarily depending on discs and the playing status. 49 - Pioneer AVH-P7480DVD | Owner's Manual - Page 51
" highlighted in green. 2. Click the joystick. The DVD Function Menu appears, offering you the following options: 7 DVD Function Menu (DVD, Video CD) Pause (See page 51.) Repeat Play (See page 51.) PGM button (See page 52.) DVD Player (Control with AV Receiver) 3. Select the option by moving - Pioneer AVH-P7480DVD | Owner's Manual - Page 52
DVD Player (Control with AV Receiver) Operating Each Function Repeat Play You can RPT Display Chapter RPT Title RPT Disc RPT Repeat range Chapter Repeat Title Repeat Disc Repeat 7 Video CD Disc RPT = Track RPT Display Track RPT Disc RPT Repeat range Track Repeat Disc Repeat Pause Pause pauses - Pioneer AVH-P7480DVD | Owner's Manual - Page 53
the PGM mode in the following order: Pause = RPT Mode Press the PGM button when playing a DVD or Video CD in the DVD source Function name (Display) Press Hold for 2 seconds Pause (Pause) ON/OFF --- Repeat play (RPT Mode) Switch repeat range --- DVD Player (Control with AV Receiver) 52 - Pioneer AVH-P7480DVD | Owner's Manual - Page 54
DVD Player (Control with AV Receiver) Operation at the Function Menu Screen (CD) With DVD player, the Function Menu differs for playing DVDs, Video CDs and CDs. When playing DVDs and Video CDs, refer to "Operation at the Function Menu Screen (DVD, Video CD)". (See page 50.) Accessing the DVD - Pioneer AVH-P7480DVD | Owner's Manual - Page 55
Play plays the tracks on a CD in random order for variety. 1. Select "Random" by moving the joystick. "Random" is highlighted in green. 2. Click the joystick. Each click toggles the Random On/Off. Source plate Repeat range Random DVD Player (Control with AV Receiver) Continued overleaf. 54 - Pioneer AVH-P7480DVD | Owner's Manual - Page 56
DVD Player (Control with AV Receiver) Scan Play Scan Play plays the first 10 seconds or so of each track on a CD in succession. 1. Select "Scan" by moving the joystick. "Scan" is highlighted in green. 2. Switch the Scan Play On by clicking the joystick. 3. When you find - Pioneer AVH-P7480DVD | Owner's Manual - Page 57
the PGM button. Press the PGM button when playing a CD in the DVD source Function name (Display) Press Hold for 2 seconds Pause (Pause) Repeat play (RPT Mode) Random play (Random) ON/OFF Switch repeat range ON/OFF --- --- --- DVD Player (Control with AV Receiver) Continued overleaf. 56 - Pioneer AVH-P7480DVD | Owner's Manual - Page 58
the disc you want to listen to. Note: • When a 12-Disc Multi-CD Player is connected and you want to select disc 7 to 12, press the 1 to 6 • If the Multi-CD player cannot operate properly, an error message such as "ERROR-14" is dis- played. Refer to the Multi-CD player owner's manual. 57 • If there - Pioneer AVH-P7480DVD | Owner's Manual - Page 59
Menu Random Play (See page 59.) Repeat Play (See page 59.) Scan Play (See page 60.) ITS Play (See page 60.) Multi-CD Player Pause (See page 61.) Compression and DBE (See page 61.) 3. Select the option by moving the joystick. The selected option is highlighted in green. 4. Click - Pioneer AVH-P7480DVD | Owner's Manual - Page 60
order: Multi RPT = Track RPT = Disc RPT Source plate Display Track RPT Disc RPT Multi RPT Repeat range One-track Repeat Disc Repeat Multi-CD player Repeat Repeat range Random Play Tracks are played at random within the selected repeat play range as explained in "Repeat Play" above. 1. Select - Pioneer AVH-P7480DVD | Owner's Manual - Page 61
ON by clicking the joy- stick. After selecting the desired repeat play range from those referred to in "Repeat Play" on page 59, switch Multi- CD Player Scan Play ON. Source plate 3. When you find the desired track (or disc), can- cel the Scan Play by clicking the joystick. If the Function - Pioneer AVH-P7480DVD | Owner's Manual - Page 62
the joystick. Each click changes the mode in the following order: COMP. Off = COMP. 1 = COMP. 2 = COMP. Off = D.B.E. 1 = D.B.E. 2 Note: • You can use these functions with a Multi-CD player that has them. If the player does not feature the COMP/DBE functions, "No COMP" is displayed in "COMP.". 61 - Pioneer AVH-P7480DVD | Owner's Manual - Page 63
for Pause, RPT, Random or ITS mode. If you want to control the function of one of these, without needing to go to the order: Source Plate = Disc Title List = No Plate Examples Source Plate Disc Title List Multi-CD Player Note: • If a disc title has not been input, "NO TITLE" is displayed. • For - Pioneer AVH-P7480DVD | Owner's Manual - Page 64
ITS program and Disc Title data for up to 100 discs in memory.) Note: • When playing a CD TEXT disc on a CD TEXT compatible Multi-CD player, you cannot switch to this mode. • A CD TEXT disc is a CD featuring recorded text information such as Disc Title, Artist Name and Track Title. • Don't click the - Pioneer AVH-P7480DVD | Owner's Manual - Page 65
that has not been played back for the longest time. Getting Text Displayed (for CD TEXT compatible type) You can use these functions when playing a CD TEXT disc on a CD TEXT compatible MultiCD player. Title Display Switching • Select the desired title display by pressing the DISPLAY button. Refer - Pioneer AVH-P7480DVD | Owner's Manual - Page 66
Discs by Disc Title List Follow the procedures below to play a disc for which you have input the title in a Multi-CD player or a CD TEXT disc on a CD TEXT compatible Multi-CD player. 1. Press the DISPLAY button for the Flip-Down Plate to appear. 2. Select the desired disc title by moving the joy - Pioneer AVH-P7480DVD | Owner's Manual - Page 67
disc is playing. 3. Select "ITS Clear" by moving the joystick. "ITS Clear" is highlighted in green. 4. Click the joystick. Erase the disc program. 66 Multi-CD Player - Pioneer AVH-P7480DVD | Owner's Manual - Page 68
TV Tuner TV Tuner The following explains how to use this product to control TV tuners. For details of TV tuner-specific operations/features, see your TV tuner's manual. Basics Channel Selecting the TV Tuner Select the "TV Tuner" as source by pressing the SOURCE button as many Band times as - Pioneer AVH-P7480DVD | Owner's Manual - Page 69
Operation at the Function Menu Screen Accessing the TV Tuner Function Menu 1. Press the MENU button. The main menu icons whirl down, with "Function" highlighted in green. 2. Click the joystick. The TV Tuner Function Menu appears, offering you the following options: 3. Select the option by moving the - Pioneer AVH-P7480DVD | Owner's Manual - Page 70
CD Player CD Player The following explains how to use this product to control CD players. For details of CD player-specific operations/features, see your CD player's manual. Basics Selecting the CD Player Select the "Compact Disc" as source by pressing the SOURCE button as many times as necessary. - Pioneer AVH-P7480DVD | Owner's Manual - Page 71
option by moving the joystick and click the joystick. The selected option is highlighted in green. 7 CD Function Menu 1 Repeat Play Each click changes the Repeat mode in the following order: Disc RPT ( to "Disc Title Input" on page 63. Exit from the CD Player Function Menu • Press the RETURN button - Pioneer AVH-P7480DVD | Owner's Manual - Page 72
to use this product to control MD players. For details of MD player-specific operations/features, see your MD player's manual. Basics Selecting the MD Player Select the "Mini Disc" as source by pressing the SOURCE button as many times as necessary. The player starts playing automatically. Track - Pioneer AVH-P7480DVD | Owner's Manual - Page 73
4 Pause Each click toggles Pause On/Off. 5 PGM button Each click changes the PGM mode in the following order: Pause = RPT Mode = Random 1234 5 MD Player Switching the Title Positions You can switch the display position of the Disc Title and Track Title. Also with text longer than 12 letters, you - Pioneer AVH-P7480DVD | Owner's Manual - Page 74
off. • With some discs, a menu may be displayed. (See page 74.) 2. Set the remote control's operation mode switch to "DVD". (Refer to "Setting the Remote Control for DVD Player Operation" on page 20.) IP AUTO Mode • When power to DVD Player is switched OFF, you can switch the IP AUTO mode ON/OFF by - Pioneer AVH-P7480DVD | Owner's Manual - Page 75
DVDs offering menu or Video CDs featuring the PBC (Playback Control) function start playing, a menu is displayed. With DVDs 1. Use the joystick to select the desired MENU option. VD Video CD CD Basic Operations of DVD Player refer to the instructions provided with the disc. Note: • - Pioneer AVH-P7480DVD | Owner's Manual - Page 76
Basic Operations of DVD Player With Video CDs Press the number buttons to select a desired menu option. to select the desired track. To return to PBC playback, stop playback and move the control stick upward (PLAY/PAUSE (6)). Chapter and Track Advance/Return Skipping to the Next Chapter/Track - Pioneer AVH-P7480DVD | Owner's Manual - Page 77
, press buttons 10 and 0 in order. To select 23, press buttons 10, 10 and 3 in order. Specifying Chapter VD Video CD CD Basic Operations of DVD Player Specifying Track Press the number button corresponding to a desired chapter number during playback. Chapter number is displayed for 8 seconds and - Pioneer AVH-P7480DVD | Owner's Manual - Page 78
Basic Operations of DVD Player Disc Fast Forward/Reverse Fast Forward 1. During play, continue moving the control stick to the right (FORWARD (¡)). The fast forward mark ( ) is displayed while pressing the button and disc fast forward is performed. 2. Release the control stick at the point you want - Pioneer AVH-P7480DVD | Owner's Manual - Page 79
Playback Press the STOP (7) button. Note: • When you stop DVD or Video CD playback (during PBC playback only) by pressing the STOP (7) button, that location on the disc is memorized enabling playback from that point when you play the disc again. VD Video CD CD Basic Operations of DVD Player 78 - Pioneer AVH-P7480DVD | Owner's Manual - Page 80
Variations of DVD Player Playback Variations of DVD Player Still, Frame-by-Frame and Slow Motion Playback Still Playback This lets you pause playback and view a still picture. AUDIO RTN Move the control stick upward (PLAY/PAUSE (6)) S.TITLE ANGLE DISP BSSM/ BAND DVD TV ch call RGB MENU - Pioneer AVH-P7480DVD | Owner's Manual - Page 81
and different systems (Dolby Digital, DTS etc.). With DVDs featuring multi-audio recordings, you can switch between languages/audio the DVD. Depending on the setting, playback may not be with the same audio system as that indicated. VD Video CD Playback Variations of DVD Player Continued - Pioneer AVH-P7480DVD | Owner's Manual - Page 82
Playback Variations of DVD Player Changing the Subtitle Language during Playback (Multi-Subtitle) With DVDs featuring multi-subtitle recordings, you can switch between subtitle languages during playback. 1. Press the SUBTITLE button during playback. The subtitle selection mark ( ) is displayed for - Pioneer AVH-P7480DVD | Owner's Manual - Page 83
Changing the Viewing Angle during Playback (Multi-Angle) VD With DVDs featuring multi-angle (scenes shot from multiple angles) recordings, you can switch among viewing angles during playback. Playback Variations of DVD Player 7 About Scenes that Let You Change the Viewing Angle During playback - Pioneer AVH-P7480DVD | Owner's Manual - Page 84
Operating DVD Player with Information Displays Operating DVD Player with Information Displays Calling up DVD) Information display 2 (e.g. DVD) Note: • For CDs there is no Display OFF setting. • You can perform title, chapter and time settings with either the information display 1 or 2. This manual - Pioneer AVH-P7480DVD | Owner's Manual - Page 85
is displayed, click the joystick. This starts playback from the selected scene. Note: • With discs featuring a menu, you can also press the MENU button or TOP MENU button and then make selections chapter. For details, see page 76. VD Video CD CD Operating DVD Player with Information Displays 84 - Pioneer AVH-P7480DVD | Owner's Manual - Page 86
. • You can switch Audio, Subtitle and Angle during playback using the respective buttons. For details, refer to "Playback Variations of DVD Player" on page 79. • You can also switch settings by inputting numbers with the number buttons. • Display indications such as "Dolby D" and "5.1ch" indicate - Pioneer AVH-P7480DVD | Owner's Manual - Page 87
Operating DVD Player with Information Displays Operating with the Information Display 2 of a DVD VD In addition to the of that title or chapter only is repeated. Note: • When the Repeat play of a DVD disc is selected, play stops and depending on the disc a menu is displayed upon completion of - Pioneer AVH-P7480DVD | Owner's Manual - Page 88
Operating DVD Player with Information Displays Operating with the Information Display of a Video CD This display lets you and select the range for Repeat play. During playback of Video CDs featuring PBC (Playback Control), "PLAYBACK CONTROL ON" is displayed. During such playback, Search and Time - Pioneer AVH-P7480DVD | Owner's Manual - Page 89
, playback of that track only is repeated. Note: • When the Repeat play of a Video CD disc is selected, play stops and depending on the disc a menu is displayed upon completion of play is output from that channel only. Video CD Operating DVD Player with Information Displays Continued overleaf. 88 - Pioneer AVH-P7480DVD | Owner's Manual - Page 90
Operating DVD Player with Information Displays Operating with the Information Display of a CD This display lets you use the Search function to specify a track to search for desired track, select the range for Repeat play, and switch Random - Pioneer AVH-P7480DVD | Owner's Manual - Page 91
setting. Random play ON Ô OFF Setting Scan Play The beginning of each track on the CD you are currently listening to is played for about 10 seconds. 1. Move the joystick left after all tracks have been scanned. CD Operating DVD Player with Information Displays Continued overleaf. 90 - Pioneer AVH-P7480DVD | Owner's Manual - Page 92
Adjusting Audio Adjusting Audio Accessing the Audio Menu Before operating with the Audio Menu, set the remote control's operation mode switch to "AUDIO". (Refer to "Setting the Remote Control for AV Receiver Operation" on page 19.) 1. Press the MENU button. The main menu icons whirl down,with " - Pioneer AVH-P7480DVD | Owner's Manual - Page 93
Adjusting Audio Equalizer Curve Selecting the Equalizer Curve You can switch between Equalizer curves. 1. Check to see "Equalizer" is currently high- lighted. If not, select that option by moving the joystick. "Equalizer" is highlighted in green. 2. Click the joystick. The Graphic Equalizer Menu - Pioneer AVH-P7480DVD | Owner's Manual - Page 94
Adjusting Audio Equalizer Curve Adjustment You can adjust the currently selected equalizer curve settings as desired. Adjusted equalizer curve settings are memorized in "CUSTOM". Before performing the following steps, select the source whose EQ curve you'll adjust. (Refer to "Operation for Each - Pioneer AVH-P7480DVD | Owner's Manual - Page 95
Adjusting Audio 6. Select "Band" by moving the joystick. 7. Repeat steps 3 - 6 for other bands. Note: • If you make adjustments when a curve other than "CUSTOM" is selected, "CUSTOM" appears and the adjusted curve is stored in "CUSTOM". (See page 92.) • For how to select EQ curves other than " - Pioneer AVH-P7480DVD | Owner's Manual - Page 96
Adjusting Audio High Pass Filter When you do not want sound in the Subwoofer output frequency range output from the front or rear speakers, switch the High Pass Filter ON. Only higher frequencies than those in the selected range are output from the front and rear speakers. 1. Select "HPF" by moving - Pioneer AVH-P7480DVD | Owner's Manual - Page 97
" is highlighted in green. 2. Click the joystick. The Audio Setting Menu appears, with "LOUD" highlighted in green. 3. Click the joystick. Each click changes sound range control in the following order: LOW = MID = HIGH = Off 96 - Pioneer AVH-P7480DVD | Owner's Manual - Page 98
output through the RCA output. When the Non Fading output is ON, you can adjust the level of Non Fading output. Note: • When the Subwoofer Controller setting is only "External" in the Initial Settings Menu, you can switch "Non Fading Set". (See page 102.) 1. Select "Non Fading" by moving the - Pioneer AVH-P7480DVD | Owner's Manual - Page 99
ON/OFF When a Subwoofer is connected, switch Subwoofer output ON. Initially, Subwoofer output is OFF. The Subwoofer output phase can be switched between normal, or 0˚ ("NORMAL"), and reverse, or 180˚("REVERSE"). 0˚ is the default phase. Note: • When the Subwoofer Controller setting is "External" in - Pioneer AVH-P7480DVD | Owner's Manual - Page 100
Adjusting Audio Subwoofer Setting Adjustment When the Subwoofer output is ON, you can adjust the cut-off frequency and the output level of Subwoofer. Note: • You can adjust the "SUB W Detail SET" only when Subwoofer output is switched ON in "SUB W Setting". 1. Select "SUB W" by moving the joystick. - Pioneer AVH-P7480DVD | Owner's Manual - Page 101
perform SLA independently for each of the following groups: Display TUN CD MD TV AUX EXT Source AM CD player, Multi-CD player, DVD player MD player TV, Video AUX, Speaker Input External 1, External 2 Note: • Since the FM volume is the control, SLA is not possible in the FM modes. Adjusting Audio - Pioneer AVH-P7480DVD | Owner's Manual - Page 102
Receiver Accessing the Initial Settings Menu Before operating with the AV Receiver's Initial Setting Menu, set the remote control's operation mode switch to "AUDIO". (Refer to "Setting the Remote Control for AV Receiver Operation" on page 19.) 1. Switch the Power off by pressing the SOURCE button - Pioneer AVH-P7480DVD | Owner's Manual - Page 103
you switch the Subwoofer Output (see page 98) in the Audio Menu ON. Setting the Subwoofer Controller When rear speaker leads are connected to full range speakers (when "Full Range" is selected), you can connect the RCA Subwoofer output to a Subwoofer. In this case, you can select whether to use the - Pioneer AVH-P7480DVD | Owner's Manual - Page 104
Changing the Initial Settings of AV Receiver Setting the Time This is the mode for setting the time on the product's clock display. 1. Select "Adjust" by moving the joystick. "Adjust" is highlighted in green. 2. Click the joystick. The clock adjustment display appears on the screen. 3. Adjust "Hour - Pioneer AVH-P7480DVD | Owner's Manual - Page 105
Changing the Initial Settings of AV Receiver Changing the Pattern of Plate You can change the pattern of the Source Plate and Flip-Down Plate in sequence. 1. Select "Plate" by moving the joystick. "Plate" is highlighted in green. 2. Click the joystick. Each click changes the pattern of the plate in - Pioneer AVH-P7480DVD | Owner's Manual - Page 106
menu to change Audio, Subtitle, Parental Lock and other DVD settings. Before operating with the DVD Player's SET UP MENU, set the remote control's operation mode switch to "DVD". (Refer to "Setting the Remote Control for DVD Player Operation" on page 20.) 1. Press the STOP (7) button. 2. Press - Pioneer AVH-P7480DVD | Owner's Manual - Page 107
you make a mistake during setting, pressing the RETURN button takes you back to the previous display each time you press it. Changing Initial Settings of DVD Player 106 - Pioneer AVH-P7480DVD | Owner's Manual - Page 108
Changing Initial Settings of DVD Player Setting the Subtitle (SUBTITLE LANG.) You can set a desired subtitle language. If the selected subtitle language is recorded on the DVD, subtitles are displayed in that language. You can also switch subtitle and assist subtitle display ON/OFF. Setting - Pioneer AVH-P7480DVD | Owner's Manual - Page 109
button upward (NEXT (¢)). • To return to the first language select menu, move the NEXT/PREV button downward (PREVIOUS (4)). Continued overleaf 108 Changing Initial Settings of DVD Player - Pioneer AVH-P7480DVD | Owner's Manual - Page 110
Changing Initial Settings of DVD Player 6. Click the joystick. A subtitle language is set. Note: • If the selected language is not recorded on the disc, languages specified on the disc are displayed. • - Pioneer AVH-P7480DVD | Owner's Manual - Page 111
takes you back to the previous display. • If you have selected "OTHERS", refer to "When You Select "OTHERS"" on page 109. Changing Initial Settings of DVD Player 110 - Pioneer AVH-P7480DVD | Owner's Manual - Page 112
Changing Initial Settings of DVD Player Setting the Menu Language (MENU LANG.) You can set the ", refer to "When You Select "OTHERS"" on page 109. Setting the Parental Lock (PARENTAL) Some DVDs let you use Parental Lock to restrict the viewing of violent and adult oriented scenes by children. You - Pioneer AVH-P7480DVD | Owner's Manual - Page 113
package, included literature or on the disc itself. With discs that do not feature a recorded Parental Lock level, you cannot use Parental Lock. • With some to the disc's instructions. • Pressing the RETURN button takes you back to the previous display. Changing Initial Settings of DVD Player 112 - Pioneer AVH-P7480DVD | Owner's Manual - Page 114
Changing Initial Settings of DVD Player Changing the Level You can change the set Parental Lock RETURN button takes you back to the previous display. 7 When Playing DVDs Enabling Parental Lock When you play a disc featuring Parental Lock, code number input indications may be displayed. If this - Pioneer AVH-P7480DVD | Owner's Manual - Page 115
display is connected to the DVD Player TV aspect 16:9 LETTER BOX PANSCAN Setting detail Select when using a wide screen display. (Initial setting) Select when using a regular display. When playing discs featuring instructions. • Pressing the RETURN button takes you back to the previous display. 114 - Pioneer AVH-P7480DVD | Owner's Manual - Page 116
Changing Initial Settings of DVD Player Setting Angle Mark Display (ANGLE) With discs featuring multi-angle recordings, the angle mark is displayed at the bottom right of the screen during playback of scenes enabling multi-angle viewing. You can - Pioneer AVH-P7480DVD | Owner's Manual - Page 117
you are using with this unit. There is no need to change settings if this unit is not connected for digital output. With this system, select the "LPCM" setting. Precaution: • Incorrect setting may result button takes you back to the previous display. Changing Initial Settings of DVD Player 116 - Pioneer AVH-P7480DVD | Owner's Manual - Page 118
of DVD Player Setting kHz signal. (Initial setting) Select this setting when using analog connections. The signal is output with the same frequency as the audio The selected audio output setting is set. Note: • With discs featuring 96 kHz recording, if you select the "96kHz" setting, audio is not - Pioneer AVH-P7480DVD | Owner's Manual - Page 119
a Pioneer DVD player, set the remote code of the supplied remote control to enable operation of this product only. There are two remote codes, CODE TYPE A and CODE TYPE B. When using this product with an "XDV-P90" Multi-DVD Player, select CODE TYPE B. When using this product with a DVD navigation - Pioneer AVH-P7480DVD | Owner's Manual - Page 120
Perform display and picture setting with this menu. You cannot operate this menu with remote controller. Use the Display buttons. 1. Enter the Display Setting Menu. Hold for 2 seconds canceled. • When the video source is RGB or VSEL SET is "AVM", you can not switch the "COLOR" and "HUE". 119 - Pioneer AVH-P7480DVD | Owner's Manual - Page 121
AV-BUS, output automatically switches to video from that component. 7 MANUAL You can switch between VCR and AV with the V.SOURCE button. (Refer to page 26.) 7 AVM This prevents switching from video from a component connected to the RGB input. Setting the Automatic Open Mode To prevent the display - Pioneer AVH-P7480DVD | Owner's Manual - Page 122
be adjusted within the range of "-24" to "+24." • The adjustment values are recorded separately for the AV, VCR and RGB video. The adjustment values of a component (AV) connected to the AV-BUS input are also recorded separately. Adjustment values are recorded when the vehicle lights are off (bright - Pioneer AVH-P7480DVD | Owner's Manual - Page 123
of the picture changes from reddish to greenish. • The adjustment values are recorded separately for the AV, VCR and RGB video. The adjustment values of a component (AV) connected to the AV-BUS input are also recorded separately. Adjustment values are recorded when the vehicle lights are off (bright - Pioneer AVH-P7480DVD | Owner's Manual - Page 124
Other Functions of AV Receiver Other Functions of AV Receiver Switching the Center Screen and Time Display in the Center Room You can change the center screen to show a simple source information, time display in addition to 9 different video clips. 1. Select the desired Display by clicking the joy- - Pioneer AVH-P7480DVD | Owner's Manual - Page 125
AUX Source An IP-BUS-RCA Interconnector such as CD-RB20 or CD-RB10 (sold separately) enables you to connect the AV Receiver to auxiliary equipment featuring an RCA output. For more details, refer to the IP-BUS-RCA Interconnector's Owner's Manual. 1. Check to see "AUX" is currently highlighted. If - Pioneer AVH-P7480DVD | Owner's Manual - Page 126
RETURN button. You go back to the Center Room. 4. Select the "Video" by pressing the SOURCE button. Switching the Speaker Input Mode When connecting auxiliary equipment to the speaker input terminal, switch the Speaker Input mode ON. 1. Select "Off" by moving the joystick. "Off" is highlighted in - Pioneer AVH-P7480DVD | Owner's Manual - Page 127
product. (The guidance audio is output with muted source sound.) • When you operate the Navigation Unit connected to this product by voice. • The guidance audio from the Navigation Unit cannot be heard such as when the DVD Player is selected as the source and no sounds are being played back (as when - Pioneer AVH-P7480DVD | Owner's Manual - Page 128
a strange noise or smell, or any other abnormal signs from the display, turn OFF the power immediately and consult your dealer or the nearest authorized PIONEER Service Station. Using the product in this condition may result in failure of the system. • Do not remove the rear cover of the display, as - Pioneer AVH-P7480DVD | Owner's Manual - Page 129
are due to the characteristics of the LCD screen and do not indicate a problem with the display. • At low temperatures, the LCD screen may be dark on operating conditions. (Using the display at low temperatures reduces the service life of the fluorescent tube.) * When the fluorescent tube reaches - Pioneer AVH-P7480DVD | Owner's Manual - Page 130
identify the problem, then take the suggested corrective action. If the error persists, contact your dealer or your nearest PIONEER Service Center. Message Replace the DVD with one bear- region number as this unit. ing the correct region number. NON-PLAYABLE DISC This type of disc (CD-ROM etc.) - Pioneer AVH-P7480DVD | Owner's Manual - Page 131
Language Code Chart Language (code) Input code Language (code) Input code Language (code) Input code Japanese (ja) 1001 Hausa (ha) 0801 Romanian (ro) 1815 English (en) 0514 Hindi (hi) 0809 Kinyarwanda (rw) 1823 French (fr) 0618 Croatian (hr) 0818 Sanskrit (sa) 1901 Spanish (es) - Pioneer AVH-P7480DVD | Owner's Manual - Page 132
Setting the Remote Control If you have changed the DVD Player's remote control code type (see page 118), reset the remote control's dipswitches. Also, when using a Pioneer Navigation Unit, if you set the remote control's operation mode switch to "NAVI", you can use it to control the Navigation Unit - Pioneer AVH-P7480DVD | Owner's Manual - Page 133
Using it as a Navigation System Remote Control q y w u e i r o t !0 !1 !2 !3 !4 q Scale controller w Joystick/OK button e Remote control operation mode switch r NAVI button t DETOUR button y TALK button u BACK button i VOL dial o MENU button !0 GUIDE button !1 CANCEL ROUTE button !2 - Pioneer AVH-P7480DVD | Owner's Manual - Page 134
has blown. Fix the problem causing the blown fuse, and replace the old fuse with a new one of the same capacity. Noise and other factors are causing the built-in microprocessor to operate incorrectly. Press the RESET button. (See page 10.) Operation with the remote control isn't possible. The - Pioneer AVH-P7480DVD | Owner's Manual - Page 135
parking brake cord is not connected. The parking brake is not applied. Remedy Connect a parking brake cord, and apply the parking brake. 7 DVD Player featuring the same region number as this unit. (See page 13.) There's no sound. Connections are incorrect. Check connections. Troubleshooting 134 - Pioneer AVH-P7480DVD | Owner's Manual - Page 136
DVD Player (continued from previous page) Troubleshooting the disc, switch the source. This problem may occur when certain connection methods are used. When the ignition switch settings selected in the SET UP MENU. The DVD playing does not feature dialog or subtitles in the language selected in the - Pioneer AVH-P7480DVD | Owner's Manual - Page 137
not mean this product is malfunctioning. 7 Problems during Video CD playback Symptom The PBC (Playback Control) menu display cannot be called up. Cause The Video CD playing does not feature PBC. Remedy This operation is not possible with Video CDs not featuring PBC. PBC is switched OFF. Switch - Pioneer AVH-P7480DVD | Owner's Manual - Page 138
control ensures sounds with an increased dynamic range are heard clearly even at low volume levels. Linear PCM (LPCM) This stands for Linear Pulse Code Modulation, which is the signal recording system used for music CDs. Compared to music CDs, which feature 44.1 kHz/16-bit recordings, DVDs feature - Pioneer AVH-P7480DVD | Owner's Manual - Page 139
Using menu displays provided by Video CDs with PBC lets you enjoy playback of simple interactive software and software with search functions. You can also enjoy viewing high- and standard-resolution still images. Region Number DVD players and DVD discs feature region numbers indicating the area in - Pioneer AVH-P7480DVD | Owner's Manual - Page 140
beginning installation. • Refer to each product's manual for details on connecting the power amp and other units, then make connections correctly. • Secure the wiring with cable clamps or adhesive tape. To protect the wiring, wrap adhesive tape around them where they lie against metal parts. • Route - Pioneer AVH-P7480DVD | Owner's Manual - Page 141
the products or fire. • Cords for this product and those for other products may be different colors even if they have the same function. When connecting this product to another product, refer to the supplied Installation manuals of both products and connect cords that have the same function. 140 - Pioneer AVH-P7480DVD | Owner's Manual - Page 142
side of the parking brake switch. Connection method Clamp the parking brake switch power supply side lead. Clamp firmly with needle-nosed pliers. Note: • The position of the parking brake switch depends on the vehicle model. For details, consult the vehicle Owner's Manual or dealer. Black - Pioneer AVH-P7480DVD | Owner's Manual - Page 143
Installation This Product (AV Receiver) Antenna cable (supplied) 6 m (19 ft. 8 in.) Blue/white To system control terminal of the power amp or Autoantenna relay control terminal (max. 300 mA 12V DC). + Front speaker ≠ Left + Rear speaker ≠ White Gray White/black Gray/black Green Violet - Pioneer AVH-P7480DVD | Owner's Manual - Page 144
Connecting the Power Cord of DVD Player Installation White (audio output (Left)) (REAR OUTPUT) Red (audio output (Right)) (REAR OUTPUT) Yellow (rear video output) (REAR VIDEO OUTPUT) Yellow (AVM output) (AVM OUTPUT) Yellow (video input) (VIDEO INPUT) 16 cm (6-1/4 in.) 16 cm (6-1/4 in.) 16 cm - Pioneer AVH-P7480DVD | Owner's Manual - Page 145
This Product (DVD Player) Connection method Clamp the parking brake switch power supply side lead. Clamp firmly with needle-nosed pliers. Note: • The position of the parking brake switch depends on the vehicle model. For details, consult the vehicle Owner's Manual or dealer. Light green - Pioneer AVH-P7480DVD | Owner's Manual - Page 146
Installation Connecting to a Sold Separately Power Amp This product can be connected to a sold separately power amp using the RCA output jacks. This Product (AV Receiver) Rear output Front output Subwoofer output RCA cables (sold separately) Blue/white To system control terminal of the power - Pioneer AVH-P7480DVD | Owner's Manual - Page 147
Jack Connection This product also can be connected to a car stereo without RCA output jacks by using the speaker input jack. This Product (AV Receiver) Speaker input terminal Gray Gray/black White White/black Car stereo with speaker output jacks. + Right ≠ Front speaker + Left ≠ Installation - Pioneer AVH-P7480DVD | Owner's Manual - Page 148
Connecting the System Installation This product (AV Receiver) Green Red (Right) White (Left) Yellow 20 pin RGB cable (supplied) Red Yellow Red Blue IP-BUS cable (supplied with the TV tuner) 6m (19 ft. 8 in.) FM MODULATOR IP-BUS MAIN UNIT IP-BUS AV MASTER RCA cable (sold separately) 20 pin - Pioneer AVH-P7480DVD | Owner's Manual - Page 149
(sold separately) Yellow/black To Yellow/black lead (GUIDE ON) on the navigation unit. Voice guidance speaker (supplied) Multi-CD player (sold separately) 3m (9 ft. 10 in.) Blue This product (DVD Player) 40 cm (1 ft. 4 in.) RCA cable (supplied) 6m (19 ft. 8 in.) Blue 40 cm (1 ft. 4 in - Pioneer AVH-P7480DVD | Owner's Manual - Page 150
(Red) When other products, such as a Single CD player, are connected to the AV Receiver, ejecting a disc will turn the AV Receiver off. If you wish to enjoy DVD viewing on the Rear Display without deactivation, connect the Rear Display directly to the DVD player instead of using the external video - Pioneer AVH-P7480DVD | Owner's Manual - Page 151
of DVD Player DVD Player's rear video output is for connection of a display to enable passengers in the rear seats to watch the DVD or Video CD. WARNING • NEVER install the display in a location that enables the Driver to watch the DVD or Video CD while Driving. This product (DVD Player) Yellow - Pioneer AVH-P7480DVD | Owner's Manual - Page 152
want to drill the holes. Do not drill into the gas line, brake line, electrical wiring or other important parts. • If the AV Receiver is installed in the passenger compartment, anchor it securely so it does not break free while the car is moving, and cause injury or an accident. • If the AV Receiver - Pioneer AVH-P7480DVD | Owner's Manual - Page 153
, utilizing threaded screw holes at the sides of unit chassis). For details, refer to the following illustrated installation methods. Installing the DVD Player (DIN Front-mount) Installation with the rubber bush 1. Remove the frame. Frame Pull out to remove the frame. (When reattaching the - Pioneer AVH-P7480DVD | Owner's Manual - Page 154
degrees.) Rubber bush Screw Attach screw Side bracket (large) 7 When the installation space is not very deep When installing in a shallow space, secure with side brackets (small). In this case, stick conceal tape on parts that protrude from the dashboard. Dashboard 182 53 Holder After inserting - Pioneer AVH-P7480DVD | Owner's Manual - Page 155
Installing the DVD Player (DIN Rear-mount) Installation using the screw holes on the side of the unit 1. 6 mm), depending on the shape of the screw holes in the bracket. *1 Use binding screws (4 × 3 mm) only. *1 *1 Installation Factory radio mounting br1a2cket 1S1crew 1D3ashboard or Console 154 - Pioneer AVH-P7480DVD | Owner's Manual - Page 156
speaker Velcro tape (20 × 50 mm) (3/4 × 2 in.) (rough surface) Velcro tape (20 × 50 mm) (3/4 × 2 in.) (soft surface) Installing the Remote Control Unit Precaution: • Press the remote control unit onto the mounting base until it clicks into place. • To avoid it being a hindrance to driving, always - Pioneer AVH-P7480DVD | Owner's Manual - Page 157
Installation 7 When attaching horizontally Remote Control Remove (not to be used) Double-sided tape 7 When attaching with elevated position Remote Control Remove Double-sided tape Mounting Base Mounting Base 156 - Pioneer AVH-P7480DVD | Owner's Manual - Page 158
Specifications Specifications 7 AV Receiver General Power source ...... 14.4 V DC (10.8 - 15.1 V allowable) Grounding system Negative type Max. current consumption 10 A Dimensions 307 (W) × 51 (H) × 187 (D) mm [12-1/8 (W) × 2 (H) × 7-3/8 (D) in.] Weight 2.0 kg (4.4 lbs) Amplifier Continuous - Pioneer AVH-P7480DVD | Owner's Manual - Page 159
95 dB (1 kHz)) Distortion 0.008 % (1 kHz) Output Level 1.0 V (1 kHz, 0 dB) Number of channels 2 (stereo) Player System DVD-Video, Video CD, Compact disc audio system Usable discs .... DVD-Video, Video CD, Compact disc Signal format Sampling frequency: 44.1/48/96 kHz Number of quantization bits - Pioneer AVH-P7480DVD | Owner's Manual - Page 160
Col. Del Valle Mexico, D.F. C.P. 03100 TEL: 55-5688-52-90 Published by Pioneer Corporation. Copyright © 2002 by Pioneer Corporation. All rights reserved. Publication de Pioneer Corporation. Copyright © 2002 Pioneer Corporation. Tous droits de reproduction et de traduction réservés.
-
 1
1 -
 2
2 -
 3
3 -
 4
4 -
 5
5 -
 6
6 -
 7
7 -
8
-
9
-
10
-
11
-
12
-
13
-
14
-
15
-
16
-
17
-
18
-
19
-
20
-
21
-
22
-
23
-
24
-
25
-
26
-
27
-
28
-
29
-
30
-
31
-
32
-
33
-
34
-
35
-
36
-
37
-
38
-
39
-
40
-
41
-
42
-
43
-
44
-
45
-
46
-
47
-
48
-
49
-
50
-
51
-
52
-
53
-
54
-
55
-
56
-
57
-
58
-
59
-
60
-
61
-
62
-
63
-
64
-
65
-
66
-
67
-
68
-
69
-
70
-
71
-
72
-
73
-
74
-
75
-
76
-
77
-
78
-
79
-
80
-
81
-
82
-
83
-
84
-
85
-
86
-
87
-
88
-
89
-
90
-
91
-
92
-
93
-
94
-
95
-
96
-
97
-
98
-
99
-
100
-
101
-
102
-
103
-
104
-
105
-
106
-
107
-
108
-
109
-
110
-
111
-
112
-
113
-
114
-
115
-
116
-
117
-
118
-
119
-
120
-
121
-
122
-
123
-
124
-
125
-
126
-
127
-
128
-
129
-
130
-
131
-
132
-
133
-
134
-
135
-
136
-
137
-
138
-
139
-
140
-
141
-
142
-
143
-
144
-
145
-
146
-
147
-
148
-
149
-
150
-
151
-
152
-
153
-
154
-
155
-
156
-
157
-
158
-
159
-
160
 |
 |
Before Using This Product
Owner’s Manual
AVH-P7480DVD
This product conforms to CEMA cord colors.
ENGLISH
AV Receiver/DVD Player with 7.0 inch Display