Pioneer DV-C36 Owner's Manual - Page 31
Improving Picture Quality
 |
View all Pioneer DV-C36 manuals
Add to My Manuals
Save this manual to your list of manuals |
Page 31 highlights
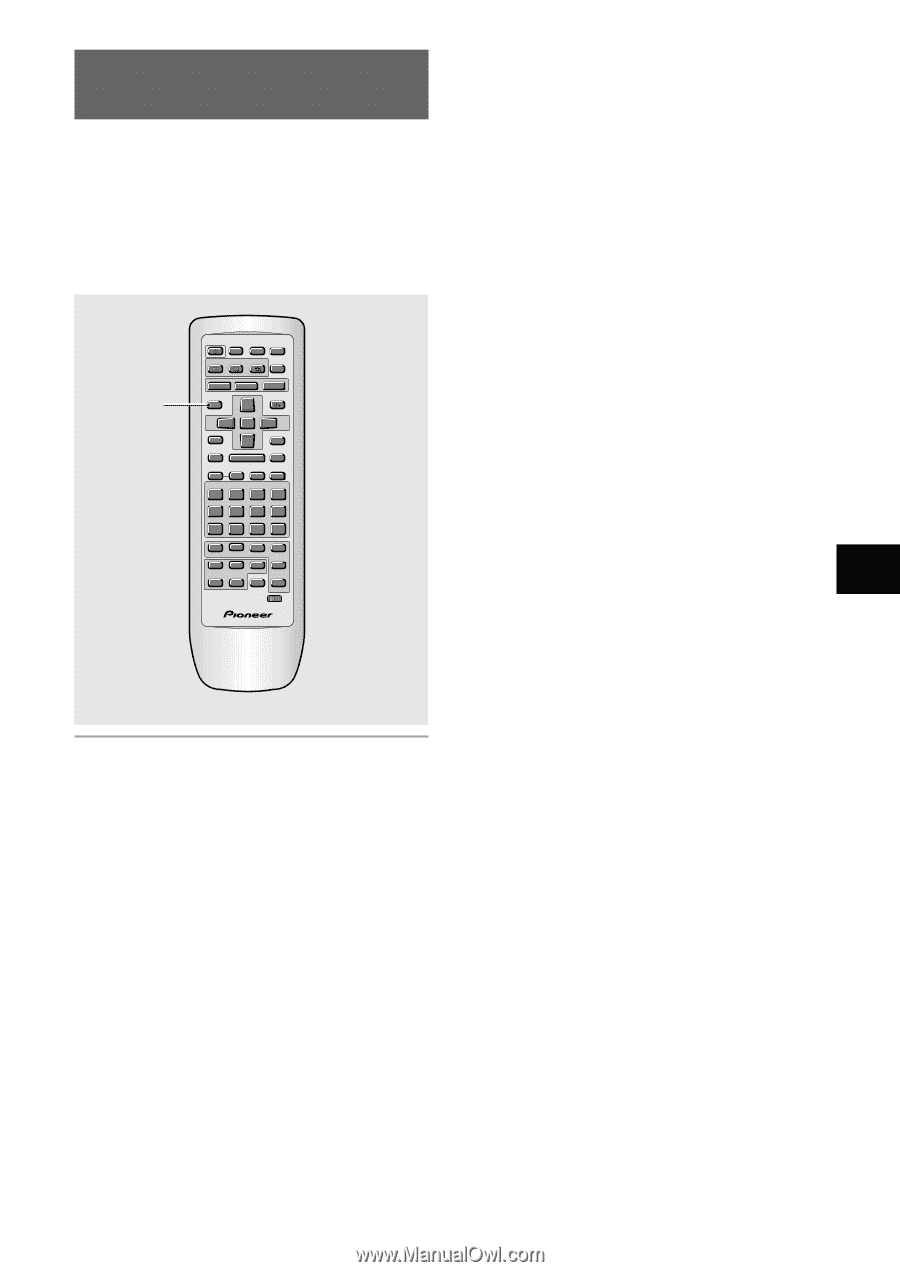
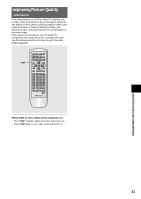
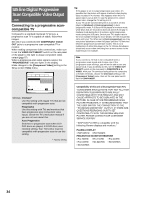
ADJUSTING AUDIO AND VIDEO SETTINGS 5 Improving Picture Quality - DVD/Video CD If the video picture of a DVD or Video CD displays a lot of video noise (tiny flecks or spots that appear randomly and briefly on the screen), using this player's video noise reduction feature it may be possible to reduce the amount of video noise and improve the overall quality of the video image. If this player is connected to your TV using the component video jacks and is set to progressive scan, see the following sections for how to ajust the video quality (page 32). VNR LAST MEMORY LAST CONDITION MEMORY COND. OPEN/ CLOSE 0 AUDIO SUBTITLE ANGLE DISPLAY DISP SETUP VNR MENU 5 TOP MENU RETURN 5 ENTER PREV 4 5 STOP 7 PLAY 3 STEP/SLOW REV e E 1 1 2 3 NEXT ¢ PAUSE 8 FWD ¡ CLEAR C 4 5 6 +10 7 8 9 0 PROGRAM REPEAT Vol - Vol + VOLUME 1 2 DDIISSCC 4 5 A-B SEARCH MODE A CH-B - CH + CHANNEL RANDOM 3 CD MODE CD TV FUNC TV DVD TV Î Press VNR to turn video noise reduction on. • The "VNR" indicator lights when this function is on. • Press VNR again to turn video noise reduction off. 31
-
 1
1 -
2
-
3
-
4
-
5
-
6
-
7
-
8
-
9
-
10
-
11
-
12
-
13
-
14
-
15
-
16
-
17
-
18
-
19
-
20
-
21
-
22
-
23
-
24
-
25
-
 26
26 -
 27
27 -
 28
28 -
 29
29 -
 30
30 -
 31
31 -
 32
32 -
 33
33 -
 34
34 -
 35
35 -
 36
36 -
37
-
38
-
39
-
40
-
41
-
42
-
43
-
44
-
45
-
46
-
47
-
48
-
49
-
50
-
51
-
52
-
53
-
54
-
55
-
56
-
57
-
58
-
59
-
60
-
61
-
62
-
63
-
64
 |
 |