Pioneer PRO110FD Owner's Manual - Page 63
Select 3DYC or I-P Mode - 1080p
 |
UPC - 012562864976
View all Pioneer PRO110FD manuals
Add to My Manuals
Save this manual to your list of manuals |
Page 63 highlights
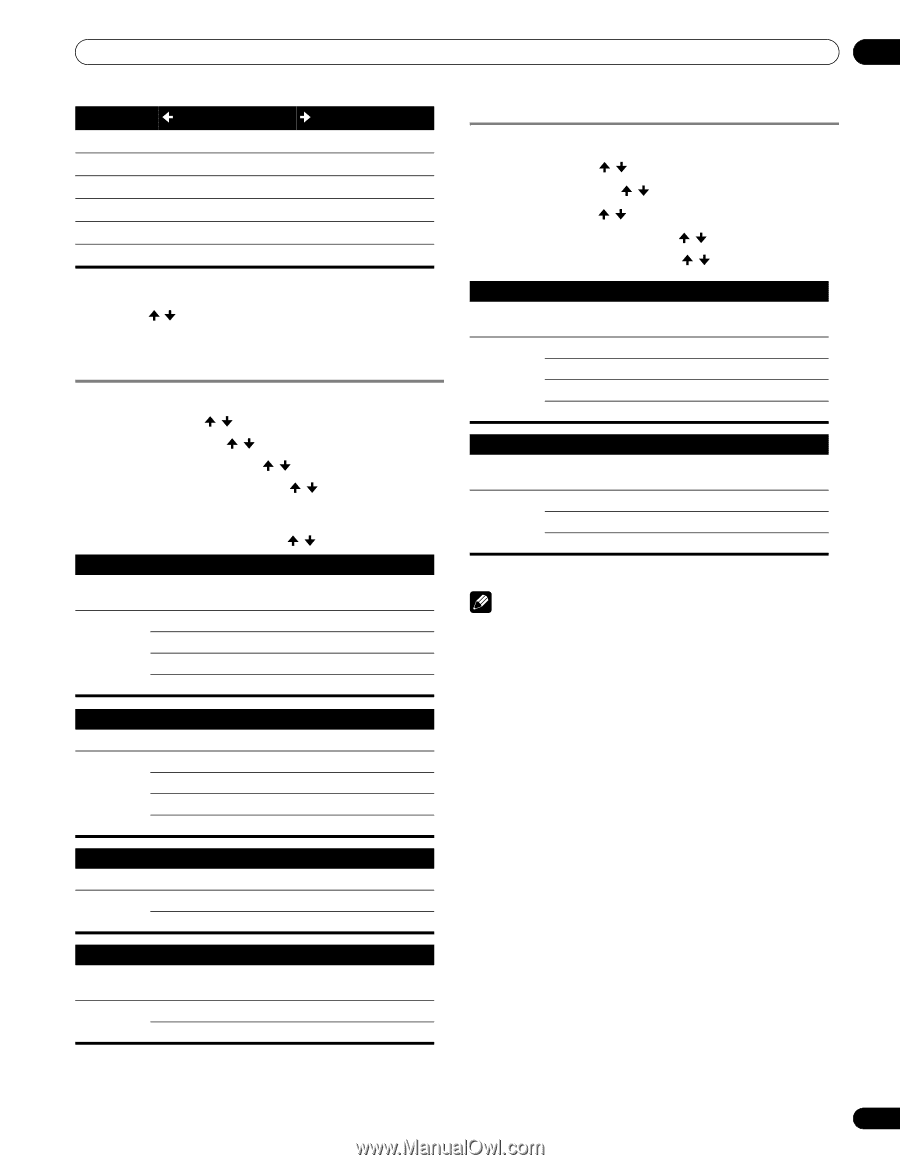
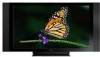
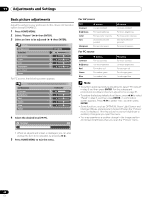
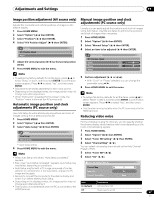
Adjustments and Settings 11 Item R Y G button Closer to magenta Closer to red Closer to yellow button Closer to yellow Closer to green Closer to cyan C Closer to green Closer to blue B Closer to cyan Closer to magenta M Closer to blue Closer to red • To adjust another item, press RETURN then repeat steps 6 and 7. • Press / to select another item for adjustment. 8 Press HOME MENU to exit the menu. Eliminating noise from images 1 Press HOME MENU. 2 Select "Picture" ( / then ENTER). 3 Select "Pro Adjust" ( / then ENTER). 4 Select "Noise Reduction" ( / then ENTER). 5 Select an item to be adjusted ( / then ENTER). • You can select "3DNR", "Field NR", "Block NR" or "Mosquito NR". 6 Select the desired parameter ( / then ENTER). 3DNR Eliminates video noise for clean crisp images. 3DNR stands for 3dimensional Noise Reduction. Selections Off Deactivates 3DNR High Enhanced 3DNR Mid Standard 3DNR Low Moderate 3DNR Field NR Removes glimmer for more natural images Selections Off Deactivates Field NR High Enhanced Field NR Mid Standard Field NR Low Moderate Field NR Block NR Helps reduce noise appearing in high-definition images Selections Off Deactivates Block NR On Activates Block NR Mosquito NR Reduces mosquito noise in DVD and high-definition images, resulting in noise-free images Selections Off Deactivates Mosquito NR On Activates Mosquito NR 7 Press HOME MENU to exit the menu. Using the 3DYC and I-P Mode 1 Press HOME MENU. 2 Select "Picture" ( / then ENTER). 3 Select "Pro Adjust" ( / then ENTER). 4 Select "Others" ( / then ENTER). 5 Select "3DYC" or "I-P Mode" ( / then ENTER). 6 Select the desired parameter ( / then ENTER). 3DYC Optimizes characteristics for separating brightness signals and color signals. This works for both video and still images. Selections Off Deactivates 3DYC High Enhanced 3DYC Mid Standard 3DYC Low Moderate 3DYC I-P Mode Perform optimum conversion from interlace signals to progressive signals. This works for both video and still images. Selections 1 Optimum for video images 2 Standard setting 3 Optimum for still images 7 Press HOME MENU to exit the menu. Note • The I-P Mode setting is disabled if you use an external input source and select "On" for "Game Control Pref" on the "Option" menu. • For the I-P Mode, the individual parameters are not selectable for the following input signals: 480p, 720p, 1080p. • The 3DYC setting is selectable when composite video or analog TV signals are received. 63 En
-
 1
1 -
2
-
3
-
4
-
5
-
6
-
7
-
8
-
9
-
10
-
11
-
12
-
13
-
14
-
15
-
16
-
17
-
18
-
19
-
20
-
21
-
22
-
23
-
24
-
25
-
26
-
27
-
28
-
29
-
30
-
31
-
32
-
33
-
34
-
35
-
36
-
37
-
38
-
39
-
40
-
41
-
42
-
43
-
44
-
45
-
46
-
47
-
48
-
49
-
50
-
51
-
52
-
53
-
54
-
55
-
56
-
57
-
 58
58 -
 59
59 -
 60
60 -
 61
61 -
 62
62 -
 63
63 -
 64
64 -
 65
65 -
 66
66 -
 67
67 -
 68
68 -
69
-
70
-
71
-
72
-
73
-
74
-
75
-
76
-
77
-
78
-
79
-
80
-
81
-
82
-
83
-
84
-
85
-
86
-
87
-
88
-
89
-
90
-
91
-
92
-
93
-
94
-
95
-
96
-
97
-
98
-
99
-
100
-
101
-
102
-
103
-
104
-
105
-
106
-
107
-
108
-
109
-
110
-
111
-
112
-
113
-
114
-
115
-
116
-
117
-
118
-
119
-
120
-
121
-
122
-
123
-
124
-
125
-
126
 |
 |