Pioneer PRO110FD Owner's Manual - Page 91
Select Home Media Gallery Version
 |
UPC - 012562864976
View all Pioneer PRO110FD manuals
Add to My Manuals
Save this manual to your list of manuals |
Page 91 highlights
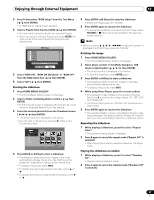
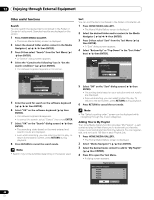
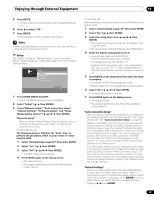
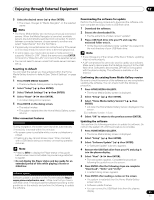
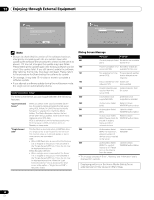
Enjoying through External Equipment 12 5 Select the desired server ( / then ENTER). • The screen changes to "Media Navigator" on the selected server. Note • The Home Media Gallery can memorize previously connected servers. When the Media Navigator is launched, available servers are automatically searched and connected. To switch between connected servers, choose server to another one, select "Select Server" from the Tool Menu. • If a previously connected server can not be found or if the server is in the sleep mode, the server name is dimmed (grayed out). Downloading the software for update Perform the following procedure to download the software onto your computer and copy it onto a USB flash drive. 1 Download the software. 2 Extract the downloaded file. • The file extracts to a folder named "updater". 3 Plug a USB flash drive into your PC and copy the extracted folder onto it. • All the files and subfolders inside "updater" are copied into the root directory of your USB flash drive. • In some cases, you may be able to start a media server if it supports "Wake On LAN". Select the server and press ENTER to transmit a "Wake On LAN" command to the selected server. • You cannot select a server unless that media server has been set up. Resetting to default You can reset the setups you have entered within the Home Media Gallery function to default (See "Default Settings" on page 89). 1 Press HOME MEDIA GALLERY. • The Home Media Gallery screen is displayed. 2 Select "Setup" ( / then ENTER). 3 Select "Default Settings" ( / then ENTER). Note • If you change any of the names of the files or folders, updating may not work properly. • A ZIP compressed file cannot be used to update your software. Make sure to decompress the file before copying it to the USB flash drive. Software to decompress ZIP files is not supplied with the plasma display. The software is available on the Internet. Confirming the existing Home Media Gallery version Be sure to check the version of the software you are using before updating the software. You can check it with the following procedure. 1 Press HOME MEDIA GALLERY. • The Home Media Gallery screen is displayed. 4 Select "Reset" ( / then ENTER). 2 Select "Setup" ( / then ENTER). • A restart dialog screen appears. 5 Press ENTER on the dialog screen. • The setup finishes. • The system restarts then the Home Media Gallery screen returns. 3 Select "Home Media Gallery Version" ( / then ENTER). • Jot down the Home Media Gallery Version displayed in the screen. Ex.) software Version: 1.0.xxx Other convenient features Screen saver During navigation, the screen saver launches automatically if no activity is sensed within five minutes. • No screen saver is available while a movie or slideshow is played. • Pressing any key cancels screen saver. When canceled with a USB device being connected, connecting operation resumes. Note • Pressing INFO to display the Player status or key guide before screen saver is activated may cause image retention to appear. • Do not display the Player status and key guide for an extended period of time while playing a movie or slideshow. 4 Select "OK" to return to the previous screen (ENTER). Updating the software Then perform the following procedure to update the software. Do not turn the system off until the procedure is complete. 1 Press HOME MEDIA GALLERY. • The Home Media Gallery screen is displayed. 2 Select "Setup" ( / then ENTER). 3 Select "Software Update" ( / then ENTER). • A "Software Update" submenu appears. 4 Remove the USB flash drive from your PC and plug it into the plasma display. 5 Select "Next" ( / then ENTER). • The next screen appears. Complete the procedure following the guidelines on the screen. 6 Press ENTER after the following steps are complete: "Download", "Write" and "Verify" Software Update • A restart dialog screen appears. Software update is available on the Pioneer website (http:// www.pioneerelectronics.com). Make sure that you have a USB flash drive. First download the software according to the 7 Press ENTER after reading a notice on the screen. • The system is restarted then the Home Media Gallery screen returns. guidelines on the website and perform the following to update • Software update finishes. the software. • You can remove the USB flash drive from the plasma display. 91 En
-
 1
1 -
2
-
3
-
4
-
5
-
6
-
7
-
8
-
9
-
10
-
11
-
12
-
13
-
14
-
15
-
16
-
17
-
18
-
19
-
20
-
21
-
22
-
23
-
24
-
25
-
26
-
27
-
28
-
29
-
30
-
31
-
32
-
33
-
34
-
35
-
36
-
37
-
38
-
39
-
40
-
41
-
42
-
43
-
44
-
45
-
46
-
47
-
48
-
49
-
50
-
51
-
52
-
53
-
54
-
55
-
56
-
57
-
58
-
59
-
60
-
61
-
62
-
63
-
64
-
65
-
66
-
67
-
68
-
69
-
70
-
71
-
72
-
73
-
74
-
75
-
76
-
77
-
78
-
79
-
80
-
81
-
82
-
83
-
84
-
85
-
 86
86 -
 87
87 -
 88
88 -
 89
89 -
 90
90 -
 91
91 -
 92
92 -
 93
93 -
 94
94 -
 95
95 -
 96
96 -
97
-
98
-
99
-
100
-
101
-
102
-
103
-
104
-
105
-
106
-
107
-
108
-
109
-
110
-
111
-
112
-
113
-
114
-
115
-
116
-
117
-
118
-
119
-
120
-
121
-
122
-
123
-
124
-
125
-
126
 |
 |