Pyle PRJ3D99TU PRJ3D99TU Manual 1 - Page 34
Adjusting, Adjusting the, the projected, projected, projected image, image
 |
View all Pyle PRJ3D99TU manuals
Add to My Manuals
Save this manual to your list of manuals |
Page 34 highlights
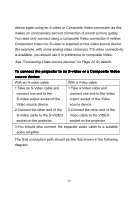
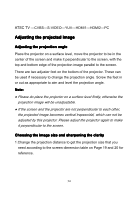
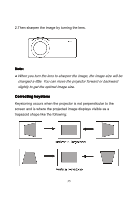
ATSC TV -CVBS-S-VIDEO-YUV-HDMI1-HDMI2-PC Adjusting the projected image Adjusting the projection angle Place the projector on a surface level, move the projector to be in the center of the screen and make it perpendicular to the screen, with the top and bottom edge of the projection image parallel to the screen. There are two adjuster feet on the bottom of the projector. These can be used if necessary to change the projection angle. Screw the feet in or out as appropriate to aim and level the projection angle. Note: ● Please do place the projector on a surface level firstly, otherwise the projection image will be unadjustable. ● If the screen and the projector are not perpendicular to each other, the projected image becomes vertical trapezoidal, which can not be adjusted by this projector. Please adjust the projector again to make it perpendicular to the screen. Choosing the image size and sharpening the clarity 1.Change the projection distance to get the projection size that you need according to the screen dimension table on Page 19 and 20 for reference. 34
-
 1
1 -
2
-
3
-
4
-
5
-
6
-
7
-
8
-
9
-
10
-
11
-
12
-
13
-
14
-
15
-
16
-
17
-
18
-
19
-
20
-
21
-
22
-
23
-
24
-
25
-
26
-
27
-
28
-
 29
29 -
 30
30 -
 31
31 -
 32
32 -
 33
33 -
 34
34 -
 35
35 -
 36
36 -
 37
37 -
 38
38 -
 39
39 -
40
-
41
-
42
-
43
-
44
-
45
-
46
-
47
-
48
-
49
-
50
 |
 |