Ricoh P C600 Setup Guide - Page 15
Configuring the Printer Settings Using Installation Settings
 |
View all Ricoh P C600 manuals
Add to My Manuals
Save this manual to your list of manuals |
Page 15 highlights
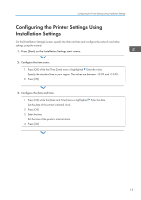
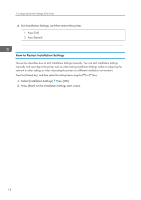
Configuring the Printer Settings Using Installation Settings Configuring the Printer Settings Using Installation Settings On the [Installation Settings] screen, specify the date and time and configure the network and other settings using the wizard. 1. Press [Start] on the Installation Settings start screen. 2. Configure the time zone. 1. Press [OK] while the [Time Zone] menu is highlighted Enter the value Specify the standard time in your region. The values are between -12:00 and +13:00. 2. Press [OK] 3. Configure the date and time. 1. Press [OK] while the [Date and Time] menu is highlighted Set the date of the printer's internal clock. 2. Press [OK] 3. Enter the time Set the time of the printer's internal clock. 4. Press [OK] Enter the date 13
-
 1
1 -
2
-
3
-
4
-
5
-
6
-
7
-
8
-
9
-
 10
10 -
 11
11 -
 12
12 -
 13
13 -
 14
14 -
 15
15 -
 16
16 -
 17
17 -
 18
18 -
 19
19 -
 20
20 -
21
-
22
-
23
-
24
-
25
-
26
-
27
-
28
-
29
-
30
-
31
-
32
-
33
-
34
-
35
-
36
-
37
-
38
-
39
-
40
-
41
-
42
-
43
-
44
-
45
-
46
-
47
-
48
-
49
-
50
-
51
-
52
-
53
-
54
-
55
-
56
-
57
-
58
-
59
-
60
 |
 |
