Ricoh P C600 Setup Guide - Page 16
Select [Active] or [Inactive], Press [OK]
 |
View all Ricoh P C600 manuals
Add to My Manuals
Save this manual to your list of manuals |
Page 16 highlights
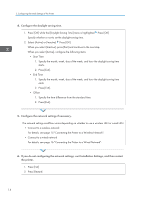
2. Configuring the Initial Settings of the Printer 4. Configure the daylight saving time. 1. Press [OK] while the [Daylight Saving Time] menu is highlighted Press [OK] Specify whether or not to set the daylight saving time. 2. Select [Active] or [Inactive] Press [OK] When you select [Inactive], press [Exit] and continue to the next step. When you select [Active], configure the following items: • Start Time 1. Specify the month, week, day of the week, and hour the daylight saving time starts. 2. Press [Exit]. • End Time 1. Specify the month, week, day of the week, and hour the daylight saving time ends. 2. Press [Exit]. • Offset 1. Specify the time difference from the standard time. 2. Press [Exit]. 5. Configure the network settings if necessary. The network settings workflow varies depending on whether to use a wireless LAN or wired LAN. • Connect to a wireless network For details, see page 15 "Connecting the Printer to a Wireless Network". • Connect to a wired network For details, see page 16 "Connecting the Printer to a Wired Network". 6. If you do not configuring the network settings, exit Installation Settings, and then restart the printer. 1. Press [Exit] 2. Press [Restart] 14
-
 1
1 -
2
-
3
-
4
-
5
-
6
-
7
-
8
-
9
-
10
-
 11
11 -
 12
12 -
 13
13 -
 14
14 -
 15
15 -
 16
16 -
 17
17 -
 18
18 -
 19
19 -
 20
20 -
 21
21 -
22
-
23
-
24
-
25
-
26
-
27
-
28
-
29
-
30
-
31
-
32
-
33
-
34
-
35
-
36
-
37
-
38
-
39
-
40
-
41
-
42
-
43
-
44
-
45
-
46
-
47
-
48
-
49
-
50
-
51
-
52
-
53
-
54
-
55
-
56
-
57
-
58
-
59
-
60
 |
 |
