Samsung L700 User Manual - Page 69
Setting up the USB Driver for MAC, Using the USB Driver for MAC, Removing the removable disk
 |
UPC - 044701007814
View all Samsung L700 manuals
Add to My Manuals
Save this manual to your list of manuals |
Page 69 highlights
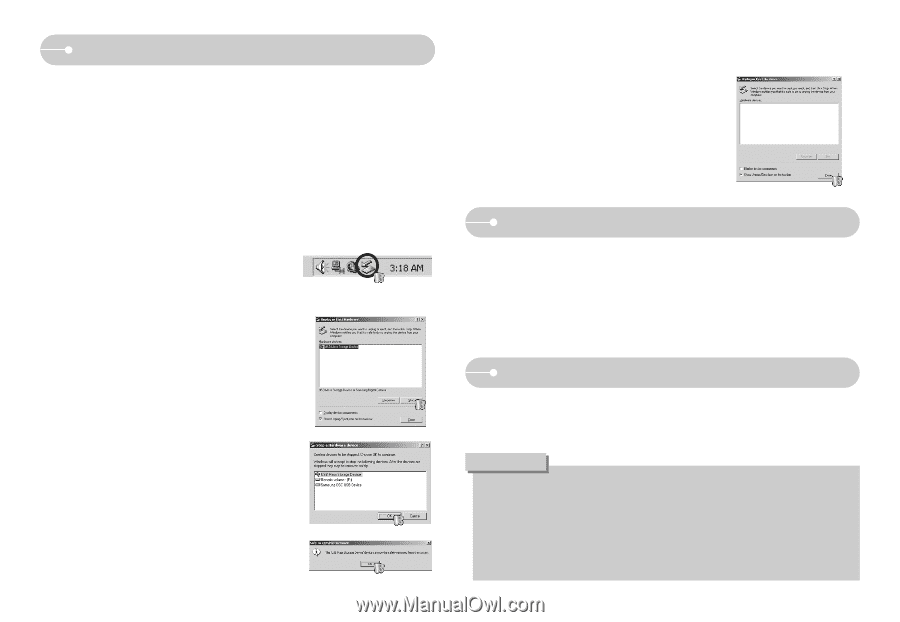
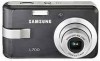
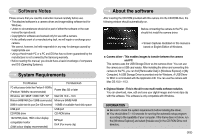
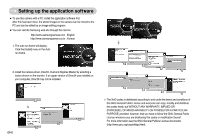
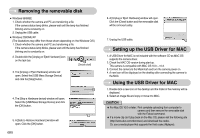
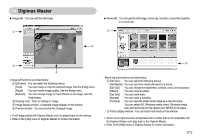
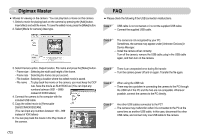
Removing the removable disk ■ Windows 98/98SE 1. Check whether the camera and PC are transferring a file. If the camera status lamp blinks, please wait until the lamp has finished blinking and is constantly on. 2. Unplug the USB cable. ■ Windows 2000/ME/XP (The illustrations may differ from those shown depending on the Windows O/S.) 1. Check whether the camera and PC are transferring a file. If the camera status lamp blinks, please wait until the lamp has finished blinking and is constantly on. 2. Double-click the [Unplug or Eject Hardware] icon on the task bar. [Double-click!] 3. The [Unplug or Eject Hardware] window will open. Select the [USB Mass Storage Device] and click the [Stop] button. 4. The [Stop a Hardware device] window will open. Select the [USB Mass Storage Device] and click the [OK] button. 5. A [Safe to Remove Hardware] window will open. Click the [OK] button. 《68》 6. A [Unplug or Eject Hardware] window will open. Click the [Close] button and the removable disk will be removed safely. 7. Unplug the USB cable. Setting up the USB Driver for MAC 1. A USB Driver for MAC is not included with the software CD as MAC OS supports the camera driver. 2. Check the MAC OS version during start-up. This camera is compatible with MAC OS 10.0 ~ 10.3. 3. Connect the camera to the Macintosh and turn the camera power on. 4. A new icon will be displayed on the desktop after connecting the camera to the MAC. Using the USB Driver for MAC 1. Double click a new icon on the desktop and the folder in the memory will be displayed. 2. Select an image file and copy or move it to MAC. CAUTION ● For Mac OS 10.0 or later : First complete uploading from computer to camera and then remove the removable disk with the Extract command. ● If a movie clip can't play back on the Mac OS, please visit the following site (http://www.divx.com/divx/mac/) and download the codec. Or, use a media player that supports the Xvid codec (Mplayer).
-
 1
1 -
2
-
3
-
4
-
5
-
6
-
7
-
8
-
9
-
10
-
11
-
12
-
13
-
14
-
15
-
16
-
17
-
18
-
19
-
20
-
21
-
22
-
23
-
24
-
25
-
26
-
27
-
28
-
29
-
30
-
31
-
32
-
33
-
34
-
35
-
36
-
37
-
38
-
39
-
40
-
41
-
42
-
43
-
44
-
45
-
46
-
47
-
48
-
49
-
50
-
51
-
52
-
53
-
54
-
55
-
56
-
57
-
58
-
59
-
60
-
61
-
62
-
63
-
 64
64 -
 65
65 -
 66
66 -
 67
67 -
 68
68 -
 69
69 -
 70
70 -
 71
71 -
 72
72 -
 73
73 -
 74
74 -
75
-
76
-
77
-
78
 |
 |