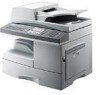
Samsung SCX 6322DN Service Manual - Page 58
Upper Ass'y.
 |
UPC - 635753620658
View all Samsung SCX 6322DN manuals
Add to My Manuals
Save this manual to your list of manuals |
Page 58 highlights
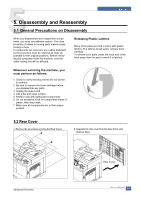
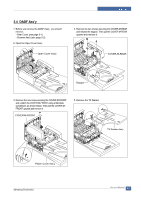
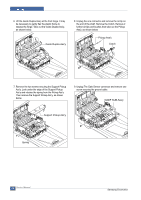
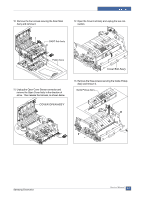
10. Pull the OPE Ass'y and unplug the one connector. OPE Ass'y 12. Release 2 clips (1 each side) to release the Scan Upper Ass'y securing the glass and remove it. Take care to ensure that the DADF connector is clear. Scan Upper Ass'y 11. Remove the five screws securing the Platen Ass'y. Hook Notice : When reassembling the Scan Upper take care to ensure that the Lever Sensor is free to operate 13. Remove the two screws to remove the Dummy Upper Ass'y. Dummy Upper Ass'y 5-4 Service Manual Notice : Dust or other foreign matter can cause the module to jam or image quality to deteriorate. Only open the scanner in a clean environment and ensure all parts are clean when reassembling the scanner. Samsung Electronics
-
 1
1 -
2
-
3
-
4
-
5
-
6
-
7
-
8
-
9
-
10
-
11
-
12
-
13
-
14
-
15
-
16
-
17
-
18
-
19
-
20
-
21
-
22
-
23
-
24
-
25
-
26
-
27
-
28
-
29
-
30
-
31
-
32
-
33
-
34
-
35
-
36
-
37
-
38
-
39
-
40
-
41
-
42
-
43
-
44
-
45
-
46
-
47
-
48
-
49
-
50
-
51
-
52
-
 53
53 -
 54
54 -
 55
55 -
 56
56 -
 57
57 -
 58
58 -
 59
59 -
 60
60 -
 61
61 -
 62
62 -
 63
63 -
64
-
65
-
66
-
67
-
68
-
69
-
70
-
71
-
72
-
73
-
74
-
75
-
76
-
77
-
78
-
79
-
80
-
81
-
82
-
83
-
84
-
85
-
86
-
87
-
88
-
89
-
90
-
91
-
92
-
93
-
94
-
95
-
96
-
97
-
98
-
99
-
100
-
101
-
102
-
103
-
104
-
105
-
106
-
107
-
108
-
109
-
110
-
111
-
112
-
113
-
114
-
115
-
116
-
117
-
118
-
119
-
120
-
121
-
122
-
123
-
124
-
125
-
126
-
127
-
128
-
129
-
130
-
131
-
132
-
133
-
134
-
135
-
136
-
137
-
138
-
139
-
140
-
141
-
142
-
143
-
144
-
145
-
146
-
147
-
148
-
149
-
150
-
151
-
152
-
153
-
154
-
155
-
156
-
157
-
158
-
159
-
160
-
161
-
162
-
163
-
164
-
165
-
166
-
167
-
168
-
169
-
170
-
171
-
172
-
173
-
174
-
175
-
176
-
177
-
178
-
179
-
180
-
181
-
182
-
183
-
184
-
185
 |
 |
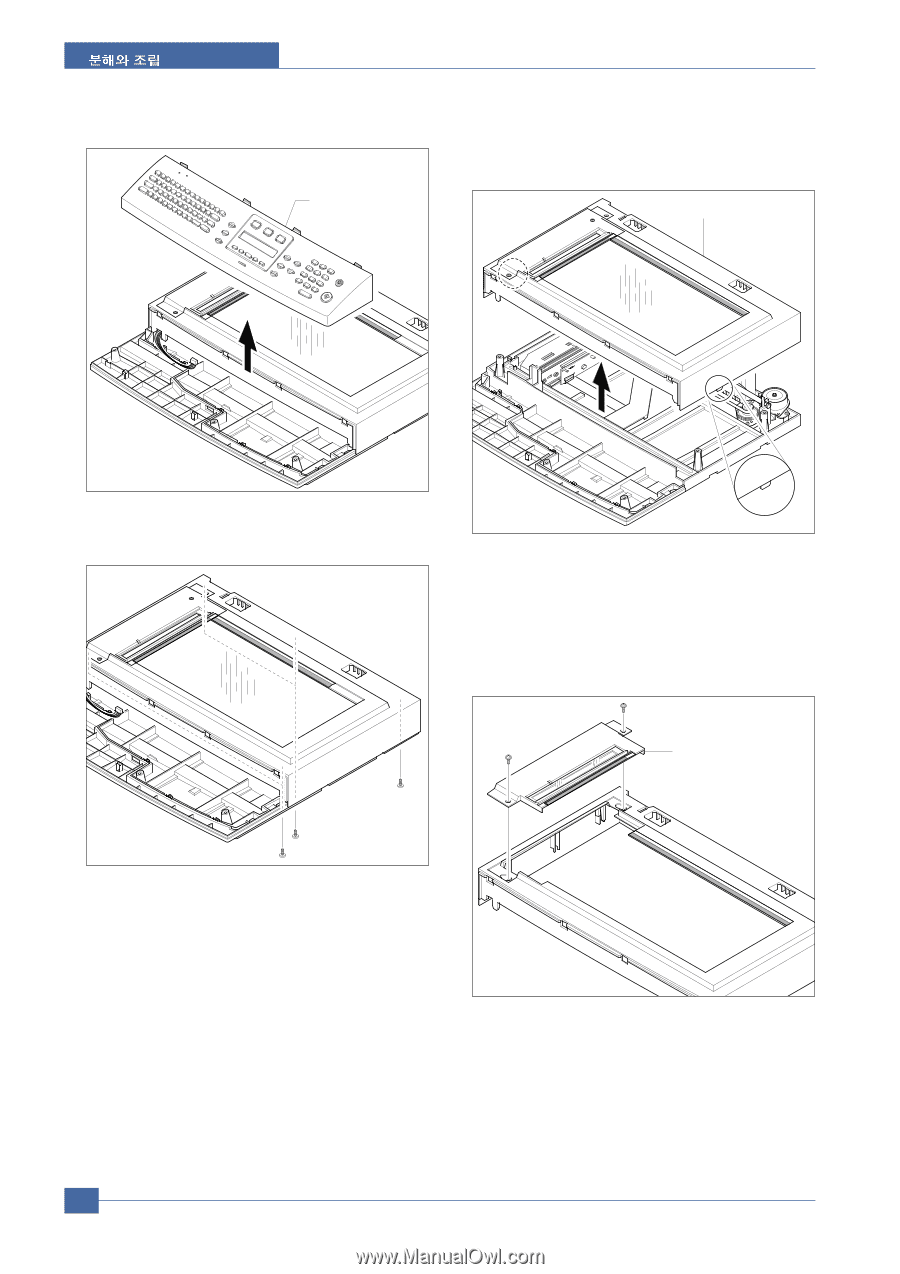
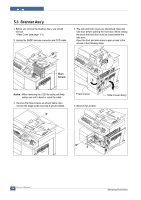
10. Pull the OPE Ass'y and unplug the one connector.
11. Remove the five screws securing the Platen Ass'y.
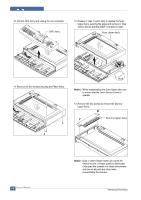
12. Release 2 clips (1 each side) to release the Scan
Upper Ass'y securing the glass and remove it. Take
care to ensure that the DADF connector is clear.
Notice :
When reassembling the Scan Upper take care
to ensure that the Lever Sensor is free to
operate
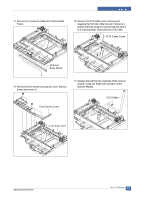
13. Remove the two screws to remove the Dummy
Upper Ass'y.
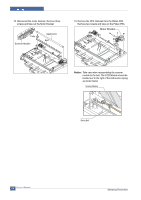
Notice :
Dust or other foreign matter can cause the
module to jam or image quality to deteriorate.
Only open the scanner in a clean environment
and ensure all parts are clean when
reassembling the scanner.
Samsung Electronics
Service Manual
5-4
OPE Ass'y
Scan Upper Ass'y
Hook
Dummy Upper Ass'y