Samsung SMX-F34SN User Manual (user Manual) (ver.1.0) (English) - Page 42
Adjusting The Lcd Screen, Using The Menu Button, Using The Control Buttons
 |
View all Samsung SMX-F34SN manuals
Add to My Manuals
Save this manual to your list of manuals |
Page 42 highlights
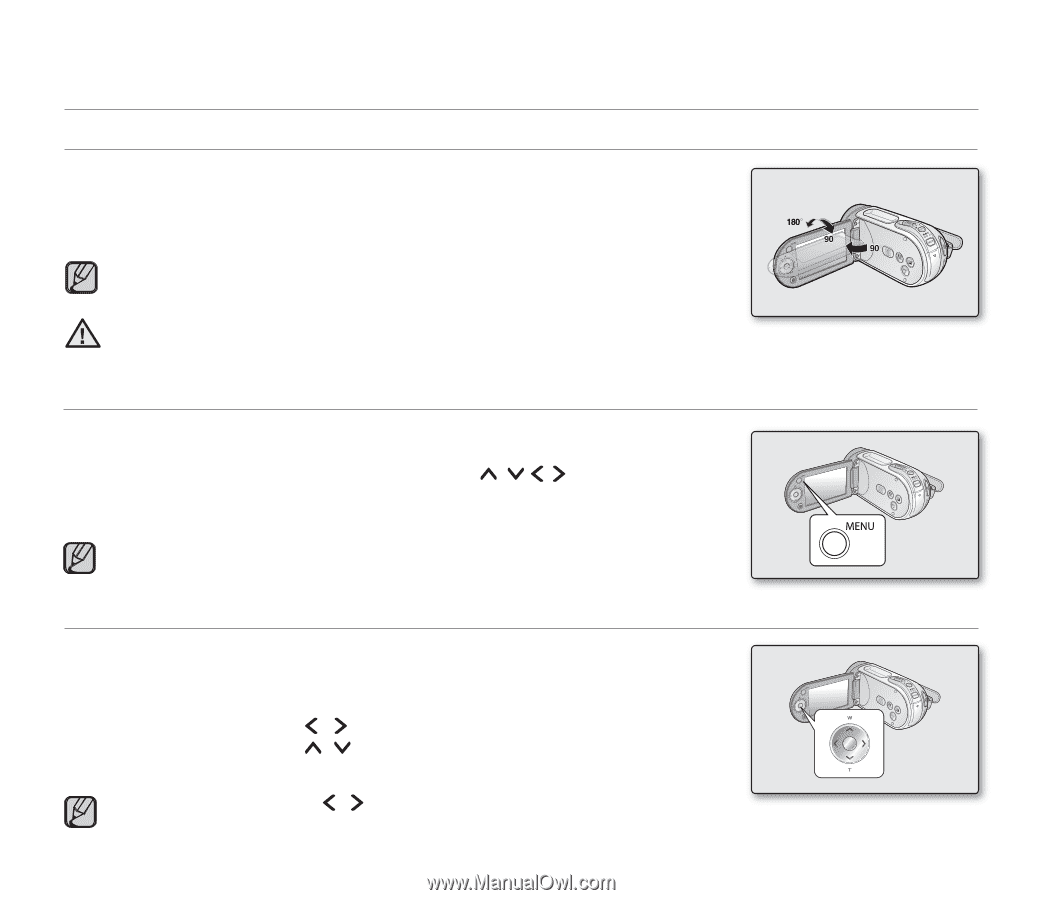
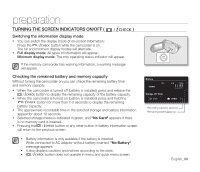
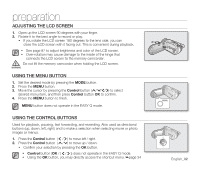
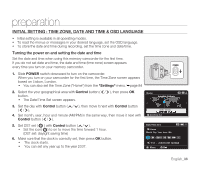
preparation ADJUSTING THE LCD SCREEN 1. Open up the LCD screen 90 degrees with your finger. 2. Rotate it to the best angle to record or play. • If you rotate the LCD screen 180 degrees to the lens side, you can close the LCD screen with it facing out. This is convenient during playback. • See page 87 to adjust brightness and color of the LCD screen. • Over-rotation may cause damage to the inside of the hinge that connects the LCD screen to the memory camcorder. Do not lift the memory camcorder when holding the LCD screen. WARNING USING THE MENU BUTTON 1. Set the desired mode by pressing the MODE button. 2. Press the MENU button. 3. Move the cursor by pressing the Control button ( / / / ) to select desired menu item, and then press Control button OK to confirm. 4. Press the MENU button to finish. MENU button does not operate in the EASY Q mode. USING THE CONTROL BUTTONS Used for playback, pausing, fast forwarding, and rewinding. Also used as directional buttons (up, down, left, right) and to make a selection when selecting movie or photo images or menus. 1. Press the Control button ( / ) to move left / right. 2. Press the Control button ( / ) to move up / down. • Confirm your selection by pressing the OK button. • Control button (OK / ( / )) does not operate in the EASY Q mode. • Using the OK button, you may directly access the shortcut menu. ➥page 34 English_32
-
 1
1 -
2
-
3
-
4
-
5
-
6
-
7
-
8
-
9
-
10
-
11
-
12
-
13
-
14
-
15
-
16
-
17
-
18
-
19
-
20
-
21
-
22
-
23
-
24
-
25
-
26
-
27
-
28
-
29
-
30
-
31
-
32
-
33
-
34
-
35
-
36
-
 37
37 -
 38
38 -
 39
39 -
 40
40 -
 41
41 -
 42
42 -
 43
43 -
 44
44 -
 45
45 -
 46
46 -
 47
47 -
48
-
49
-
50
-
51
-
52
-
53
-
54
-
55
-
56
-
57
-
58
-
59
-
60
-
61
-
62
-
63
-
64
-
65
-
66
-
67
-
68
-
69
-
70
-
71
-
72
-
73
-
74
-
75
-
76
-
77
-
78
-
79
-
80
-
81
-
82
-
83
-
84
-
85
-
86
-
87
-
88
-
89
-
90
-
91
-
92
-
93
-
94
-
95
-
96
-
97
-
98
-
99
-
100
-
101
-
102
-
103
-
104
-
105
-
106
-
107
-
108
-
109
-
110
-
111
-
112
-
113
-
114
-
115
-
116
-
117
-
118
-
119
-
120
-
121
-
122
-
123
-
124
-
125
-
126
-
127
-
128
-
129
-
130
-
131
 |
 |