Samsung SMX-F34SN User Manual (user Manual) (ver.1.0) (English) - Page 90
settings options
 |
View all Samsung SMX-F34SN manuals
Add to My Manuals
Save this manual to your list of manuals |
Page 90 highlights
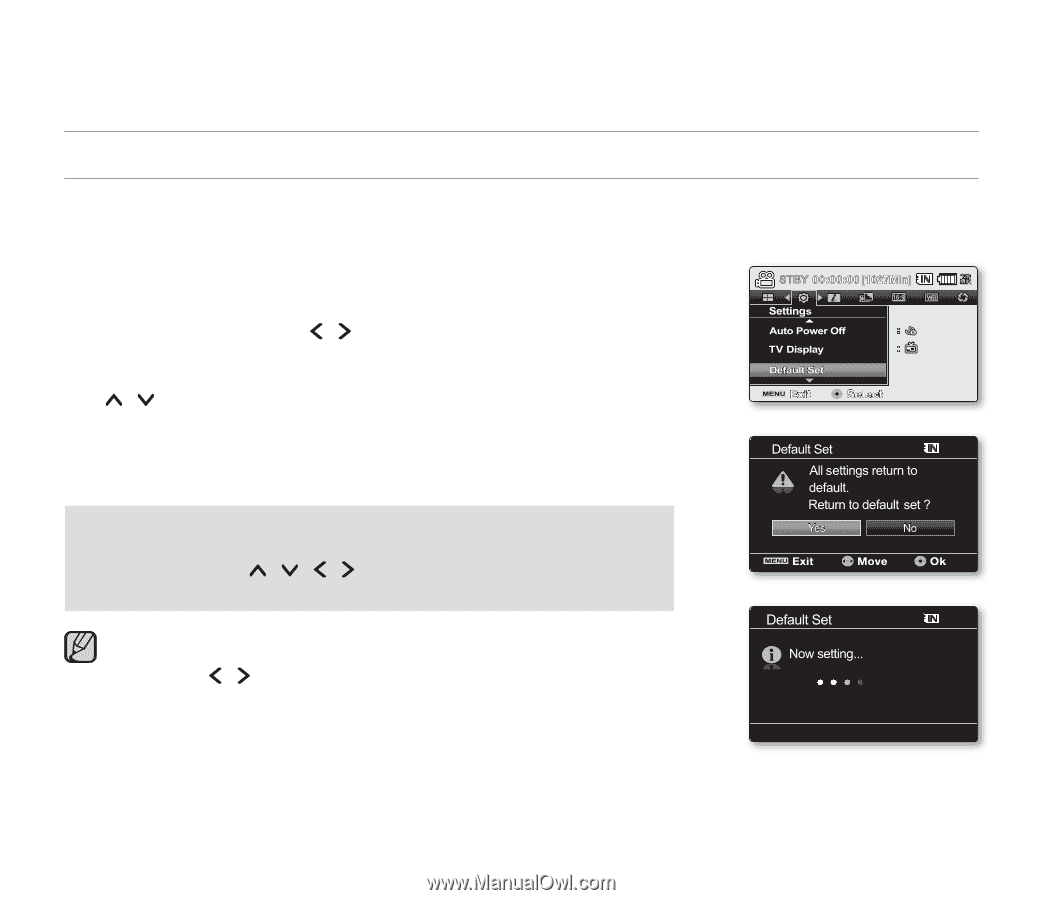
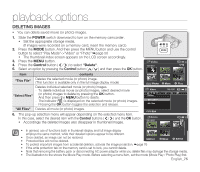
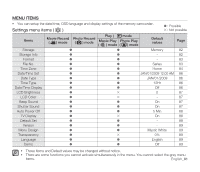
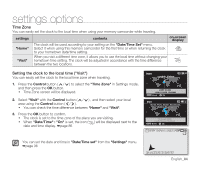
settings options CHANGING THE MENU SETTINGS IN "SETTINGS" You can change the menu settings to customize your memory camcorder. Access the desired menu screen by following the steps below and change the various settings. 1. Slide POWER switch downward to turn the memory camcorder on. 2. Press MENU button. • The menu screen appears. 3. Press the Control button ( / ) to select "Settings". • The menus in "Settings" mode will appear. 4. Select the desired sub menu and menu item with the Control buttons ( / ) and the OK button. • To return to the normal screen, press MENU button. • Depending on the mode selected not all items will be selectable to be changed. 120 (If there is no storage media inserted, it can not be selected and will be dimmed MIN on the menu: "Storage", "Storage Info", "Format", etc.) Button Tips a. MENU button : Use it to enter or exit the menu. b. Control button Use it to move up/down/left/right c. OK button : Use it to select or confirm the menu. • The pop-up selection menu will appear depending on the selected menu item. In this case, select the desired item with the Control buttons ( / ) and the OK button. • The illustration to the shows the Movie record mode. Before selecting a menu item, set the appropriate operation mode first (Movie Record / Photo Record / Movie Play /Photo Play ). ➥page 22 Video 100-0001 120 MIN MENU Exit OK English_80
-
 1
1 -
2
-
3
-
4
-
5
-
6
-
7
-
8
-
9
-
10
-
11
-
12
-
13
-
14
-
15
-
16
-
17
-
18
-
19
-
20
-
21
-
22
-
23
-
24
-
25
-
26
-
27
-
28
-
29
-
30
-
31
-
32
-
33
-
34
-
35
-
36
-
37
-
38
-
39
-
40
-
41
-
42
-
43
-
44
-
45
-
46
-
47
-
48
-
49
-
50
-
51
-
52
-
53
-
54
-
55
-
56
-
57
-
58
-
59
-
60
-
61
-
62
-
63
-
64
-
65
-
66
-
67
-
68
-
69
-
70
-
71
-
72
-
73
-
74
-
75
-
76
-
77
-
78
-
79
-
80
-
81
-
82
-
83
-
84
-
 85
85 -
 86
86 -
 87
87 -
 88
88 -
 89
89 -
 90
90 -
 91
91 -
 92
92 -
 93
93 -
 94
94 -
 95
95 -
96
-
97
-
98
-
99
-
100
-
101
-
102
-
103
-
104
-
105
-
106
-
107
-
108
-
109
-
110
-
111
-
112
-
113
-
114
-
115
-
116
-
117
-
118
-
119
-
120
-
121
-
122
-
123
-
124
-
125
-
126
-
127
-
128
-
129
-
130
-
131
 |
 |