Samsung SPH-M320 User Manual (user Manual) (ver.f12) (English) - Page 84
Editing a Contacts Entry
 |
View all Samsung SPH-M320 manuals
Add to My Manuals
Save this manual to your list of manuals |
Page 84 highlights
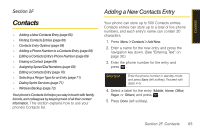
4. Highlight the entry again and press Ok (left softkey). (If your entry contains more than one number, select the number and press Assign (left softkey). 5. Press to return to the Contacts menu. To assign a speed dial number to an existing phone number: 1. Highlight a Contacts entry. (See "Finding Contacts Entries" on page 66.) 2. Press Options > Edit to display the Edit Entry menu. 3. Select a phone number and press Options (right softkey) > Set Speed Dial. 4. Select an available speed dial location (or enter a location using your keypad) and press Assign (left softkey) or press . (The new speed dial entry is then assigned.) 5. Press Done (left softkey) to save the updates and return to the Contacts menu. Note If you attempt to assign an already in-use speed dial location to a new phone number, a message will appear asking if you wish to replace the existing speed dial assignment. Press Yes to assign the location to the new phone number and delete the previous speed dial assignment. Editing a Contacts Entry 1. Highlight a Contacts entry. 2. Press Options > Edit to display the Edit Entry menu. 3. Select the information field you wish to edit (Name, Ringer, etc.) and press . 4. Add or edit the information and press . 5. Press Done (left softkey) to save your changes. 70 Section 2F. Contacts
-
 1
1 -
2
-
3
-
4
-
5
-
6
-
7
-
8
-
9
-
10
-
11
-
12
-
13
-
14
-
15
-
16
-
17
-
18
-
19
-
20
-
21
-
22
-
23
-
24
-
25
-
26
-
27
-
28
-
29
-
30
-
31
-
32
-
33
-
34
-
35
-
36
-
37
-
38
-
39
-
40
-
41
-
42
-
43
-
44
-
45
-
46
-
47
-
48
-
49
-
50
-
51
-
52
-
53
-
54
-
55
-
56
-
57
-
58
-
59
-
60
-
61
-
62
-
63
-
64
-
65
-
66
-
67
-
68
-
69
-
70
-
71
-
72
-
73
-
74
-
75
-
76
-
77
-
78
-
 79
79 -
 80
80 -
 81
81 -
 82
82 -
 83
83 -
 84
84 -
 85
85 -
 86
86 -
 87
87 -
 88
88 -
 89
89 -
90
-
91
-
92
-
93
-
94
-
95
-
96
-
97
-
98
-
99
-
100
-
101
-
102
-
103
-
104
-
105
-
106
-
107
-
108
-
109
-
110
-
111
-
112
-
113
-
114
-
115
-
116
-
117
-
118
-
119
-
120
-
121
-
122
-
123
-
124
-
125
-
126
-
127
-
128
-
129
-
130
-
131
-
132
-
133
-
134
-
135
-
136
-
137
-
138
-
139
-
140
-
141
-
142
-
143
-
144
-
145
-
146
-
147
-
148
-
149
-
150
-
151
-
152
-
153
-
154
-
155
-
156
-
157
-
158
-
159
-
160
-
161
-
162
-
163
-
164
-
165
-
166
-
167
-
168
-
169
-
170
-
171
-
172
 |
 |
