Sanyo PDG-DHT8000L Owners Manual - Page 59
Change the PIN Code, Change the PIN Code Lock setting, Enter a PIN code
 |
View all Sanyo PDG-DHT8000L manuals
Add to My Manuals
Save this manual to your list of manuals |
Page 59 highlights
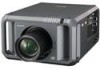
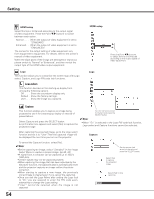
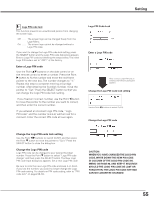
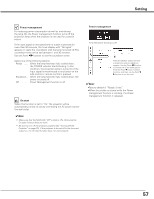
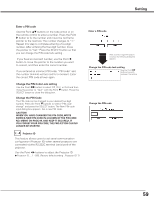
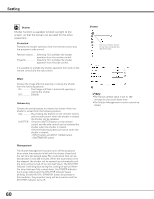
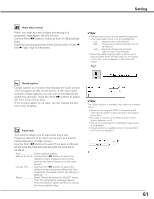
Setting Enter a PIN code Use the Point ed buttons on the side control or on the remote control to enter a number. Press the Point 8 button to fix the number and move the red frame pointer to the next box. The number changes to "✳." Repeat this step to complete entering a four-digit number. After entering the four-digit number, move the pointer to "Set." Press the SELECT button so that you can change the PIN code lock setting . If you fixed an incorrect number, use the Point 7 button to move the pointer to the number you want to correct, and then enter the correct number. If you entered an incorrect PIN code, "PIN code" and the number will turn red for a moment. Enter the correct PIN code all over again. Change the PIN Code Lock setting Use the Point 7 8 button to select Off, On1, or On2 and then move the pointer to "Quit" with the Point d button. Press the SELECT button to close the dialog box. Change the PIN Code The PIN code can be changed to your desired four-digit number. Press the Point d buttons to select "PIN code change" and press the SELECT button. The New PIN code input dialog box appears. Set a new PIN code. caution: when you have changed THE PIn code, write down A new pin code in column of the pin code no. memo on page 88, and keep it securely. If you forget your pin code, the projector can no longer be started. Projector ID This feature allows users to set serial communication configuration (Projector ID) when several projectors are connected via the RS-232C terminal (serial port) of the projector. Use the Point 7 8 buttons to adjust the Projector ID. ● Projector ID ... 1 - 999. (Factory default setting : Projector ID 1) Enter a PIN code After a correct Logo PIN code is entered, the following dialog box appears. Change the PIN code lock setting Use the Point 7 8 buttons to switch between the options. Change the PIN code 59
-
 1
1 -
2
-
3
-
4
-
5
-
6
-
7
-
8
-
9
-
10
-
11
-
12
-
13
-
14
-
15
-
16
-
17
-
18
-
19
-
20
-
21
-
22
-
23
-
24
-
25
-
26
-
27
-
28
-
29
-
30
-
31
-
32
-
33
-
34
-
35
-
36
-
37
-
38
-
39
-
40
-
41
-
42
-
43
-
44
-
45
-
46
-
47
-
48
-
49
-
50
-
51
-
52
-
53
-
 54
54 -
 55
55 -
 56
56 -
 57
57 -
 58
58 -
 59
59 -
 60
60 -
 61
61 -
 62
62 -
 63
63 -
 64
64 -
65
-
66
-
67
-
68
-
69
-
70
-
71
-
72
-
73
-
74
-
75
-
76
-
77
-
78
-
79
-
80
-
81
-
82
-
83
-
84
-
85
-
86
-
87
-
88
-
89
-
90
-
91
-
92
-
93
-
94
 |
 |