Seagate OneTouch II OneTouch II SBE Install Guide - Page 27
Adding Rubber Feet to Your Maxtor, OneTouch II Small Business Edition Drive - download
 |
View all Seagate OneTouch II manuals
Add to My Manuals
Save this manual to your list of manuals |
Page 27 highlights
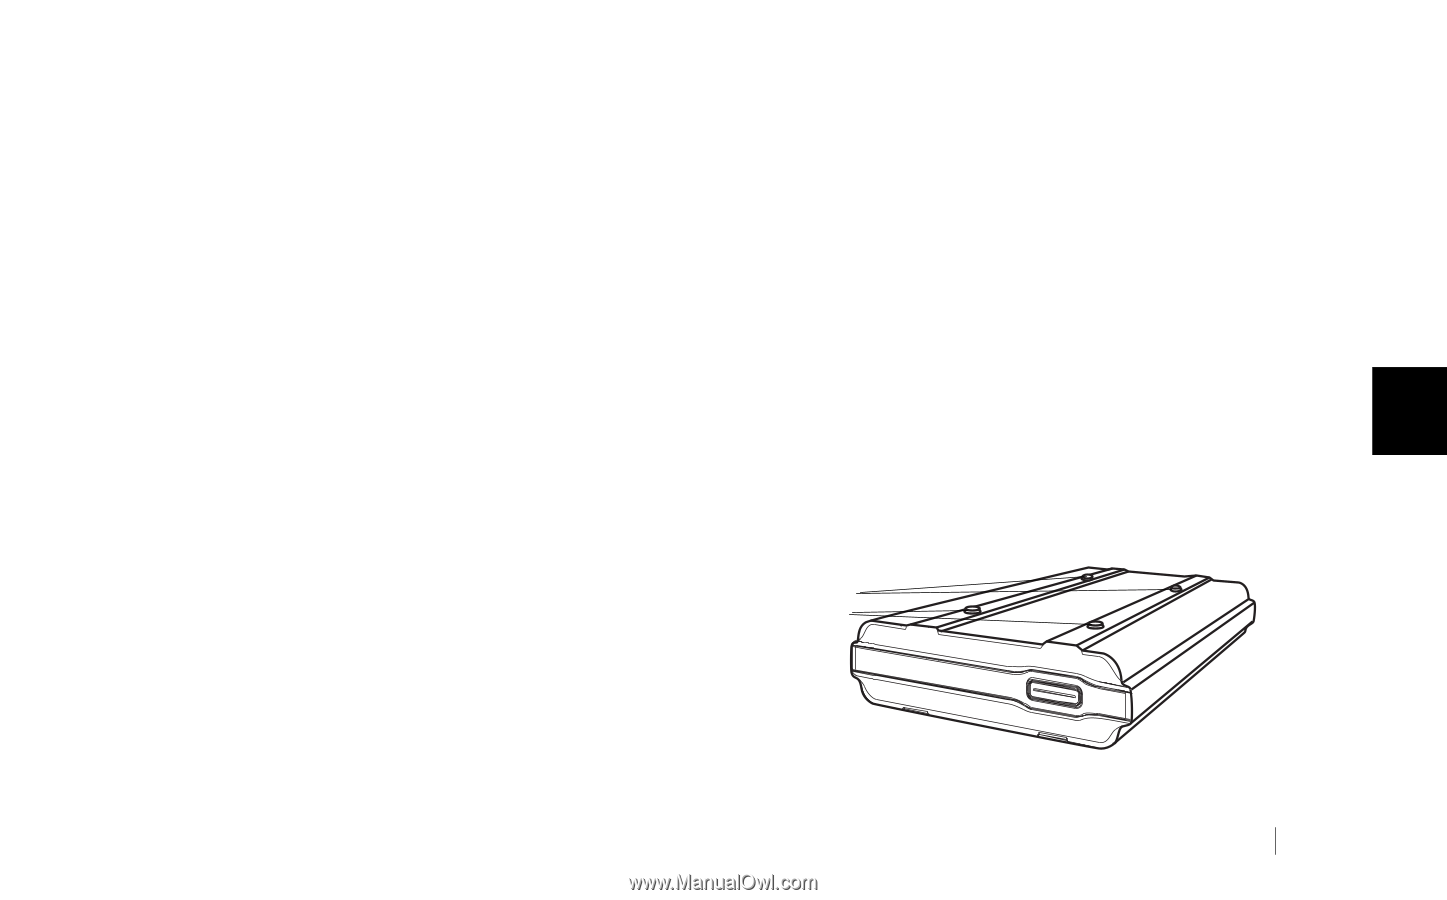
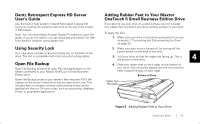
Dantz Retrospect Express HD Server User's Guide Use the built-in help system in Dantz Retrospect Express HD Server by clicking the question mark icon at the top of the screen in Retrospect. Note: You will need Adobe Acrobat Reader™ installed to open the guide. If you do not have it, you can download and install it for free from Adobe's website: www.adobe.com. Using Security Lock Your new drive includes a security locking slot on the back of the drive. The slot is compatible with most security locking cables. Open File Backup Open File Backup protects all open files and applications on the server connected to your Maxtor OneTouch II Small Business Edition drive. Open File Backup protects your server's files (requires NTFS file system on the server's hard drive) that are open and in use. This includes files on multiple volumes and business-critical server applications that run 24 hours a day, such as accounting, database, e-mail, or proprietary applications. Adding Rubber Feet to Your Maxtor OneTouch II Small Business Edition Drive If you plan to use your drive on a desk surface, your kit includes four rubber feet to protect your drive and the surface of your desk. To apply the feet: 1. Make sure your drive is disconnected properly from your computer. ("Connecting and Disconnecting the Drive" on page 21). 2. Make sure your drive is turned off, by turning off the power switch on the back of the drive. 3. Turn your drive so that the ridges are facing up. This is the bottom of the drive. 4 4. Place two rubber feet on each ridge on the bottom of your drive. One should be placed near the front and the other toward the back of each ridge. Bottom of Drive Rubber Feet Placement Figure 5. Adding Rubber Feet to Your Drive Using Your Drive 25
-
 1
1 -
2
-
3
-
4
-
5
-
6
-
7
-
8
-
9
-
10
-
11
-
12
-
13
-
14
-
15
-
16
-
17
-
18
-
19
-
20
-
21
-
 22
22 -
 23
23 -
 24
24 -
 25
25 -
 26
26 -
 27
27 -
 28
28 -
 29
29 -
 30
30 -
 31
31 -
 32
32 -
33
-
34
-
35
-
36
-
37
-
38
-
39
 |
 |