Sharp LC-32D50U LC-32D50U Operation Manual
Sharp LC-32D50U - 32" LCD TV Manual
 |
UPC - 074000363274
View all Sharp LC-32D50U manuals
Add to My Manuals
Save this manual to your list of manuals |
Sharp LC-32D50U manual content summary:
- Sharp LC-32D50U | LC-32D50U Operation Manual - Page 1
ENGLISH FRANÇAIS ESPAÑOL LC-32D50U LIQUID CRYSTAL TELEVISION TÉLÉVISEUR ACL TELEVISOR CON PANTALLA DE CRISTAL LÍQUIDO OPERATION MANUAL MODE D'EMPLOI MANUAL DE OPERACIÓN - Sharp LC-32D50U | LC-32D50U Operation Manual - Page 2
ENGLISH LC-32D50U LIQUID CRYSTAL TELEVISION ENGLISH OPERATION MANUAL • The illustrations and on-screen displays in this operation manual are REMOVE COVER (OR BACK). NO USER-SERVICEABLE PARTS INSIDE. REFER SERVICING TO QUALIFIED SERVICE PERSONNEL. The lightning flash with arrow-head symbol, within - Sharp LC-32D50U | LC-32D50U Operation Manual - Page 3
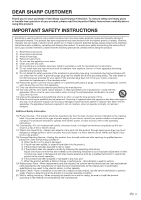
'S INSTRUCTIONS WHEN INSTALLING THE PRODUCT AND USE MOUNTING ACCESSORIES SHARP LIQUID CRYSTAL TELEVISION, MODEL LC-32D50U This device complies with Part the equipment off and on, the user is encouraged to try to correct Consult the dealer or an experienced radio/TV technician for help. "Note to CATV - Sharp LC-32D50U | LC-32D50U Operation Manual - Page 4
hazards. 20) Safety Check-Upon completion of any service or repairs to this product, ask the service technician to perform safety checks to determine that the product is in proper operating condition. 21) Wall or ceiling mounting-When mounting the product on a wall or ceiling, be sure to install the - Sharp LC-32D50U | LC-32D50U Operation Manual - Page 5
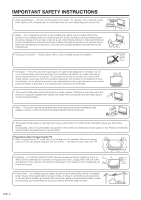
tripod, bracket or table recommended by the manufacturer or sold with the product. When mounting the product on a wall, be sure to follow the manufacturer's instructions. Use only the mounting hardware recommended by the manufacturer. • Selecting the location - Select a place with no direct sunlight - Sharp LC-32D50U | LC-32D50U Operation Manual - Page 6
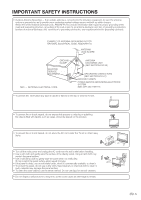
UNIT (NEC SECTION 810-20) GROUNDING CONDUCTORS (NEC SECTION 810-21) GROUND CLAMPS POWER SERVICE GROUNDING ELECTRODE SYSTEM (NEC ART 250, PART H) • To prevent fire, never place any type of candle or flames on the top or near the TV set. • To prevent fire or shock hazard, do not expose this product to - Sharp LC-32D50U | LC-32D50U Operation Manual - Page 7
Page 7 Operation manual (g1) Page 7 Page 7 NOTE • Always use the AC cord supplied with the TV. QUICK REFERENCE Page 6 Attaching the stand • Before attaching (or detaching) stand, unplug the AC cord from the AC INPUT terminal. • Before performing work spread cushioning over the base area to lay - Sharp LC-32D50U | LC-32D50U Operation Manual - Page 8
television into the AC outlet. POWER B) POWER indicator on the front of the AQUOS television lights BLUE. AC outlet • Place the TV close to the AC outlet, and keep the power plug within reach. NOTE • TO PREVENT RISK OF ELECTRIC SHOCK, DO NOT TOUCH UN-INSULATED PARTS OF ANY CABLES WITH THE AC CORD - Sharp LC-32D50U | LC-32D50U Operation Manual - Page 9
to follow the instructions below. • Do light up, press TV POWER on the remote control to turn the power on. IMPORTANT: IF THE UNIT DOES NOT POWER ON - UNPLUG THE AQUOS TELEVISION FROM THE OUTLET AND REPEAT THE INSTALLATION STEPS. IF YOU STILL ENCOUNTER NO POWER, PLEASE CONTACT US AT 1-800-BE-SHARP - Sharp LC-32D50U | LC-32D50U Operation Manual - Page 10
of channels 62 Viewing information of the program 62 Freezing images 63 Presetting remote control function 63 Appendix 67 Removing the stand 67 Setting the TV on the wall 67 Troubleshooting 68 Troubleshooting-Digital broadcasting 69 PC compatibility chart 69 RS-232C port specifications 70 - Sharp LC-32D50U | LC-32D50U Operation Manual - Page 11
Part names TV (Front) Channel buttons (CHs/r) Volume buttons (VOLl/k) INPUT button POWER button Remote control sensor POWER indicator** OPC sensor* OPC indicator* NOTE *OPC: Optical Picture Control (See page 24.) **See page 14 for TV status indicator. 10 - Sharp LC-32D50U | LC-32D50U Operation Manual - Page 12
Part names TV (Rear) DVI terminal (INPUT 5) DIGITAL AUDIO OUTPUT terminal DVI AUDIO terminal (INPUT 5) AUDIO input terminals (INPUT 4) HDMI terminal (INPUT 3) HDMI terminal (INPUT 4) i.LINK terminals INPUT 2 terminals AUDIO OUTPUT terminals CABLE - Sharp LC-32D50U | LC-32D50U Operation Manual - Page 13
Part names Remote control unit 1 17 2 3 18 4 19 5 6 20 7 21 8 22 9 23 10 24 11 25 12 26 27 13 28 29 30 14 31 15 16 32 NOTE • When using the remote control unit, point it at the TV. 12 1 TV POWER: Switches the TV power on or enters standby mode. (See page 14.) 2 DISPLAY: - Sharp LC-32D50U | LC-32D50U Operation Manual - Page 14
. The heat may cause deformation of the remote control unit. • The remote control unit may not work properly if the remote control sensor on the TV is under direct sunlight or strong lighting. In such cases, change the angle of the lighting or the TV, or operate the remote control unit closer to the - Sharp LC-32D50U | LC-32D50U Operation Manual - Page 15
remove the AC cord from the power outlet. • Weak electric power is still consumed even when POWER is turned off. TV status indicator (POWER) ON OFF/Standby Lighting (Blue) Lights off TV status indicator (OPC) "Off" is selected in OPC setting "On" or "On: Display" is selected in OPC setting • See - Sharp LC-32D50U | LC-32D50U Operation Manual - Page 16
TV POWER on the remote control unit. 1. Insert the batteries into the remote control unit. (See page 8.) 2. Connect the antenna cable to the TV to move down. Press c/d to select "Yes" or "No" for CABLE Analog & Digital, then press b to move down. Select "Search Start", and then press ENTER. • If - Sharp LC-32D50U | LC-32D50U Operation Manual - Page 17
• FLASHBACK will not work if no channel has been changed after the TV is turned on. Method 3 Using remote control buttons 0-9, • (DOT) to select channels for VHF/UHF/CATV/DIGITAL. To select a 1 or 2-digit channel number (e. g., Channel 5): Press 5sENT Air 5 Air ANALOG 5 NOTE • When selecting - Sharp LC-32D50U | LC-32D50U Operation Manual - Page 18
control unit Mutes the current sound output. Changing the volume You can change the volume on the TV or on the remote control unit. Press MUTE. • M will be displayed on the screen for 30 minutes, and the sound is silenced. 20 Using VOLk/l • To increase the volume, press VOLk. • To decrease - Sharp LC-32D50U | LC-32D50U Operation Manual - Page 19
stereo sound is difficult to hear. • Obtain a clearer sound by manually switching to fixed mono-sound mode. NOTE • MTS only operates while in TV mode. Setting Digital broadcasting audio mode The types of audio transmitted in a digital broadcast include SURROUND as well as MONO and STEREO. In addition - Sharp LC-32D50U | LC-32D50U Operation Manual - Page 20
the remote control -Screen Display Example MENU [Option ... Color System] Option Audio Only Digital Noise Reduction Item displayed in white • This indicates an item can be selected. 4 Item displayed in same. • The screens in the operation manual are for explanation purposes (some are enlarged - Sharp LC-32D50U | LC-32D50U Operation Manual - Page 21
Reset Page 46 Option Audio Only Page 52 Digital Display Page 53 Favorite CH Page 23 Digital Sharpness Page 24 Advanced Color Temp Page 25 Black Page 25 Monochrome Page 25 Film Mode Page 25 Range of OPC Page 25 Audio Treble Page 26 Bass Page 26 Balance Page 26 Surround Page 26 Power - Sharp LC-32D50U | LC-32D50U Operation Manual - Page 22
4. If not, skip to step 5. 4 Input the 4-digit secret number by using 0-9. 5 Press a/b to select the instructions below to manually memorize the channels. Channel search Channel auto search makes the TV look for all channels viewable in the set area. 1 Press MENU and the MENU screen displays - Sharp LC-32D50U | LC-32D50U Operation Manual - Page 23
what kind of connection is made with your TV. 3 Press a/b to select "Antenna Setup DIGITAL", and then press ENTER. 4 Press a/b to select "Signal Strength". • The signal strength of DIGTAL channel is displayed. The signal information is based on the current channel. Signal Strength Channel - Sharp LC-32D50U | LC-32D50U Operation Manual - Page 24
you want to register as a favorite channel. Using FAVORITE CH on the remote control unit 1 Select the channel you want to register as a favorite to register. A B C D Air 3 2 Press MENU and the MENU screen displays. 3 Press c/d to select "Option". 4 Press a/b to select "Favorite CH", - Sharp LC-32D50U | LC-32D50U Operation Manual - Page 25
[b12] a16 Contrast [b30] 0 Brightness [ 0] a30 Color [ 0] a30 Tint [ 0] a30 Sharpness [ b2] a10 Advanced Reset On : Display b16 b40 b30 b30 b30 b10 NOTE • When set to "On", the OPC senses the surrounding light and automatically adjusts the backlight brightness. Make sure nothing obstructs - Sharp LC-32D50U | LC-32D50U Operation Manual - Page 26
This TV provides various advanced functions for optimizing the picture quality. 1 Press MENU and the MENU screen displays. (3:2 pull-down) Automatically detects a film-based source (originally encoded at 24 frames/second), light, the OPC sensor might not operate if the adjustment range is small. - Sharp LC-32D50U | LC-32D50U Operation Manual - Page 27
displays. 3 Press a/b to select "Surround", and then press ENTER. MENU [Audio ... Surround] Audio Power Control 2 Press c/d to select "Audio". MENU [Audio] Audio Power Control Treble [ 0] a15 b15 Bass [ 0] a15 b15 Balance [ 0] L R Surround [Off] Reset remote manual of your DVD - Sharp LC-32D50U | LC-32D50U Operation Manual - Page 28
select "Enable", and then press ENTER. Enable Disable • Five minutes before the power shuts down, the remaining time displays every minute. 5 Press MENU to exit. NOTE • "Disable" is the factory preset value. • When a TV program finishes, this function may not operate. No operation off When set - Sharp LC-32D50U | LC-32D50U Operation Manual - Page 29
is connected to the DIGITAL AUDIO OUTPUT terminal on the TV. Please select an audio output format compatible with the audio format of the program you are watching and the equipment connected. 1 Press MENU and the MENU screen displays. 2 Press c/d to select "Digital Setup". 3 Press a/b to - Sharp LC-32D50U | LC-32D50U Operation Manual - Page 30
TV like a DVD player, VCR, Digital TV tuner, PC, HDMI equipment, game console or camcorder. To view external source images, select the input source from INPUT on the remote control unit or on the TV. Displaying . • Refer to your external equipment operation manual for the signal type. NOTE • If - Sharp LC-32D50U | LC-32D50U Operation Manual - Page 31
(Air or Cable) You can use the INPUT 1, INPUT 2 or INPUT 5 terminals when connecting to a DVD player, a Digital TV STB (Air or Cable) and other audiovisual equipment. When using component cable. (INPUT 1) When using composite cable. (INPUT 1 or 2) Audio cable (commercially available) Component - Sharp LC-32D50U | LC-32D50U Operation Manual - Page 32
using INPUT on the remote control unit or on the TV. (See page 47.) based on signal recognition, including an HDMI signal. Audio Digital/Analog 2 Press MENU and the MENU screen displays. Select Select "Digital Digital Noise Reduction [Low] • Refer to your external equipment operation manual - Sharp LC-32D50U | LC-32D50U Operation Manual - Page 33
with the TV. • If you are connecting the TV to a PC Digital Audio Output It is possible to output audio through the DIGITAL AUDIO OUTPUT terminal. (See page 28 for details.) PCM audio outputs from the terminal. S-video cable (commercially available) Optical fiber cable To optical digital - Sharp LC-32D50U | LC-32D50U Operation Manual - Page 34
be recorded with the i.LINK Only digital programs can be recorded by i.LINK devices connected to this TV using the i.LINK. i.LINK recording should be connected at the end of any series of connections. • This TV can relay data during power off, by selecting "Active" in the "Standby Mode" option in "i. - Sharp LC-32D50U | LC-32D50U Operation Manual - Page 35
i.LINK terminal and INPUT 2 i.LINK cable (commercially available) AV cable (commercially available) Digital TV STB 1 Press MENU and the MENU screen displays. 2 Press c/d to select "Digital Setup". 3 Press a/b to select "i.LINK Setup", and then press ENTER. 4 Press a/b to select "Input - Sharp LC-32D50U | LC-32D50U Operation Manual - Page 36
to save power at the standby, select "Inactive" in "Standby Mode". 1 Press MENU and the MENU screen displays. 2 Press c/d to select "Digital Setup". 3 is set to "Active". To control the TV from an i.LINK device, turn the TV power on (POWER indicator lights up in blue). • Data cannot be relayed - Sharp LC-32D50U | LC-32D50U Operation Manual - Page 37
be connected properly.) Disabling the TV's operation of an i.LINK device By disabling the TV's operation of an i.LINK device, the device can be operated from another i.LINK device. 1 Press i.LINK to display the i.LINK control panel. STOP 00:01:32 05 PWR STOP Model Input • When there is no - Sharp LC-32D50U | LC-32D50U Operation Manual - Page 38
refer to the operation manual of the i.LINK device to be used with this TV. Basic operation 1 Press i.LINK to display the i.LINK control panel 32 05 PWR STOP Model Model Go to Model Selection screen Input Select input Tape Counter Function selected with the cursor Type of videotape PWR Power - Sharp LC-32D50U | LC-32D50U Operation Manual - Page 39
Control Pass-through mode. Model Input Go to Model Selection screen Select input POWER Switch on/off of OSD Start remote control pass-through mode Function selected with the cursor NOTE • Depending on the STB or TV, the "OSD Switch" button and/or "RC Pass-through" button may not display. 38 - Sharp LC-32D50U | LC-32D50U Operation Manual - Page 40
using the control panel, or to display picture and/or sound input from some i.LINK devices. • When the TV's control panel is used to record a program, what is recorded with the i.LINK device are the pictures and sound of the digital program that the TV is receiving. • The i.LINK control panel - Sharp LC-32D50U | LC-32D50U Operation Manual - Page 41
completed beforehand. Please also refer to the operation manual of the D-VHS deck to be used with this TV. 1 Select a digital program to be recorded. 2 Press i.LINK to display the i.LINK control panel. STOP 00:01:32 05 PWR STOP Model Input 3 Press a/b/c/d to select "E", and then press ENTER - Sharp LC-32D50U | LC-32D50U Operation Manual - Page 42
manual of the AVHDD recorder/Blu-ray Disc recorder to be used with this TV. 1 Select a digital program to be recorded. 2 Press i.LINK to display Free 61% 06 PWR PLAY OPERATION REC STOP REC PAUSE Play Ope. Model Input NOTE • Input mode cannot be switched to i.LINK during recording. - Sharp LC-32D50U | LC-32D50U Operation Manual - Page 43
TV. 3 Press i.LINK to display 32 SHOOT SHOOT Model Input NOTE • Some HDV camcorders include a "photo mode" for taking still pictures. When an HDV camcorder is in "photo mode", the TV cannot control the camera via the i.LINK control panel. Please consult your HDV camcorder's instruction manual - Sharp LC-32D50U | LC-32D50U Operation Manual - Page 44
device such as a digital STB/digital TV via the i.LINK cable, you can view the On-Screen Display of the connected i.LINK devices on the TV if the device supports this function. DTVLink also allows you to control the connected i.LINK devices using the TV's remote control without displaying the i.LINK - Sharp LC-32D50U | LC-32D50U Operation Manual - Page 45
. 1 Press MENU and the MENU screen displays. 2 Press c/d to select "Setup". Reset 3 Press a/b to select "Standby Mode", and then press ENTER. 4 Press a/b to select "Mode1" or "Mode2", and then press ENTER. Selected item Mode1 Mode2 Description Starting TV is quick from standby. Power - Sharp LC-32D50U | LC-32D50U Operation Manual - Page 46
90] a b Phase [ 20] a b Reset 30% 5 Press MENU to exit. NOTE • When Auto Sync. is successful, "Completed" displays. If not, Auto Sync. failed. • Auto Sync. may fail even if "Completed" displays. • Auto Sync. may fail if the computer image has low resolution, has unclear (black) edges, or is - Sharp LC-32D50U | LC-32D50U Operation Manual - Page 47
select "Yes", and then press ENTER. • "Now, TV will restart automatically. OK?" displays on the screen. 5 Press c/d to select "Yes", and then press ENTER. • "Now initializing..." displays on the screen and blinks. • After the reset has completed, the power shuts off and then comes back on. The - Sharp LC-32D50U | LC-32D50U Operation Manual - Page 48
select the input source. • An image from the selected source automatically displays. • You can also select the input source by pressing a/b. • DIGITAL ANALOG 6 Press MENU to exit. NOTE • If you set INPUT 1 to Auto, the TV will automatically select the input signal. • Check the operation manual - Sharp LC-32D50U | LC-32D50U Operation Manual - Page 49
to select the desired input source. 2 Press MENU and the MENU screen displays. ABC 3 Press c/d to select "Setup" [Mirror]: mirror image 4 Press the new name for the input mode, and then press ENTER. INPUT SOURCE TV DVD INPUT2 INPUT3 INPUT4 INPUT5 i.LINK (Example) 6 Press MENU to exit. - Sharp LC-32D50U | LC-32D50U Operation Manual - Page 50
Useful adjustment settings View Mode for 4:3 Programs 1 Press VIEW MODE. • The View Mode menu displays. • The menu lists the View Mode options selectable for the type of video signal currently being received. 2 Press VIEW MODE or a/b while the View Mode - Sharp LC-32D50U | LC-32D50U Operation Manual - Page 51
adjustments. (See page 32.) • Selectable screen size may vary with input signal type. 1 Press VIEW MODE. • The View Mode menu displays. 2 Press VIEW MODE the resolution aspect ratio in a full screen programs. The screen. of the signal and screen display. top and bottom of the displays an - Sharp LC-32D50U | LC-32D50U Operation Manual - Page 52
for each input mode. (For example, select STANDARD for TV input and DYNAMIC for VIDEO input.) Input Signal (for PC input mode) Some input signals may have to be registered manually to display properly. The pair of input signals (resolutions) in the list below are not distinguishable when received - Sharp LC-32D50U | LC-32D50U Operation Manual - Page 53
the MENU screen displays. 2 Press c/d to select "Option". 2 Press c/d to select "Option". 3 Press a/b to select "Digital Noise Reduction", and the AUDIO OUTPUT terminal is adjusted with VOL k/l on the remote control unit or VOL l/k on the TV. • Sound via speaker is muted. 5 Press MENU to - Sharp LC-32D50U | LC-32D50U Operation Manual - Page 54
when the TV automatically switches to standby. 1 Press MENU and the MENU screen displays. 2 Display Select the CH display when changing channels for digital broadcasting. 1 Press MENU and the MENU screen displays. 2 Press c/d to select "Option". 3 Press a/b to select "Program Title Display - Sharp LC-32D50U | LC-32D50U Operation Manual - Page 55
settings. • When the program contains no Closed Caption, "--" displays in the closed caption information. • If the language code, e.g. "ENG", is not found on Digital TV programs, "--" will be shown. • Four kinds of Closed Caption service (CC1, CC2, Text1, Text2) are potentially available, but - Sharp LC-32D50U | LC-32D50U Operation Manual - Page 56
screen appearance to suit your preference. 1 Press MENU and the MENU screen displays. 2 Press c/d to select "Option". 3 Press a/b to select "Caption Color Foreground Opacity Background Color Background Opacity Character Edge Reset Default Default Default Default Default Default Default 5 - Sharp LC-32D50U | LC-32D50U Operation Manual - Page 57
met to enable the V-Chip (see pages 56 to 61): 6 Input the same 4-digit number on the "Reconfirm" screen as in step 5 to confirm. New is set to "On". Setting a secret number 1 Press MENU and the MENU screen displays. 2 Press c/d to select "Setup". 3 Press a/b to select "Parental CTRL", and - Sharp LC-32D50U | LC-32D50U Operation Manual - Page 58
clear your secret number. 1 Repeat steps 1 to 3 in Setting a secret number. • The secret number setting menu displays. 2 Input the 4-digit secret number by using 0-9. 2 Input the 4-digit secret number by using 0-9. 3 Press a/b to select "Secret No.", and then press ENTER. 4 Press a/b to - Sharp LC-32D50U | LC-32D50U Operation Manual - Page 59
NOTE • Voluntary movie rating system only uses an age-based rating. Rating TV-Y (All children) TV-Y7 (Directed to older children) Suggested age TV-G (General audience) TV-PG (Parental Guidance suggested) TV-14 (Parents strongly cautioned) TV-MA (Mature audience only) X: Content rating can be - Sharp LC-32D50U | LC-32D50U Operation Manual - Page 60
automatically enters "Block" for any ratings below your selection. Example MPAA TV Guidelines Can. English Ratings Can. French Ratings TV-Y TV-Y7 D TV-G L TV-PG S TV-14 V TV-MA FV NONE When setting an individual content-based rating item, do as follows: 1 Press d or ENTER to access - Sharp LC-32D50U | LC-32D50U Operation Manual - Page 61
Useful adjustment settings Canadian Rating Systems • The TV rating systems in Canada are based on the Canadian Radio-Television and Telecommunications Commission (CRTC) policy on violence in television programming. • While violence is the most important content element to be - Sharp LC-32D50U | LC-32D50U Operation Manual - Page 62
displays. ENTER. • Secret number setting menu displays only when "Secret No." is 4-digit secret number by using 0-9. MPAA TV BEEN ACTIVATED." displays. 6 number setting menu displays. 7 Press 2 Input the 4-digit secret number by MPAA TV Guidelines setting ("MPAA", "TV Guidelines", 8 Press - Sharp LC-32D50U | LC-32D50U Operation Manual - Page 63
select the channel you want to watch, and then press ENTER to display the will be displayed in the program information. Recording digital programs via i.LINK, or recording digital audio via selected channel. digital audio output terminals, is restricted. 3 Press c/d to scroll between pages of - Sharp LC-32D50U | LC-32D50U Operation Manual - Page 64
(AV Receiver, Cable Box, SAT tuner, DTV, VCR, DVD, LD) using the presetting manufacturer function of your remote control unit. 1 Press FREEZE. • FUNCTION until the LED for your device lights up. 2 After the LED for your device lights up, press FUNCTION and DISPLAY at the same time to enter the - Sharp LC-32D50U | LC-32D50U Operation Manual - Page 65
Other viewing options Manufacturer codes VCR BRAND REMOTE CONTROL CODE NUMBER DVD/LD BRAND REMOTE CONTROL CODE NUMBER CATV/SAT BRAND REMOTE CONTROL CODE NUMBER NOTE • Numbers marked with * are SAT codes, all others are CATV codes. AUDIO BRAND REMOTE CONTROL CODE NUMBER 64 - Sharp LC-32D50U | LC-32D50U Operation Manual - Page 66
options 1 2 Cable control buttons When the FUNCTION is set to CBL/SAT, the cable converter connected to the TV can be operated using 1 to 4. 1 SOURCE POWER Turns the cable converter power on and off. 2 0-9 Press a button (or buttons) that corresponds to the channel that you wish to watch - Sharp LC-32D50U | LC-32D50U Operation Manual - Page 67
when the FUNCTION of the remote control unit is set to VCR. • Press INPUT until the input connected to the VCR is selected. The following 1 to 8 can be used to control the VCR. 1 CH r/s Press to select the channel of the TV tuner on the VCR. 2 SOURCE POWER Turns the power of the VCR on - Sharp LC-32D50U | LC-32D50U Operation Manual - Page 68
. SHARP bears no responsibility for improper mounting or mounting that results in accident or injury. Using an optional bracket to mount the TV • You can ask a qualified service professional about using an optional AN-37AG2 bracket to mount the TV to the wall. • Carefully read the instructions that - Sharp LC-32D50U | LC-32D50U Operation Manual - Page 69
Appendix Troubleshooting Problem • No power Possible Solution • Check if you pressed TV POWER on the remote control unit. (See page 14.) If the indicator on the TV does not light up, press POWER on the TV. • Is the AC cord disconnected? (See page 7.) • Has the power been turned on? (See page 14.) - Sharp LC-32D50U | LC-32D50U Operation Manual - Page 70
model. Possible Solution • Displayed when you have selected a device that is not compatible with the TV, or that does not have DTLA copy protection technology installed. • Wrong connection or no i.LINK connection was found. Refer to Operation Manual on connection. • Displayed when a problem - Sharp LC-32D50U | LC-32D50U Operation Manual - Page 71
the control commands from the PC via the RS-232C connector. The TV operates according to the received command and sends a response message to the Command 4-digits: Command. The text of four characters. Parameter 4-digits: Parameter 0 - 9, g, blank, ? Command 4-digits Parameter 4-digits Return code - Sharp LC-32D50U | LC-32D50U Operation Manual - Page 72
TV display. In Air, 2-69ch is effective. In Cable, 1-135ch is effective. DIGITAL Air (Two-Part numbers, 2-digit plus 2-digit) DIGITAL Cable (Two-Part numbers, 3-digit plus 3-digit) Front half of DIGITAL CABLE CHANNEL NO. (Designate major channel) DIGITAL Cable (Two-Part numbers, 3-digit plus 3-digit - Sharp LC-32D50U | LC-32D50U Operation Manual - Page 73
Item Model: LC-32D50U LCD panel Number of dots 32o Advanced Super View & BLACK TFT LCD 3,147,264 dots (1366 g 768 g 3 dots) TV Function TV-standard Receiving VHF/UHF Channel CATV American TV Standard ATSC/NTSC System VHF 2-13ch, UHF 14-69ch 1-135ch (non-scrambled channel only) Digital - Sharp LC-32D50U | LC-32D50U Operation Manual - Page 74
Dimensional drawings 243/32 (612) 321/16 (814) 279/16 (700.0) Unit: inch/(mm) 417/32 457/64 (115) (124) 1535/64 (394.6) 153/4 (400) 2541/64 (651) 239/32 (591) 77/8 (200) 121/64 (305) 77/8 (200) 417/32 (115) 73 - Sharp LC-32D50U | LC-32D50U Operation Manual - Page 75
to select "EZ Setup", "CH Setup", "Parental CTRL" or "Reset", and then the Secret number input screen displays. MENU [Setup ... Parental CTRL] Setup Option Secret No. aaaa 4 Press and hold both CHr and VOLk on the TV simultaneously until the message appears on the screen. The secret number - Sharp LC-32D50U | LC-32D50U Operation Manual - Page 76
. Model Specific Section Your Product Model Number & Description: Warranty Period for this Product: Additional Item(s) Excluded from Warranty Coverage (if any): LC-32D50U LCD Color Television (Be sure to have this information available when you need service for your Product.) One (1) year parts - Sharp LC-32D50U | LC-32D50U Operation Manual - Page 77
76 - Sharp LC-32D50U | LC-32D50U Operation Manual - Page 78
SHARP ELECTRONICS CORPORATION Sharp Plaza, Mahwah, New Jersey 07430-2135 SHARP CORPORATION Printed in Mexico Imprimé au Mexique Impreso en México TINS-C414WJZZ 1 06P05-MX-NG
-
 1
1 -
 2
2 -
 3
3 -
 4
4 -
 5
5 -
 6
6 -
 7
7 -
8
-
9
-
10
-
11
-
12
-
13
-
14
-
15
-
16
-
17
-
18
-
19
-
20
-
21
-
22
-
23
-
24
-
25
-
26
-
27
-
28
-
29
-
30
-
31
-
32
-
33
-
34
-
35
-
36
-
37
-
38
-
39
-
40
-
41
-
42
-
43
-
44
-
45
-
46
-
47
-
48
-
49
-
50
-
51
-
52
-
53
-
54
-
55
-
56
-
57
-
58
-
59
-
60
-
61
-
62
-
63
-
64
-
65
-
66
-
67
-
68
-
69
-
70
-
71
-
72
-
73
-
74
-
75
-
76
-
77
-
78
 |
 |

LC-32D50U
LIQUID CRYSTAL TELEVISION
TÉLÉVISEUR ACL
TELEVISOR CON PANTALLA
DE CRISTAL LÍQUIDO
ENGLISH
FRAN
Ç
AIS
ESPAÑOL
OPERATION MANUAL
MODE D’EMPLOI
MANUAL DE OPERACIÓN