Sharp LC-32D50U LC-32D50U Operation Manual - Page 22
EZ Setup, Channel Setup, ENTER, Language setting - instruction manual
 |
UPC - 074000363274
View all Sharp LC-32D50U manuals
Add to My Manuals
Save this manual to your list of manuals |
Page 22 highlights
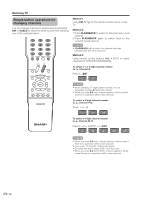
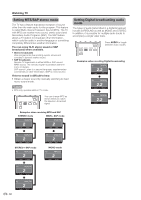
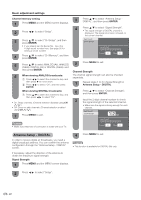
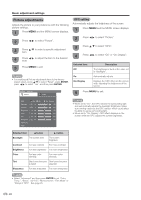
Basic adjustment settings EZ Setup You can run EZ Setup again, even after setting up the preset channels. Language setting Select from among 3 languages: English, French and Spanish. 1 Press MENU and the MENU screen displays. 2 Press c/d to select "Setup". 3 Press a/b to select "EZ Setup", and then press ENTER. • If you already set the Secret No., go to step 4. If not, skip to step 5. 4 Input the 4-digit secret number by using 0-9. 5 Press a/b to select the desired language listed on the screen, and then press ENTER. Channel search Channel auto search makes the TV look for all channels viewable in the set area. 6 Press c/d to select "Yes" or "No" for AIR Analog & Digital, then press b to move down. Press c/d to select "Yes" or "No" for CABLE Analog, then press b to move down. Press c/d to select "Yes" or "No" for CABLE Analog & Digital, then press b to move down. Select "Search Start", and then press ENTER. • If you are only receiving an analog signal through the cable, select "Yes" for CABLE Analog. If you are receiving both an analog signal and a digital signal through the cable, select "Yes" for CABLE Analog & Digital. 7 Press MENU to exit. NOTE • If no channel is found, confirm the type of connection made with your TV and try EZ Setup again. • If you select "Yes" for CABLE Analog and initiate the channel search, the channel list for CABLE Digital will be deleted. Channel Setup If initial setup does not memorize all the channels in your region, follow the instructions below to manually memorize the channels. Channel search Channel auto search makes the TV look for all channels viewable in the set area. 1 Press MENU and the MENU screen displays. 2 Press c/d to select "Setup". 3 Press a/b to select "CH Setup", and then press ENTER. • If you already set the Secret No., input the 4-digit secret number here. See page 56 for setting a secret number. 4 Press a/b to select "CH Search", and then press ENTER. 5 Press c/d to select "Yes" or "No" for AIR Analog & Digital, then press b to move down. Press c/d to select "Yes" or "No" for CABLE Analog, then press b to move down. Press c/d to select "Yes" or "No" for CABLE Analog & Digital, then press b to move down. Select "Search Start", and then press ENTER. • If you are only receiving an analog signal through the cable, select "Yes" for CABLE Analog. If you are receiving both an analog signal and a digital signal through the cable, select "Yes" for CABLE Analog & Digital. 6 Press MENU to exit. NOTE • If no channel is found, confirm the type of connection made with your TV and try channel search again. • If you select "Yes" for CABLE Analog and initiate the channel search, the channel list for CABLE Digital will be deleted. 21
-
 1
1 -
2
-
3
-
4
-
5
-
6
-
7
-
8
-
9
-
10
-
11
-
12
-
13
-
14
-
15
-
16
-
 17
17 -
 18
18 -
 19
19 -
 20
20 -
 21
21 -
 22
22 -
 23
23 -
 24
24 -
 25
25 -
 26
26 -
 27
27 -
28
-
29
-
30
-
31
-
32
-
33
-
34
-
35
-
36
-
37
-
38
-
39
-
40
-
41
-
42
-
43
-
44
-
45
-
46
-
47
-
48
-
49
-
50
-
51
-
52
-
53
-
54
-
55
-
56
-
57
-
58
-
59
-
60
-
61
-
62
-
63
-
64
-
65
-
66
-
67
-
68
-
69
-
70
-
71
-
72
-
73
-
74
-
75
-
76
-
77
-
78
 |
 |