Sharp LC46LE700UN Owners Manual for LC-52LE700UN - Page 25
Audio Menu, Power Control Menu
 |
UPC - 074000372207
View all Sharp LC46LE700UN manuals
Add to My Manuals
Save this manual to your list of manuals |
Page 25 highlights
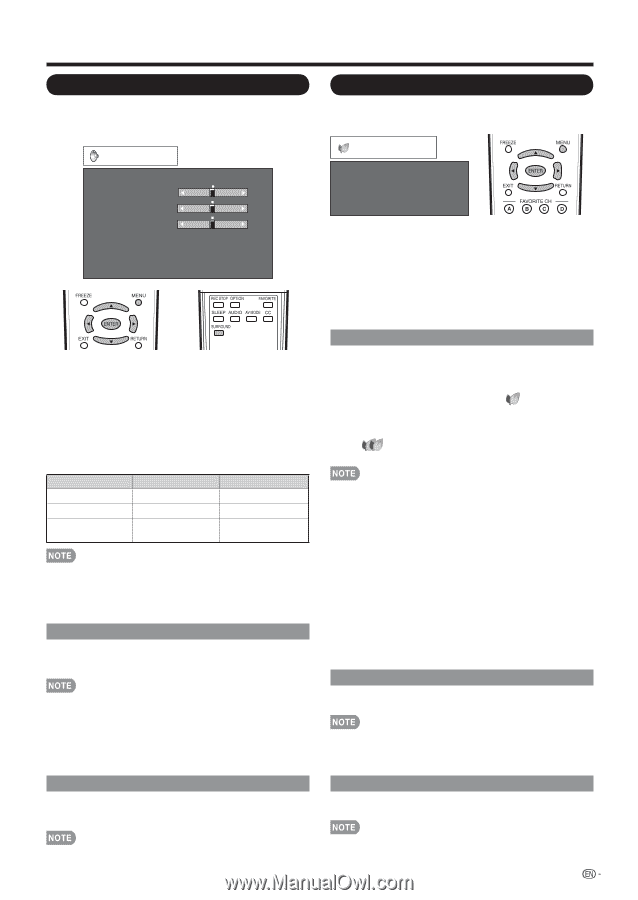
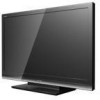
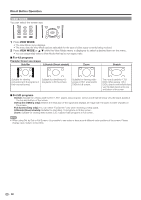
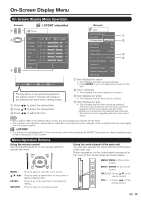
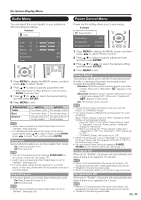
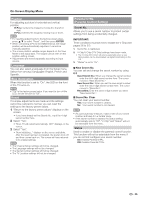
On-Screen Display Menu Audio Menu You can adjust the sound quality to your preference with the following settings. Example Audio Treble [ 0] a15 b15 Bass [ 0] a15 b15 Balance [ 0] L R Surround [Off] Bass Enhancer [On] Reset 1 Press MENU to display the MENU screen, and then press c/d to select "Audio". 2 Press a/b to select a specific adjustment item. • Select "Surround" or "Bass Enhancer" and then press ENTER to set each item. 3 Press a/b (or c/d) to select the desired setting, and then press ENTER. 4 Press MENU to exit. Selected item Treble Bass Balance cbutton For weaker treble For weaker bass Decrease audio from the right speaker dbutton For stronger treble For stronger bass Decrease audio from the left speaker • Audio menu is grayed out when Output Select is set to "Variable". (See page 28.) • For resetting all Audio adjustment items to the factory preset values, press a/b to select "Reset", press ENTER, press c/d to select "Yes", and then press ENTER. Surround Surround function allows you to enjoy realistic "live" sound. On: Surround function is on. Off: Normal sound. • You can choose Surround by pressing SURROUND on the remote control unit. (See page 15.) • Audio menu is grayed out when Output Select is set to "Variable". (See page 28.) • For some discs, setup may be required on your DVD player. In this case, please refer to the operation manual of your DVD player. Bass Enhancer This function allows you to enjoy bass-enhanced sound. On: Bass Enhancer function is on. Off: Normal sound. • Audio menu is grayed out when Output Select is set to "Variable". (See page 28.) Power Control Menu Power control setting allows you to save energy. Example Power Control Power Saving No Signal Off No Operation Off [Off] [Disable] [Disable] 1 Press MENU to display the MENU screen, and then press c/d to select "Power Control". 2 Press a/b to select a specific adjustment item, and then press ENTER. 3 Press a/b (or c/d) to select the desired setting, and then press ENTER. 4 Press MENU to exit. Power Saving This function allows you to set the Power Saving level in order to decrease the power consumption and increase the backlight lifespan. Standard: Optimizes power reduction based upon video content. When set to "Standard", " " appears on the screen. Advanced: Optimizes power reduction based upon video content and engages OPC. When set to "Advanced", " " appears on the screen. Off: This function does not work. • "Power Saving" does not function when you set "AV MODE" to "DYNAMIC (Fixed)". • You cannot select a different Power Saving item for each AV MODE. When "Power Saving" is set, the "OPC" settings for all AV Modes will automatically change. -If you set "OPC" to "On" when "Power Saving" is set to "Standard", then the "Power Saving" setting will change to "Advanced". -When you change the "Power Saving" setting from "Advanced" to "Off" or to "Standard", "OPC" will be set to "Off". -"DYNAMIC (Fixed)" will remain set to "Off". • When "Power Saving" is set to "Standard" or "Advanced", the Power Saving leaf icon appears to the left of "OPC" in the Picture menu screen. • You can select Power Saving by pressing POWER SAVING on the remote control unit. (See page 17.) No Signal Off When set to "Enable", the power will automatically shut down if there is no signal for 15 minutes. • When it is 5 minutes before the power shuts down, the remaining time will start to keep appearing every minute. • "Disable" is the factory preset value. • When a TV program finishes, this function may not operate. No Operation Off When set to "Enable", the power will automatically shut down if there is no operation for 3 hours. • When it is 5 minutes before the power shuts down, the remaining time will start to keep appearing every minute. • "Disable" is the factory preset value. 23
-
 1
1 -
2
-
3
-
4
-
5
-
6
-
7
-
8
-
9
-
10
-
11
-
12
-
13
-
14
-
15
-
16
-
17
-
18
-
19
-
 20
20 -
 21
21 -
 22
22 -
 23
23 -
 24
24 -
 25
25 -
 26
26 -
 27
27 -
 28
28 -
 29
29 -
 30
30 -
31
-
32
-
33
-
34
-
35
-
36
-
37
-
38
-
39
-
40
-
41
-
42
-
43
-
44
-
45
-
46
-
47
-
48
-
49
-
50
-
51
-
52
-
53
-
54
-
55
-
56
-
57
-
58
-
59
-
60
-
61
-
62
 |
 |