Singer 14J250 Stylist II Serger Instruction Manual - Page 51
Basic Techniques
 |
View all Singer 14J250 Stylist II Serger manuals
Add to My Manuals
Save this manual to your list of manuals |
Page 51 highlights
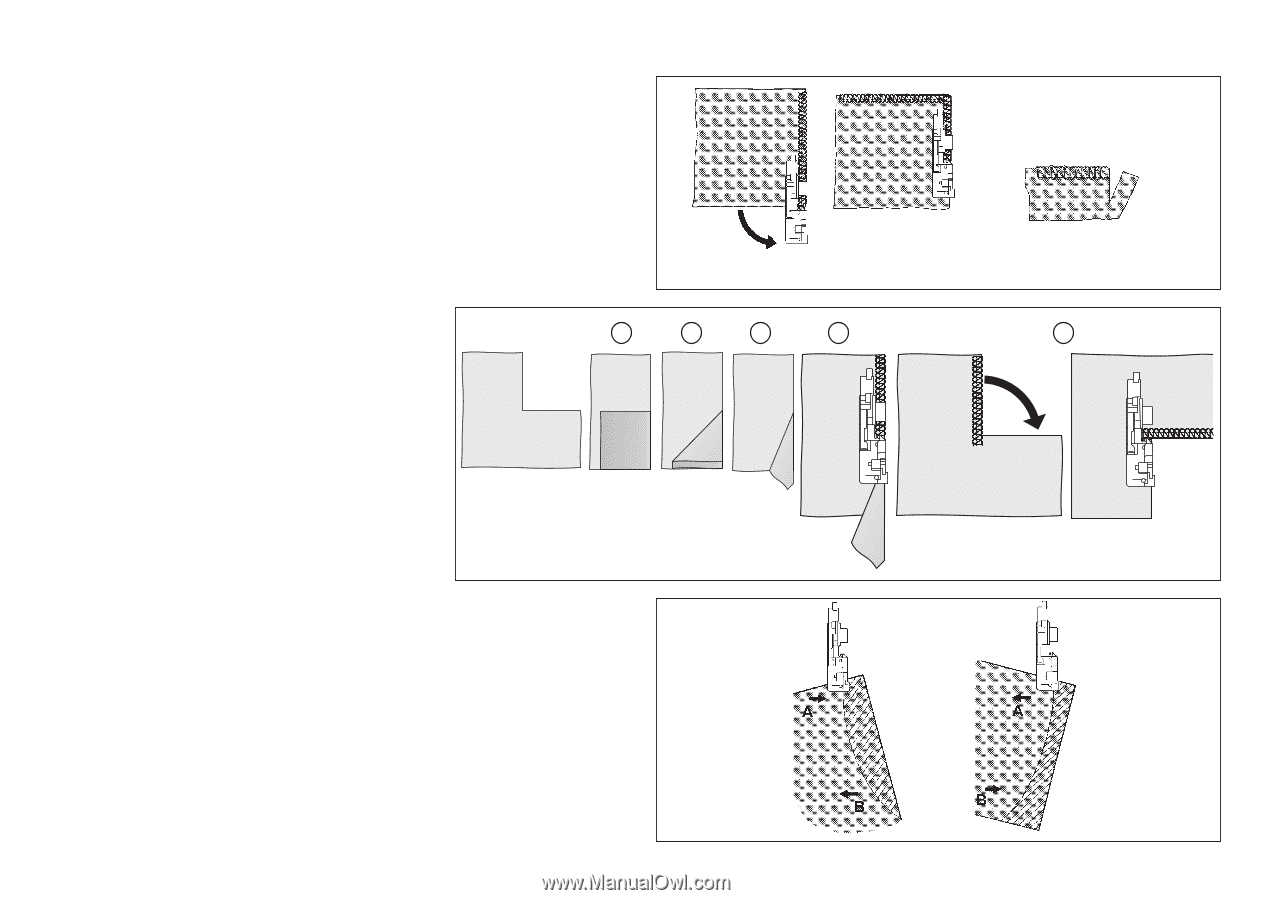
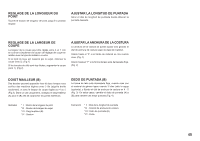
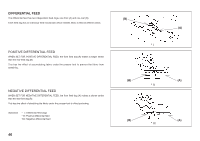
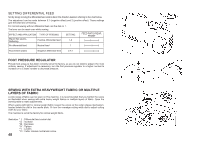
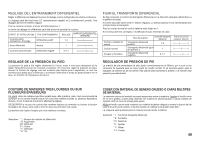
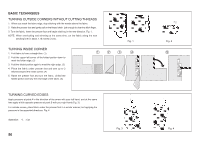
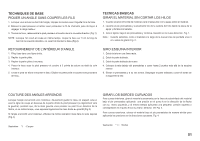
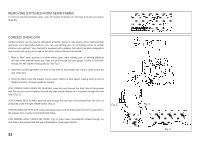
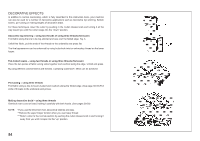
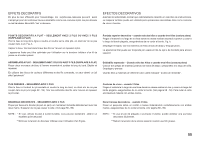
BASIC TECHNIQUES TURNING OUTSIDE CORNERS WITHOUT CUTTING THREADS 1. When you reach the fabric edge, stop stitching with the needle above the fabric. 2. Raise the presser foot and gently pull on the thread chain just enough to clear the stitch finger. 3. Turn the fabric, lower the presser foot and begin stitching in the new direction. Fig. 1. NOTE: When overlocking and trimming at the same time, cut the fabric along the new stitching line for about 1.18 inches (3 cm). Fig. 1 TURNING INSIDE CORNER 1. Fold fabric to form a straight line. (1) 2. Fold the upper left corner of the folded portion down to meet the folder edge. (2) 3. Fold the folded portion again to meet the right edge. (3) 4. Place the fabric under presser foot and sew up to 2 stitches beyond the inside corner. (4) 5. Raise the presser foot and turn the fabric. Unfold the folded portion and sew the next edge of the fabric. (5) 1 2 3 4 TURNING CURVED EDGES Apply pressure at point A in the direction of the arrow with your left hand, and at the same time apply a little opposite pressure at point B with your right hand (Fig. 3) For outside curves, place fabric under the presser foot in a similar manner, but applying the pressure in the opposited directions. Fig. 4 Illustration * I : Cut 50 Fig. 3 * I Fig. 2 5 Fig. 4
-
 1
1 -
2
-
3
-
4
-
5
-
6
-
7
-
8
-
9
-
10
-
11
-
12
-
13
-
14
-
15
-
16
-
17
-
18
-
19
-
20
-
21
-
22
-
23
-
24
-
25
-
26
-
27
-
28
-
29
-
30
-
31
-
32
-
33
-
34
-
35
-
36
-
37
-
38
-
39
-
40
-
41
-
42
-
43
-
44
-
45
-
 46
46 -
 47
47 -
 48
48 -
 49
49 -
 50
50 -
 51
51 -
 52
52 -
 53
53 -
 54
54 -
 55
55 -
 56
56 -
57
-
58
-
59
-
60
-
61
-
62
-
63
-
64
-
65
-
66
-
67
 |
 |