Sony CCD-TRV238E User Manual - Page 31
Superimposing a title
 |
View all Sony CCD-TRV238E manuals
Add to My Manuals
Save this manual to your list of manuals |
Page 31 highlights
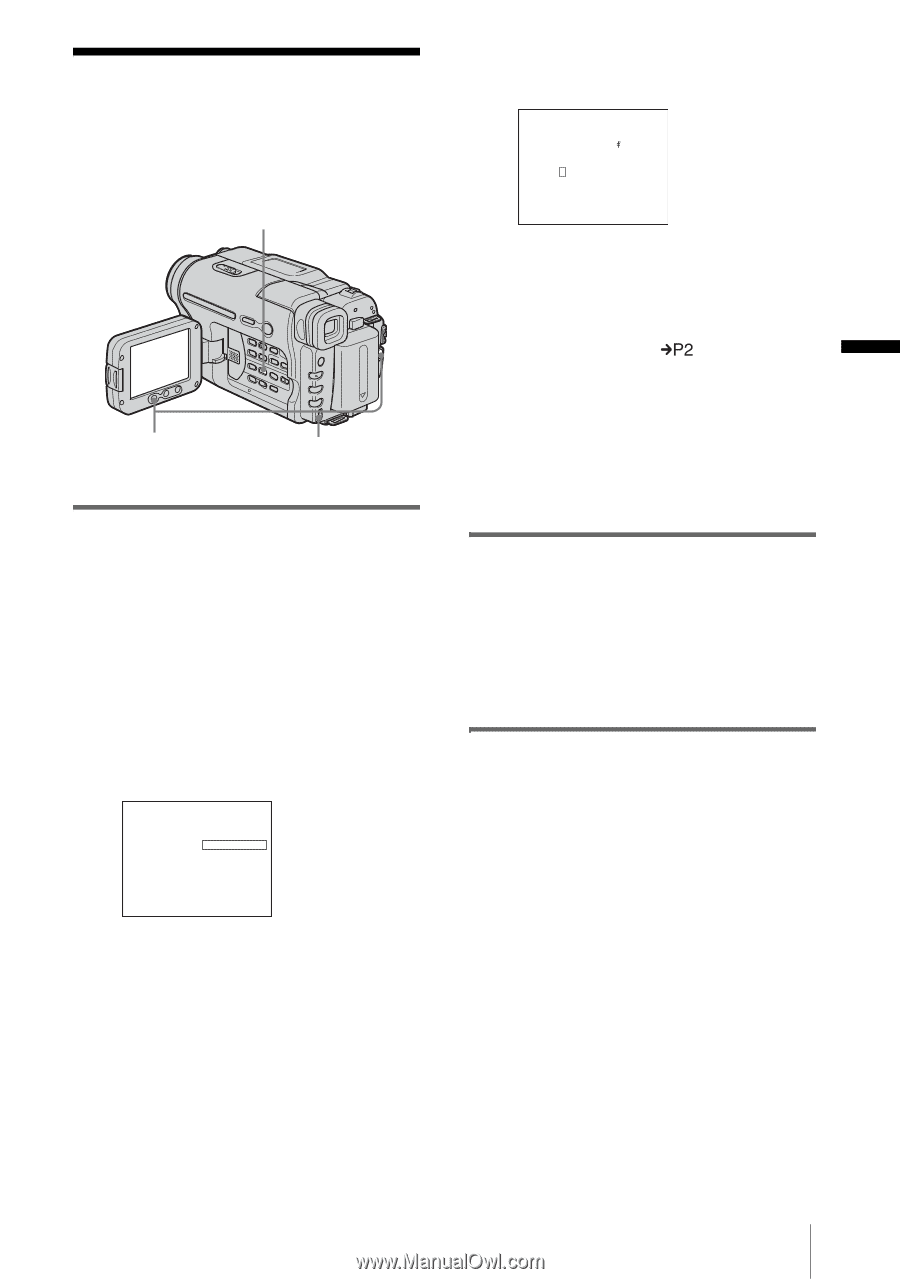
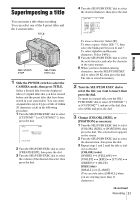
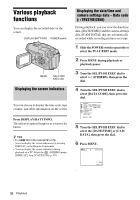
Superimposing a title You can insert a title when recording. You can select one of the 8 preset titles and the 2 custom titles. TITLE REC START/ STOP SEL/PUSH EXEC dial 1 Slide the POWER switch to select the CAMERA mode, then press TITLE. Select a desired title from the displayed titles (2 original titles that you have created before and the preset titles that have been stored in your camcorder). You can create original titles (up to 2 types of title of within 20 characters each) in the following procedure. 1 Turn the SEL/PUSH EXEC dial to select [CUSTOM1""] or [CUSTOM2""], then press the dial. TITLE STBY CUSTOM1"" OK CREATE / EDIT [TITLE] : END 2 Turn the SEL/PUSH EXEC dial to select [CREATE/EDIT], then press the dial. 3 Turn the SEL/PUSH EXEC dial to select the column of the desired character, then press the dial. 4 Turn the SEL/PUSH EXEC dial to select the desired character, then press the dial. TITLE SET P1 STBY S ABCDE 1 2 3 4 5 $ ¥DM£ FGHIJ 67890 ¿ i ø " : KLMNO C ] PQRST cP2 ] UVWXY O K ] Z TITLE] : END To erase a character: Select [C]. To enter a space: Select [Z& ? !], then select the blank part between & and ?. To select alphabet and Russian characters: Select [ ]. 5 Turn the SEL/PUSH EXEC dial to select the next character, and enter the character in the same manner. 6 When you have finished entering characters, turn the SEL/PUSH EXEC dial to select [O K], then press the dial. The title is stored in memory. 2 Turn the SEL/PUSH EXEC dial to select the title you want to insert, then press the dial. To insert an original title, turn the SEL/ PUSH EXEC dial to select [CUSTOM1""] or [CUSTOM2""], and press the dial, then select [OK] and press the dial. 3 Change [COLOR], [SIZE], or [POSITION] as necessary. 1 Turn the SEL/PUSH EXEC dial to select [COLOR], [SIZE], or [POSITION], then press the dial. The selected item appears on the screen. 2 Turn the SEL/PUSH EXEC dial to select the desired item, then press the dial. 3 Repeat steps 1 and 2 until the title is laid out as desired. [COLOR] (color) [WHITE] y [YELLOW] y [VIOLET] y [RED] y [CYAN] y [GREEN] y [BLUE] [SIZE] (size) [SMALL] y [LARGE] (You can only select [SMALL] when you are entering more than 13 characters.) ,continued Recording 31 Recording
-
 1
1 -
2
-
3
-
4
-
5
-
6
-
7
-
8
-
9
-
10
-
11
-
12
-
13
-
14
-
15
-
16
-
17
-
18
-
19
-
20
-
21
-
22
-
23
-
24
-
25
-
 26
26 -
 27
27 -
 28
28 -
 29
29 -
 30
30 -
 31
31 -
 32
32 -
 33
33 -
 34
34 -
 35
35 -
 36
36 -
37
-
38
-
39
-
40
-
41
-
42
-
43
-
44
-
45
-
46
-
47
-
48
-
49
-
50
-
51
-
52
-
53
-
54
-
55
-
56
-
57
-
58
-
59
-
60
-
61
-
62
-
63
-
64
-
65
-
66
-
67
-
68
-
69
-
70
-
71
-
72
-
73
-
74
-
75
-
76
-
77
-
78
-
79
-
80
-
81
-
82
-
83
-
84
-
85
-
86
-
87
-
88
-
89
-
90
-
91
-
92
-
93
-
94
-
95
-
96
-
97
-
98
-
99
-
100
-
101
-
102
-
103
-
104
-
105
-
106
-
107
-
108
-
109
-
110
-
111
-
112
-
113
-
114
-
115
-
116
 |
 |