Sony CCD-TRV238E User Manual - Page 68
To set the [IR SETUP] code, Prepare your VCR.
 |
View all Sony CCD-TRV238E manuals
Add to My Manuals
Save this manual to your list of manuals |
Page 68 highlights
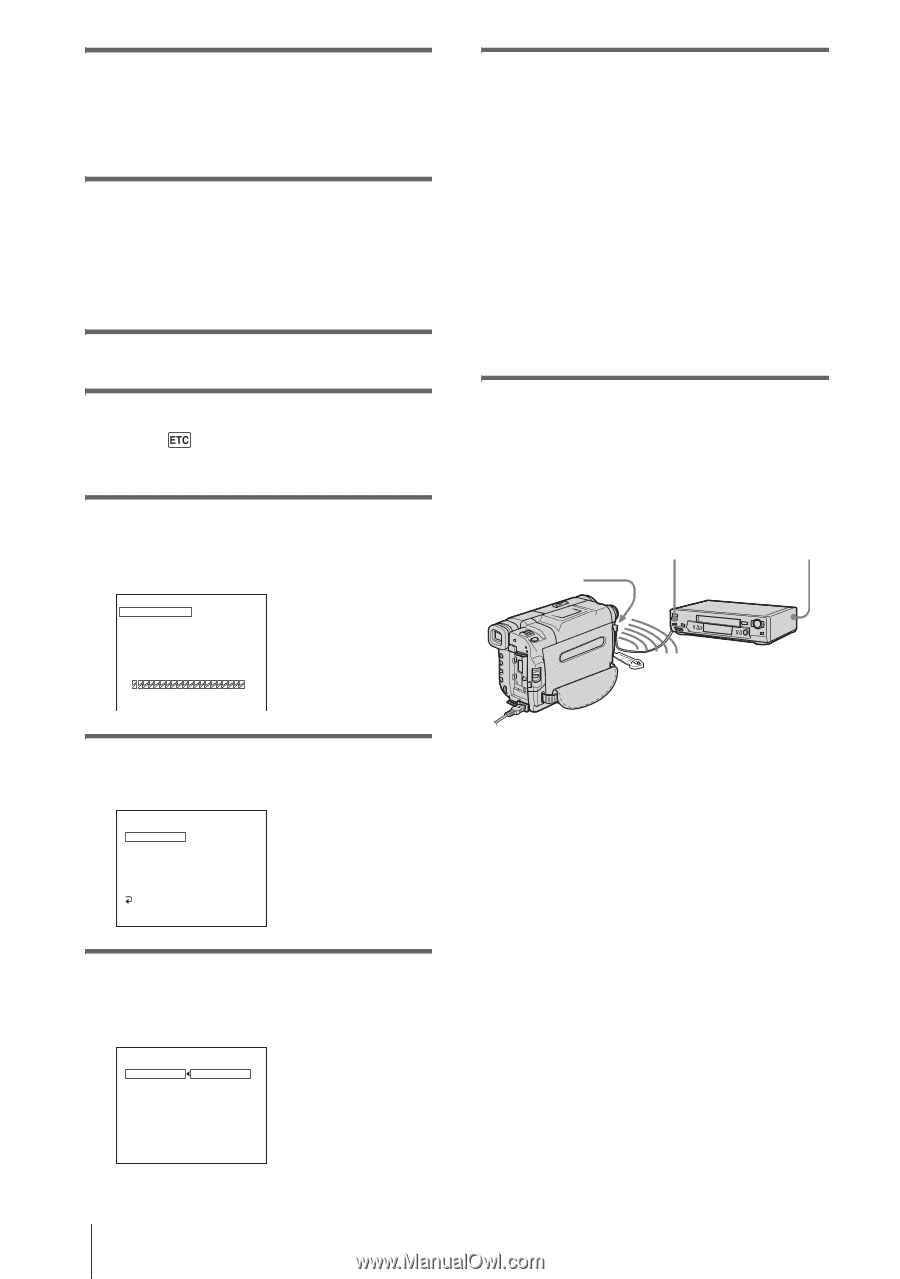
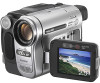
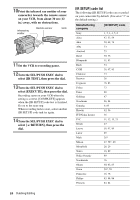
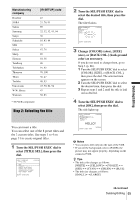
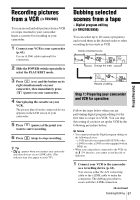
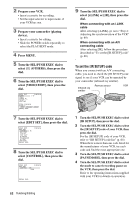
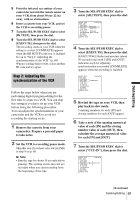
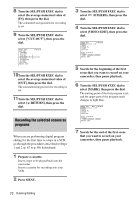
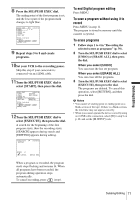
2 Prepare your VCR. • Insert a cassette for recording. • Set the input selector to input mode, if your VCR has one. 3 Prepare your camcorder (playing device). • Insert a cassette for editing. • Slide the POWER switch repeatedly to select the PLAY/EDIT mode. 4 Press MENU. 5 Turn the SEL/PUSH EXEC dial to select (OTHERS), then press the dial. 6 Turn the SEL/PUSH EXEC dial to select [VIDEO EDIT], then press the dial. VIDEO EDIT MARK UNDO ERASE ALL START EDIT SET 0:08:55:06 1 IN TOTAL 0:00:00:00 SCENE 0 [MENU] : END 7 Turn the SEL/PUSH EXEC dial to select [EDIT SET], then press the dial. VIDEO EDIT EDIT SET CONTROL IR ADJ TEST "CUT-IN" "CUT-OUT" IR SETUP PAUSEMODE IR TEST RETURN [MENU] : END 0:08:55:06 8 Turn the SEL/PUSH EXEC dial to select [CONTROL], then press the dial. VIDEO EDIT EDIT SET CONTROL 0:08:55:06 IR i. LINK [MENU] : END 9 Turn the SEL/PUSH EXEC dial to select [i.LINK] or [IR], then press the dial. When connecting with an i.LINK cable After selecting [i.LINK], go on to "Step 2: Adjusting the synchronization of the VCR" (p. 69). When connecting with an A/V connecting cable After selecting [IR], follow the procedure described in "To set the [IR SETUP] code" (p. 68). To set the [IR SETUP] code When you connect with an A/V connecting cable, you need to check the [IR SETUP] code signal to see if your VCR can be operated by your camcorder (infrared ray emitter). Infrared ray emitter Remote sensor VCR 1 Turn the SEL/PUSH EXEC dial to select [IR SETUP], then press the dial. 2 Turn the SEL/PUSH EXEC dial to select the [IR SETUP] code of your VCR, then press the dial. For the [IR SETUP] code of your VCR, refer to "[IR SETUP] code list" (p. 64). When there is more than one code listed for the manufacturer of your VCR, try each code and find the most appropriate one. 3 Turn the SEL/PUSH EXEC dial to select [PAUSEMODE], then press the dial. 4 Turn the SEL/PUSH EXEC dial to select the mode to cancel recording pause on the VCR, then press the dial. Refer to the operating instructions supplied with your VCR for details on operation. 68 Dubbing/Editing
-
 1
1 -
2
-
3
-
4
-
5
-
6
-
7
-
8
-
9
-
10
-
11
-
12
-
13
-
14
-
15
-
16
-
17
-
18
-
19
-
20
-
21
-
22
-
23
-
24
-
25
-
26
-
27
-
28
-
29
-
30
-
31
-
32
-
33
-
34
-
35
-
36
-
37
-
38
-
39
-
40
-
41
-
42
-
43
-
44
-
45
-
46
-
47
-
48
-
49
-
50
-
51
-
52
-
53
-
54
-
55
-
56
-
57
-
58
-
59
-
60
-
61
-
62
-
 63
63 -
 64
64 -
 65
65 -
 66
66 -
 67
67 -
 68
68 -
 69
69 -
 70
70 -
 71
71 -
 72
72 -
 73
73 -
74
-
75
-
76
-
77
-
78
-
79
-
80
-
81
-
82
-
83
-
84
-
85
-
86
-
87
-
88
-
89
-
90
-
91
-
92
-
93
-
94
-
95
-
96
-
97
-
98
-
99
-
100
-
101
-
102
-
103
-
104
-
105
-
106
-
107
-
108
-
109
-
110
-
111
-
112
-
113
-
114
-
115
-
116
 |
 |