Sony DCR-DVD201 Operating Instructions - Page 27
To remove the disc, Notes
 |
UPC - 027242644557
View all Sony DCR-DVD201 manuals
Add to My Manuals
Save this manual to your list of manuals |
Page 27 highlights
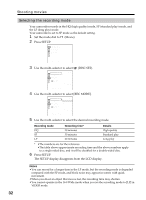
Getting Started Step 5 Preparing a disc for recording 5 Close the disc cover. Your camcorder starts recognizing the inserted disc. With a DVD-R, you can start recording immediately after [DISC ACCESS] disappears on the LCD display. The FORMAT display appears when you insert a DVD-RW. Proceed to step 6. FORMAT REC FORMAT EXECUTE VIDEO EST. PROCESS TIME : 7sec REC FORMAT : VIDEO 6 Use the multi-selector to select [REC FORMAT]. 7 Use the multi-selector to select desired recording format. Your camcorder is set in VIDEO mode as the default setting. Refer to page 7 about recording mode. 8 Use the multi-selector to select [EXECUTE]. 9 Use the multi-selector to select [YES]. The selection of the recording format is completed. The disc formatting starts. When the formatting is completed, you can start recording on the DVD-RW. Notes •It may take some time to recognize the disc depending on the disc type and condition. •If you close the disc cover with the disc set incorrectly, it may cause your camcorder to malfunction. •You may hear the motor running when the disc cover is closed without a disc being set. This is not a malfunction. •Do not remove the battery pack or disconnect the AC adaptor while formatting. •You can remove the disc when a power source is connected to your camcorder even when your camcorder is turned off. However, when you change the disc, the disc recognition process does not start automatically. To remove the disc 1 Perform the step 3 on page 26. 2 Remove the disc. Tips •When you replace a disc, disc information such as the date you started to use it and information on previously recorded areas appears for about 5 seconds. The information on previously recorded areas may not be displayed correctly depending on the condition of the disc. •See page 129 for details on disc handling. 27
-
 1
1 -
2
-
3
-
4
-
5
-
6
-
7
-
8
-
9
-
10
-
11
-
12
-
13
-
14
-
15
-
16
-
17
-
18
-
19
-
20
-
21
-
 22
22 -
 23
23 -
 24
24 -
 25
25 -
 26
26 -
 27
27 -
 28
28 -
 29
29 -
 30
30 -
 31
31 -
 32
32 -
33
-
34
-
35
-
36
-
37
-
38
-
39
-
40
-
41
-
42
-
43
-
44
-
45
-
46
-
47
-
48
-
49
-
50
-
51
-
52
-
53
-
54
-
55
-
56
-
57
-
58
-
59
-
60
-
61
-
62
-
63
-
64
-
65
-
66
-
67
-
68
-
69
-
70
-
71
-
72
-
73
-
74
-
75
-
76
-
77
-
78
-
79
-
80
-
81
-
82
-
83
-
84
-
85
-
86
-
87
-
88
-
89
-
90
-
91
-
92
-
93
-
94
-
95
-
96
-
97
-
98
-
99
-
100
-
101
-
102
-
103
-
104
-
105
-
106
-
107
-
108
-
109
-
110
-
111
-
112
-
113
-
114
-
115
-
116
-
117
-
118
-
119
-
120
-
121
-
122
-
123
-
124
-
125
-
126
-
127
-
128
-
129
-
130
-
131
-
132
-
133
-
134
-
135
-
136
-
137
-
138
-
139
-
140
-
141
-
142
-
143
-
144
-
145
-
146
-
147
-
148
 |
 |
