Sony DSC-WX5 Cyber-shot® Handbook
Sony DSC-WX5 - Cyber-shot Digital Still Camera Manual
 |
UPC - 027242792975
View all Sony DSC-WX5 manuals
Add to My Manuals
Save this manual to your list of manuals |
Sony DSC-WX5 manual content summary:
- Sony DSC-WX5 | Cyber-shot® Handbook - Page 1
Table of contents Operation Search MENU/Settings Search Index Cyber-shot Handbook DSC-WX5/WX5C © 2010 Sony Corporation GB 4-194-687-11(1) - Sony DSC-WX5 | Cyber-shot® Handbook - Page 2
used in this handbook In this handbook, the sequence of operations is shown by arrows (t). Operate the camera in the order indicated. Marks are shown as they appear in the camera's default setting. The default setting is indicated by . Indicates cautions and limitations relevant to the correct - Sony DSC-WX5 | Cyber-shot® Handbook - Page 3
1080 60i-compatible device: 60i 1080 50i-compatible device: 50i • Do not watch 3D images shot with this camera for extended periods of time on 3D-compatible monitors. • When you view 3D images shot with this camera on a 3D-compatible monitors, you may experience discomfort in the form of eye strain - Sony DSC-WX5 | Cyber-shot® Handbook - Page 4
Black, white, red, blue or green dots • Exposing the LCD screen or the lens to direct sunlight for long periods may cause malfunctions. Be careful when placing the camera and are not actual images shot using this camera. Note when playing movies on other devices This camera uses MPEG-4 AVC/H.264 - Sony DSC-WX5 | Cyber-shot® Handbook - Page 5
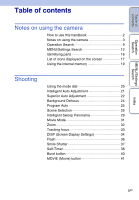
Table of contents Operation Search MENU/Settings Search Table of contents Notes on using the camera How to use this handbook 2 Notes on using the camera 3 Operation Search 9 MENU/Settings Search 12 Identifying parts 16 List of icons displayed on the screen 17 Using the internal memory 19 - Sony DSC-WX5 | Cyber-shot® Handbook - Page 6
Delete 45 Viewing burst images 47 Viewing movies 49 3D images 3D Functions 51 3D Shooting 53 Viewing images shot in Sweep Multi Angle mode stereoscopically 55 Viewing an image on a 3D TV 56 MENU (Shooting) MENU items (Shooting 12 MENU (Viewing) MENU items (Viewing 13 Settings Setting - Sony DSC-WX5 | Cyber-shot® Handbook - Page 7
Computer Using with your computer 133 Using the software 134 Connecting the camera to a computer 136 Uploading images to a media service 138 Creating a disc of movies 140 Printing Printing still images 143 Troubleshooting Troubleshooting 144 Warning indicators and messages 152 Index - Sony DSC-WX5 | Cyber-shot® Handbook - Page 8
Table of contents Operation Search Others Index Using the camera abroad 157 Memory card 158 Battery pack 160 Battery charger 161 Intelligent Pantilter 162 AVCHD format 163 TransferJet standard 164 Number of still images and recordable time of movies 165 Precautions 167 Index 168 MENU/ - Sony DSC-WX5 | Cyber-shot® Handbook - Page 9
/Settings Search Operation Search Leaving the settings to the camera Intelligent Auto Adjustment 21 Superior Auto Adjustment 22 Scene Mode 31 MOVIE (Movie) button 41 Movie format 95 Shooting 3D images 3D Sweep Panorama 53 Sweep Multi Angle 53 Shooting portraits Background Defocus - Sony DSC-WX5 | Cyber-shot® Handbook - Page 10
78 Changing image size/ Image Size/Panorama Image Size/ quality Quality 62 Changing screen display DISP (Screen Display Settings 34 Function Guide 104 Deleting images Delete 45, 90 Format 119 Displaying enlarged images Playback zoom 43 Trimming (Resize 89 Editing images Retouch 89 - Sony DSC-WX5 | Cyber-shot® Handbook - Page 11
Search MENU/Settings Search Viewing 3D images Viewing images shot in Sweep Multi Angle mode stereoscopically 55 Printing images with the date "PMB (Picture Motion Browser 134 Changing date and time settings Area Setting 125 Date & Time Setting 126 Initializing settings Initialize - Sony DSC-WX5 | Cyber-shot® Handbook - Page 12
from the MENU button. 1 Press the ON/OFF (Power) button and set the camera to shooting mode. 2 Press the MENU button to display the Menu screen. 3 Selection - - - - - - - Easy Mode - - - - - - - 3D Shooting - - - - - - - Shooting Direction - - - - - - Defocus Effect - Sony DSC-WX5 | Cyber-shot® Handbook - Page 13
, while - indicates settings that cannot be changed. View Mode Memory card Internal Memory MENU/Settings Search Index Menu items (Slideshow) (3D Viewing) (Send by TransferJet) (View Mode) (Display Burst Group) (Retouch) (Delete) (Protect) DPOF (Rotate) (Select Folder) (Settings) Date View - Sony DSC-WX5 | Cyber-shot® Handbook - Page 14
then press z. Categories Shooting Settings Main Settings Items Movie format AF Illuminator Grid Line Digital Zoom Auto Orientation Red Eye Reduction Blink Alert Beep Language Setting Function Guide Display color Demo Mode Initialize HDMI Resolution CTRL FOR HDMI COMPONENT USB Connect LUN Settings - Sony DSC-WX5 | Cyber-shot® Handbook - Page 15
File Number Internal Memory Tool Format File Number Clock Settings Area Setting Date & Time Setting * [Eye-Fi] appears only when an Eye-Fi card (commercially available) is inserted in the camera. Notes • [Shooting Settings] appears only when settings have been entered from shooting mode - Sony DSC-WX5 | Cyber-shot® Handbook - Page 16
I Lens J Speaker K LCD screen L Mode dial (20) M (Playback) button (42) N MOVIE (Movie) button (41) O HDMI connector P Hook for wrist strap* Q (Delete) button (45) R MENU button (12) S Control button Menu on: v/V/b/B/z Menu off: DISP/ / / /Tracking focus T Battery eject lever U Battery insertion - Sony DSC-WX5 | Cyber-shot® Handbook - Page 17
camera status. You can change the screen display using DISP (Screen Display Settings) on the control button. When shooting still images A Display Indication Battery remaining Low battery Panorama/3D Sweep Panorama/Sweep Multi Angle/Movie Mode) Scene Recognition icon White Balance Metering Mode 3D - Sony DSC-WX5 | Cyber-shot® Handbook - Page 18
101-0012 2010 1 1 9:30 AM C Display 96 12/12 100Min TransferJet settings Indication AE/AF lock ISO number NR slow shutter Shutter speed Aperture value Exposure value Focus Recording a movie/Standby Recording time (m:s) Folder-file number Recorded date/time of the playback image Indication Recording - Sony DSC-WX5 | Cyber-shot® Handbook - Page 19
computer Perform the procedure on page 136 without a memory card inserted in the camera. To copy (back up) data on a memory card Prepare a memory memory card to the internal memory. • By making a USB connection between the camera and a computer with a cable, you can import data stored in the internal - Sony DSC-WX5 | Cyber-shot® Handbook - Page 20
menu. (Scene Selection) Allows you to shoot with preset settings according to the scene. (iSweep Panorama) Allows you to shoot a panoramic image after composing images. (3D Shooting) Allows you to shoot 3D images by composing images. (Movie Mode) Allows you to record movies. Index 20GB - Sony DSC-WX5 | Cyber-shot® Handbook - Page 21
shoot the image. Scene Recognition icon and guide • The camera recognizes (Twilight), (Twilight Portrait), (Twilight the lens). • When the camera cannot focus on the subject automatically, the AE/AF lock indicator changes to flash slowly and the beep does not sound. Either recompose the shot or - Sony DSC-WX5 | Cyber-shot® Handbook - Page 22
The effect of reduced subject blur and noises is less effective in the following situations: - Subjects are moving - Subjects are too close to the camera - Images with little contrast, such as sky, sandy beach or lawn - Images with constant changes, such as waves or waterfalls MENU/Settings Search - Sony DSC-WX5 | Cyber-shot® Handbook - Page 23
and under exposure. Twilight using a tripod Backlight Backlight Portrait Overlaying shooting Reduces noises. Landscape Macro Portrait Shooting an image The camera selects the optimal overlay mode based on the recognized scene. • In Backlight Correction HDR or overlaying shooting mode, (the - Sony DSC-WX5 | Cyber-shot® Handbook - Page 24
may not work effectively in the following situations: - The subjects are too small. - The subject is the same color as the background. - You moved the camera after setting the AE/AF lock. • If you are unable to defocus effectively, try the following steps: - Turn the W/T (zoom) lever to the T side - Sony DSC-WX5 | Cyber-shot® Handbook - Page 25
Table of contents Operation Search MENU/Settings Search Index Program Auto Allows you to shoot with the exposure adjusted automatically (both the shutter speed and the aperture value). Also you can select various settings using the menu. 1 Set the mode dial to (Program Auto). 2 Press the shutter - Sony DSC-WX5 | Cyber-shot® Handbook - Page 26
and flowers, etc. (Anti Motion Blur) Allows you to shoot indoor shots without using the flash to reduce subject blur. (Landscape) Allows easy exposures to create a single image with a greater range of gradation. The camera combines the dark parts of an image taken with a bright exposure setting - Sony DSC-WX5 | Cyber-shot® Handbook - Page 27
you to shoot food arrangements in delicious and bright colors using Macro mode. (Pet) Allows you to shoot images of your pet with the best settings. (Beach) Allows you to shoot images with the proper settings for seaside or lakeside scenes. (Snow) (Fireworks) Allows you to record clear images - Sony DSC-WX5 | Cyber-shot® Handbook - Page 28
can use in Scene Selection For shooting an image appropriately according to the scene condition, a combination of functions is determined by the camera. indicates settings that can be changed, while - indicates settings that cannot be changed. For "Flash" and "Self-Timer," the icons indicate modes - Sony DSC-WX5 | Cyber-shot® Handbook - Page 29
people's faces or moving subjects. 1 Set the mode dial to (iSweep Panorama). 2 Align the camera with the end of the subject to be shot and press the shutter button. 3 Pan the camera to the end of the guide, following the indication on the LCD screen. This part will not be taken Guidance bar - Sony DSC-WX5 | Cyber-shot® Handbook - Page 30
rest are more suited for panorama shots than moving subjects. Operation Search camera. • If a section with greatly varied shapes or scenery is concentrated along a screen edge, the image composition may fail. In such case software "PMB" (page 134). • Panoramic images recorded using another camera - Sony DSC-WX5 | Cyber-shot® Handbook - Page 31
Table of contents Operation Search Movie Mode Allows you to record movies. 1 Set the mode dial to (Movie Mode). 2 Press the shutter button. 3 To stop recording, press the shutter button again. zChanging the Movie Format, Image Quality or Image Size Movie format: Quality (AVCHD): Image Size (MP4 - Sony DSC-WX5 | Cyber-shot® Handbook - Page 32
Operation Search Zoom You can enlarge the image when shooting. The camera's optical zoom function can enlarge images up to 5×. 1 Turn situations: - In Intelligent Sweep Panorama mode - In 3D shooting mode • The operating sound of the lens is recorded when the zoom function operates while shooting - Sony DSC-WX5 | Cyber-shot® Handbook - Page 33
Search Tracking focus The camera tracks the subject the following situations: - In Intelligent Sweep Panorama mode - In 3D shooting mode - In Movie Mode - In Easy Mode - One Person] or [Self-portrait Two People] - When you use [Digital Zoom] • Tracking focus may fail to lock the focus, lose the - Sony DSC-WX5 | Cyber-shot® Handbook - Page 34
) Sets screen to standard brightness and displays the information. Note • If you view images in bright outside light, adjust the screen brightness up. However, the battery power may decrease faster under such condition. Index 34GB - Sony DSC-WX5 | Cyber-shot® Handbook - Page 35
you cannot adjust the exposure. • The histogram does not appear when: - Recording 3D images - Playing back 3D images shot in other than [16:9] image size - Recording movies - Playing back movies - Viewing is slow or fast. • The histogram may not appear for images recorded using other cameras. 35GB - Sony DSC-WX5 | Cyber-shot® Handbook - Page 36
- In 3D shooting mode - In Background Defocus mode • When shooting with the flash and the zoom is set to W, the shadow of the lens may appear .) floating close to the lens. When they are accentuated by the camera's flash, they appear as white circular spots. Camera Subject Particles (dust, pollen - Sony DSC-WX5 | Cyber-shot® Handbook - Page 37
the conditions. • You cannot use the digital zoom function. • The Smile Shutter function Auto Adjustment mode - In Background Defocus mode - In 3D shooting mode - In Movie Mode zHints for better . 2 Try to orient the face in front of the camera and be as level as possible. Keep the eyes narrowed. - Sony DSC-WX5 | Cyber-shot® Handbook - Page 38
-timer is not available in the following situations: - In Intelligent Sweep Panorama mode - In 3D shooting mode zAutomatic shooting with Self-portrait timer Point the lens at yourself so your face is reflected in the LCD screen. The camera detects the subjects, and then the shutter operates. The - Sony DSC-WX5 | Cyber-shot® Handbook - Page 39
speed conditions, such as those encountered in (Twilight Portrait) or (Twilight) mode. In such a case, shoot with the below tips in mind. • Shoot with a 2-second delay self-timer and stabilize the camera by holding your arms firmly at your side after pressing the shutter button. • Use a tripod or - Sony DSC-WX5 | Cyber-shot® Handbook - Page 40
you press the (Burst) button, the setting switches. Single Burst The camera shoots a single image. The camera shoots up to 10 continuous frames in one burst when you hold Auto Adjustment mode - In Background Defocus mode - In 3D shooting mode - In Movie Mode - When the Smile Shutter function is - Sony DSC-WX5 | Cyber-shot® Handbook - Page 41
Table of contents Operation Search MOVIE (Movie) button You can quickly start shooting movies from all REC modes. 1 Press the MOVIE (Movie) button. 2 To stop recording, press the MOVIE (Movie) button again. Note • MOVIE (Movie) button is not available in the following situations: - When the Smile - Sony DSC-WX5 | Cyber-shot® Handbook - Page 42
the control button. zViewing images taken with a different camera This camera creates an Image Database File on the memory card for recording and images, register them by selecting [OK]. • Use a sufficiently charged battery to register images. If a battery with a low charge is used to register images, it may - Sony DSC-WX5 | Cyber-shot® Handbook - Page 43
Table of contents Operation Search Playback zoom Plays back the enlarged image. 1 Turn the (Playback zoom) lever to (T) during still image playback. The image is enlarged to twice the previous size, at the center of the image. 2 Adjust the position with the control button. 3 Change the zoom - Sony DSC-WX5 | Cyber-shot® Handbook - Page 44
Table of contents Operation Search MENU/Settings Search Index Image Index Displays multiple images at the same time. 1 Press the (Playback) button to switch to playback mode. 2 Turn the (Index) lever to (W) to display the image index screen. Turn the lever again to - Sony DSC-WX5 | Cyber-shot® Handbook - Page 45
Table of contents Operation Search MENU/Settings Search Delete Allows you to select unwanted images for deletion. You can also delete images from the MENU button (page 90). 1 Press the (Playback) button to switch to playback mode. 2 (Delete) button t desired mode t z on the control button All - Sony DSC-WX5 | Cyber-shot® Handbook - Page 46
Table of contents Operation Search MENU/Settings Search Index zYou can switch between index and single-image mode when selecting images Turn the lever to (T) of the W/T (zoom) lever in index mode to return to single-image mode, and turn the (Index) lever to (W) in single-image mode to return to - Sony DSC-WX5 | Cyber-shot® Handbook - Page 47
burst images in index mode. The display switches between single image display and thumbnail image display each time you press z on the control button. You can view the burst images as a movie by tilting the camera to the right or left. Note • You can view the burst images as a movie only when - Sony DSC-WX5 | Cyber-shot® Handbook - Page 48
Index zViewing the burst images as a movie by tilting the camera to the right or left To view the burst images smoothly as a movie, press z on the control button, then tilt the camera to the right or left, as illustrated. Tilt the camera to the right or left, with the center of the - Sony DSC-WX5 | Cyber-shot® Handbook - Page 49
. Control button z B b V Action Stop Fast forward Fast rewind Displays the control panel Note • You may not be able to play back some images shot using other cameras. zTo display only movies on the index screen You can view only movie thumbnails on the index screen by pressing MENU t (View Mode - Sony DSC-WX5 | Cyber-shot® Handbook - Page 50
Table of contents zOn the movie viewing screen Select the image you want to display using b/B on the control button, and press z. The Playback bar appears, you can check a playback position of a movie. , , , or appears on the movie viewing screen. The icon displayed may vary depending on - Sony DSC-WX5 | Cyber-shot® Handbook - Page 51
Table of contents 3D Functions This camera is compatible with 3D functions. The 3D functions installed on this camera are [3D Sweep Panorama] and [Sweep Multi Angle]. 3D images shot in [3D Sweep Panorama] mode can be played back only on a 3D TV, while the images shot in [Sweep Multi Angle] mode can - Sony DSC-WX5 | Cyber-shot® Handbook - Page 52
shot in [3D Sweep Panorama] and [Sweep Multi Angle] modes into a computer, the image data is stored on the computer as follows. File name on the computer Usage 3D the 3D images on a 3D TV For playing back the 3D images on a 3D TV For playing back the 3D images on the camera • If you shoot 3D - Sony DSC-WX5 | Cyber-shot® Handbook - Page 53
(Sweep Multi Angle) t z on the 3 Align the camera with the end of the subject to be shot and press the shutter button. For (3D Sweep Panorama), press MENU t (Shooting Direction) to change the shooting direction. 4 Pan the camera to the end of the guide, following the indication on the LCD screen - Sony DSC-WX5 | Cyber-shot® Handbook - Page 54
of contents Operation Search MENU/Settings Search Index zTips for shooting a 3D image Pan the camera in an arc at a constant velocity in the direction indicated on the LCD screen. Subjects at rest are best suited for 3D shots. • Determine the scene and press the shutter button halfway, so that - Sony DSC-WX5 | Cyber-shot® Handbook - Page 55
or left. 5 Press z again to end playback. Note • 3D images shot in [3D Sweep Panorama] mode cannot be played back in 3D on the camera. zTilting the camera to the right or left To view images shot in [Sweep Multi Angle] mode stereoscopically, tilt the camera to the right or left as illustrated. 55GB - Sony DSC-WX5 | Cyber-shot® Handbook - Page 56
MENU/Settings Search Viewing an image on a 3D TV You can view 3D images recorded on the camera in 3D format by connecting the camera to a 3D TV using an HDMI Cable (sold separately). Refer also to the operating instructions supplied with the TV. 1 Connect the camera to the TV using an HDMI Cable - Sony DSC-WX5 | Cyber-shot® Handbook - Page 57
you select (3D Viewing) mode, only 3D images are displayed. • If you play back an image shot in [3D Sweep Panorama] mode trouble of the camera and/or connected equipment. • This function may not work properly with some TVs. For example, you may not be able to view a video on your TV, output in 3D - Sony DSC-WX5 | Cyber-shot® Handbook - Page 58
[OK] t z 4 Shoot with the shutter button. Note • The battery power may decrease faster because the screen brightness increases automatically. zFunctions available in and shoot the image. Scene Recognition icon • The camera recognizes (Twilight), (Twilight Portrait), (Twilight using a tripod - Sony DSC-WX5 | Cyber-shot® Handbook - Page 59
with [1 image] and delete all images in the selected date range or internal memory (if selected) with [All]. • When a memory card is inserted in the camera, [View Mode] is set to [Date View]. Operation Search MENU/Settings Search Index 59GB - Sony DSC-WX5 | Cyber-shot® Handbook - Page 60
Table of contents Shooting Direction Set the direction in which the camera will be panned when shooting in Intelligent Sweep Panorama or 3D Sweep Panorama modes. 1 MENU t (Shooting Direction) t desired direction (Right) (Left) (Up) (Down) Pan from left to right. Pan from right to left. Pan from - Sony DSC-WX5 | Cyber-shot® Handbook - Page 61
Table of contents Defocus Effect Sets the level of background defocus effect when shooting in Background Defocus mode. 1 Set the mode dial to (Background Defocus). 2 MENU t (Defocus Effect) t desired mode (Low) (Mid) (High) Adds a slight Background Defocus effect. Adds an average Background - Sony DSC-WX5 | Cyber-shot® Handbook - Page 62
Table of contents Operation Search Image Size/Panorama Image Size/ Quality The image size determines the size of the image file that is recorded when you take an image. The larger the image size, the more detail will be reproduced when the image is printed on largeformat paper. The smaller the - Sony DSC-WX5 | Cyber-shot® Handbook - Page 63
with Dolby Digital audio, AVCHD format. Movie quality Average bit-rate Description AVC HD 17M FH 17 Mbps Shoots at a maximum picture quality of 1920×1080 size AVC HD 9M HQ 9 Mbps Shoots at a high picture quality of 1440×1080 size Movie recording format (MP4) Movies shot with this camera are - Sony DSC-WX5 | Cyber-shot® Handbook - Page 64
size" A digital image is made on the screen of the camera, the fine detail and data processing time differ when the image is printed or displayed on a computer screen. Description of the pixels and the image size Pixels 1 Image size: 12M 4000 pixels × 3000 pixels = 12 - Sony DSC-WX5 | Cyber-shot® Handbook - Page 65
camera shoots up to 10 continuous frames in one burst when you hold down the shutter button. Notes • [Burst Settings] is not available in the following situations: - In Intelligent Sweep Panorama mode - In Superior Auto Adjustment mode - In Background Defocus mode - In 3D the battery level is low - Sony DSC-WX5 | Cyber-shot® Handbook - Page 66
Table of contents Burst Shooting Interval Selects the number of images taken per second for Burst shooting. 1 MENU t (Burst Shooting Interval) t desired mode (High) (Mid) (Low) Shoots up to 10 images per second in succession. Shoots up to 5 images per second in succession. Shoots up to 2 images - Sony DSC-WX5 | Cyber-shot® Handbook - Page 67
Table of contents Operation Search MENU/Settings Search Index EV You can adjust the exposure manually in 1/3 EV steps in a range of -2.0 EV to +2.0 EV. 1 MENU t (EV) t desired EV setting Note • If you shoot a subject in extremely bright or dark conditions, - Sony DSC-WX5 | Cyber-shot® Handbook - Page 68
is captured blurred when the shutter button is pressed. Camera shake is reduced automatically, however, the function does not effectively reduce subject blur. Subject blur occurs frequently under low-light or slow shutter speed conditions. In such a case, shoot with the below tips in mind. • Select - Sony DSC-WX5 | Cyber-shot® Handbook - Page 69
Defocus mode - In Easy Mode • [Flash] in [White Balance] is not available in the following situations: - In Intelligent Sweep Panorama mode - In 3D shooting mode - In Movie Mode - When Scene Selection is set to (Anti Motion Blur), (Hand-held Twilight), (High Sensitivity) mode • Under fluorescent - Sony DSC-WX5 | Cyber-shot® Handbook - Page 70
Set] t z on the control The screen momentarily turns black, and when the white balance has been adjusted and stored Use automatic white balance. • Do not shake or strike the camera while [One Push Set] is in progress. • When flash can adjust color tones manually using the White Balance function - Sony DSC-WX5 | Cyber-shot® Handbook - Page 71
. AF range finder frame AF range finder frame Notes • When you use [Digital Zoom] or [AF Illuminator], the AF range finder frame setting is disabled and AF range finder frame is displayed as a dotted line instead. In this case, the camera works to focus on the subjects at the center of the screen - Sony DSC-WX5 | Cyber-shot® Handbook - Page 72
do as follows: AF range finder frame AE/AF lock indicator 1Recompose the shot so that the subject is centered in the AF range finder, and press AE/AF lock indicator stops flashing and remains on, return to the fully composed shot, and press the shutter button fully down. • As long as you do not - Sony DSC-WX5 | Cyber-shot® Handbook - Page 73
to determine the exposure. 1 MENU t (Metering Mode) t desired mode (Multi) (Center) (Spot) Divides into multiple regions and measures each region. The camera determines a well-balanced exposure (Multi-pattern metering). Measures the center of the image, and determines the exposure based on the - Sony DSC-WX5 | Cyber-shot® Handbook - Page 74
shot. When a motion is detected, the ISO sensitivity is increased according to the movement to reduce subject blur (Motion Detection). Example of an image when (Backlight) is activated. Scene Recognition icon and guide The camera operate when you shoot images using digital zoom. • [Scene Recognition] - Sony DSC-WX5 | Cyber-shot® Handbook - Page 75
the two images shot. First Image* Shoots in Slow Synchro Shoots in Slow Synchro with the face which the flash strobes on as guide Shoots in Slow When set to [Advanced], the camera automatically shoots two images consecutively* when it recognizes (Portrait). The camera will select, display, and - Sony DSC-WX5 | Cyber-shot® Handbook - Page 76
Table of contents Soft Skin Effect When the Face Detection function is activated, sets whether to use the Soft Skin effect, and the effect level. 1 MENU t (Soft Skin Effect) t desired mode (Off) (Low) (Mid) (High) Does not use the Soft Skin Effect. Adds light Soft Skin Effect. Adds moderate Soft - Sony DSC-WX5 | Cyber-shot® Handbook - Page 77
. • [Smile Detection Sensitivity] cannot be adjusted in the following situations: - In Intelligent Sweep Panorama mode - In Superior Auto Adjustment mode - In Background Defocus mode - In 3D shooting mode - In Movie Mode - In Easy Mode MENU/Settings Search Index 77GB - Sony DSC-WX5 | Cyber-shot® Handbook - Page 78
When the camera detects more than one subject, the camera will judge which the following situations: - In Intelligent Sweep Panorama mode - In 3D shooting mode - In Movie Mode - In Easy Mode • The Face Detection function does not work when using the digital zoom. • Up to 8 faces of your subjects can - Sony DSC-WX5 | Cyber-shot® Handbook - Page 79
as the priority face, and the frame changes to an orange-colored . 3To cancel face registration, press z again. • When you remove the battery from the camera or leave the power turned off for a few days, the face registration is reset. • If Tracking focus is activated, Face Registration settings are - Sony DSC-WX5 | Cyber-shot® Handbook - Page 80
Search Anti Blink When Scene Selection is set to (Soft Skin) or (Soft Snap) while you are shooting an image, the camera automatically shoots two images consecutively. The camera will select, display and record the image which the eyes are not blinked automatically. 1 Set the mode dial to (Scene - Sony DSC-WX5 | Cyber-shot® Handbook - Page 81
Table of contents Operation Search MENU/Settings Search Slideshow Images are automatically played back in succession. 1 Press the 2 MENU t button (Playback) button to switch to playback mode. (Slideshow) t desired slideshow t z on the control (Continuous Playback) (Slideshow with music) - Sony DSC-WX5 | Cyber-shot® Handbook - Page 82
• [Slideshow with music] is not available for the following images: - Panoramic images - 3D images recorded in [Standard] or [Wide] Image Selects the group of images to be Selects the playback speed and mood for slideshows. If the playback time of a movie is long, an image is taken from it - Sony DSC-WX5 | Cyber-shot® Handbook - Page 83
ends. zSelecting background music You can transfer a desired music file from your CDs or MP3 files to the camera to play back during slideshow. To transfer music, install the "Music Transfer" software (supplied) to your computer. For details, see pages 134 and 135. • You can record up to four - Sony DSC-WX5 | Cyber-shot® Handbook - Page 84
] when you want to play back images shot in 3D mode on the 3D TV. Connect the camera and the 3D TV using an HDMI Cable (sold separately) (page 56). 1 Press the 2 MENU t (Playback) button to switch to playback mode. (3D Viewing) t z on the control button Operation Search MENU/Settings Search - Sony DSC-WX5 | Cyber-shot® Handbook - Page 85
the operating instructions supplied with Memory Stick with TransferJet. 1 Insert a Memory Stick with TransferJet into the camera, and be transferred. • Up to 10 images can be transferred at once. However, for 3D images, both the MPO file and the JPEG file are transferred. Depending on the receiving - Sony DSC-WX5 | Cyber-shot® Handbook - Page 86
sending and receiving data successfully Closely align the (TransferJet) mark on the camera and other device. • The transfer rate and range differ depending on enjoyment of transferring data. For details, see the operating instructions supplied with your TransferJet-compatible device. • Note the - Sony DSC-WX5 | Cyber-shot® Handbook - Page 87
the camera detects images not registered in the Image Database File on the memory card, a registration screen with the message "Files found which were not recognized Import files" will be displayed. To view unregistered images, register them by selecting [OK]. • Use a sufficiently charged battery to - Sony DSC-WX5 | Cyber-shot® Handbook - Page 88
displayed as the main image. Plays back all burst images one at a time. zDisplaying burst images When [Display Burst Group] is set to [Display Main Only], only the main image of the burst group is displayed. When the camera displays the main image, you can play back the images in the following - Sony DSC-WX5 | Cyber-shot® Handbook - Page 89
] t z • Depending on the image, sufficient correction may not be applied and the image quality may deteriorate. Note • You cannot retouch the following images: - Panoramic images - 3D images - Movies - Images displayed in a burst group Index 89GB - Sony DSC-WX5 | Cyber-shot® Handbook - Page 90
Table of contents Operation Search MENU/Settings Search Delete Allows you to select unwanted images for deletion. You can also delete images using the (Delete) button (page 45). 1 Press the 2 MENU t 3 [OK] t z (Playback) button to switch to playback mode. (Delete) t desired mode t z on the - Sony DSC-WX5 | Cyber-shot® Handbook - Page 91
Table of contents Operation Search Protect Protects recorded images against accidental erasure. The mark is displayed for registered images. 1 Press the 2 MENU t (Playback) button to switch to playback mode. (Protect) t desired mode t z on the control button (This Image) (Multiple Images) - Sony DSC-WX5 | Cyber-shot® Handbook - Page 92
Table of contents Operation Search DPOF DPOF (Digital Print Order Format) is a function that allows you to specify the images of the memory card that you want to print out later. The (Print - Sony DSC-WX5 | Cyber-shot® Handbook - Page 93
rotate the following images: - 3D images - Movies - Images displayed in a burst group - Protected still images • You may not be able to rotate images shot with other cameras. • When viewing images on a computer, the image rotation information may not be reflected depending on the software. 93GB - Sony DSC-WX5 | Cyber-shot® Handbook - Page 94
Table of contents Operation Search MENU/Settings Search Index Select Folder When multiple folders are created in a memory card, this function selects the folder containing the image you want to play back. 1 Press the (Playback) button to switch to playback mode. 2 MENU t (View Mode) t [Folder - Sony DSC-WX5 | Cyber-shot® Handbook - Page 95
Table of contents Movie format You can set the recording method used to record movies. 1 Set the camera to shooting mode. 2 MENU t (Settings) t (Shooting Settings) t [Movie format] t desired mode t z on the control button AVCHD MP4 Sets the recording method to AVCHD, which is - Sony DSC-WX5 | Cyber-shot® Handbook - Page 96
, until the focus is locked. The indicator appears at this time. 1 Set the camera to shooting mode. 2 MENU t (Settings) t (Shooting Settings AF illuminator in the following situations: - In Intelligent Sweep Panorama mode - In 3D shooting mode - When (Landscape), (Twilight), (Pet) or (Fireworks) mode - Sony DSC-WX5 | Cyber-shot® Handbook - Page 97
Table of contents Grid Line With reference to the grid lines, you can easily set a subject in a horizontal/vertical position. 1 Set the camera to shooting mode. 2 MENU t (Settings) t (Shooting Settings) t [Grid Line] t desired mode t z on the control button On Displays the grid lines. The grid - Sony DSC-WX5 | Cyber-shot® Handbook - Page 98
camera uses either smart or precision Digital Zoom. 1 Set the camera to shooting mode. 2 MENU t (Settings) t (Shooting Settings) t [Digital Zoom not work when using the Digital Zoom. Total zoom scale when using Smart zoom (including optical zoom 5×) The supported zoom ratio differs depending on - Sony DSC-WX5 | Cyber-shot® Handbook - Page 99
. Notes • Black is displayed to the left and right of vertical orientation images. • Depending on the shooting angle of the camera, the orientation of the image may not be recorded correctly. • You cannot use [Auto Orientation] in the following situations: - In 3D - Sony DSC-WX5 | Cyber-shot® Handbook - Page 100
strobes two or more times before shooting to reduce the red-eye phenomenon when using the flash. 1 Set the camera to shooting mode. [Off] in the following situations: - In Background Defocus mode - In 3D shooting mode - When (Anti Motion Blur), (Hand-held Twilight) or ( software "PMB". Index 100GB - Sony DSC-WX5 | Cyber-shot® Handbook - Page 101
with the subject's eyes closed is recorded while Face Detection is activated, the message "Blinked eye detected" is displayed. 1 Set the camera to shooting mode. 2 MENU t (Settings) t (Shooting Settings) t [Blink Alert] t desired mode t z on the control button Auto Off Displays the "Blinked eye - Sony DSC-WX5 | Cyber-shot® Handbook - Page 102
Table of contents Beep Changes the settings of the sound produced when you operate the camera. 1 MENU t (Settings) t (Main Settings) t [Beep] t desired mode t z on the control button Shutter High Low Off Turns on the shutter sound when you press the shutter - Sony DSC-WX5 | Cyber-shot® Handbook - Page 103
Table of contents Operation Search MENU/Settings Search Index Language Setting Selects the language to be used in the menu items, warnings and messages. 1 MENU t (Settings) t (Main Settings) t [Language Setting] t desired mode t z on the control button 103GB - Sony DSC-WX5 | Cyber-shot® Handbook - Page 104
select whether or not the function guide is displayed when you operate the camera. 1 MENU t (Settings) t (Main Settings) t [Function Guide] t desired mode t z on the control button On Displays the function guide. Off Does not display the function guide. Operation Search MENU/Settings Search - Sony DSC-WX5 | Cyber-shot® Handbook - Page 105
Table of contents Display color Sets the color of the screen display. 1 MENU t (Settings) t (Main Settings) t [Display color] t desired mode t z on the control button Black White Pink Sets the background color of the LCD screen. Operation Search MENU/Settings Search Index 105GB - Sony DSC-WX5 | Cyber-shot® Handbook - Page 106
the Smile Shutter demonstration when no operation is performed for 15 seconds. If no operation is performed for a set period of time while the camera is connected to an HD TV, a demonstration of AVCHD movie playback will automatically be performed. Does not perform a demonstration. Notes • Pressing - Sony DSC-WX5 | Cyber-shot® Handbook - Page 107
you execute [Initialize], the images are retained. 1 MENU t (Settings) t (Main Settings) t [Initialize] t [OK] t z on the control button Note • Be sure not to turn off the camera while initializing. 107GB - Sony DSC-WX5 | Cyber-shot® Handbook - Page 108
an HD TV and sets the output resolution. Outputs signals in HD picture quality (1080i). Outputs signals in SD picture quality (480p/576p). • If the camera is 1080 60i-compatible, signals are output using 480p, whereas if it is 1080 50i-compatible, signals are output using 576p. Note • If you cannot - Sony DSC-WX5 | Cyber-shot® Handbook - Page 109
button On Enables remote-controlled operation. Off Disables remote-controlled operation. Note • You can perform the operation of the camera with the remote controller of your TV by connecting your camera to a "BRAVIA" Sync-compatible TV. Operation Search MENU/Settings Search Index 109GB - Sony DSC-WX5 | Cyber-shot® Handbook - Page 110
Selects the video signal output type from either SD or HD (1080i) in accordance with the type of TV you connect to the camera using an HD Output Adaptor Cable (sold separately). Use a Type3-compliant HD Output Adaptor Cable (sold separately). 1 MENU t (Settings) t (Main Settings) t [COMPONENT - Sony DSC-WX5 | Cyber-shot® Handbook - Page 111
) t [USB Connect] t desired mode t z on the control button Mass Storage PTP/MTP Establishes a Mass Storage connection between the camera and a computer or other USB device. When you connect the camera to a computer, the AutoPlay Wizard appears, and the still images in the recording folder on the - Sony DSC-WX5 | Cyber-shot® Handbook - Page 112
monitor when the camera is connected with camera, the images on the memory card are displayed; when it is not inserted, the images in the internal memory are displayed. Select this setting in cases where the images of both the memory card and the internal memory are not displayed when the camera - Sony DSC-WX5 | Cyber-shot® Handbook - Page 113
music tracks. 1 MENU t (Settings) t (Main Settings) t [Download Music] t z on the control button The message "Connect to PC" is displayed. 2 Make a USB connection between the camera and a computer, then start "Music Transfer". 3 Follow the instructions on the screen to change music files. 113GB - Sony DSC-WX5 | Cyber-shot® Handbook - Page 114
of contents Operation Search MENU/Settings Search Index Format Music You can delete all the background music files stored in the camera. It can be used in cases such as when the background music files are damaged and cannot be played. 1 MENU t (Settings) t (Main Settings) t [Format Music] t [OK - Sony DSC-WX5 | Cyber-shot® Handbook - Page 115
button Stamina Standard Off Proactively saves the battery power. If the camera is not operated for a certain period of time, the power turns off automatically. In When viewing images shot in [Sweep Multi Angle] mode by tilting the camera - When viewing burst images by tilting the camera - When - Sony DSC-WX5 | Cyber-shot® Handbook - Page 116
camera. Using a Memory Stick with TransferJet (sold separately) allows images to be transferred between TransferJet-compatible devices. For more details on TransferJet, see the Operating Instructions in your camera and align two (TransferJet) marks of the camera and another device that supports this - Sony DSC-WX5 | Cyber-shot® Handbook - Page 117
transferring direction settings of the Eye-Fi card. For details, refer to the operating instructions supplied with the Eye-Fi card. 2 After the settings are finished, insert the Eye-Fi card into the camera, and shoot the images. The recorded images are automatically transferred via the wireless LAN - Sony DSC-WX5 | Cyber-shot® Handbook - Page 118
new Eye-Fi card for the first time, copy the install file of the PC re-insert the Eye-Fi card, or turn the power of the camera off and on again. If the (error) icon is still instructions supplied with the Eye-Fi card. • Some Eye-Fi cards have an "Endless Memory Mode." This product does not support - Sony DSC-WX5 | Cyber-shot® Handbook - Page 119
card or the internal memory. To ensure stable operations of the memory card, we recommend that you use this camera to format any memory card being used with this camera for the first time. Note that formatting will erase all data recorded on the memory card. This data cannot be restored. Be sure - Sony DSC-WX5 | Cyber-shot® Handbook - Page 120
is not displayed when the internal memory is used to record images. • When you insert a memory card that was used with other equipment into the camera and shoot images, a new folder may be automatically created. • Up to 4,000 images can be stored in one folder. When the folder capacity is exceeded - Sony DSC-WX5 | Cyber-shot® Handbook - Page 121
Table of contents Change REC.Folder Changes the folder in the memory card that is currently used to store recorded images. 1 MENU t (Settings) t REC.Folder] (Memory Card Tool) t [Change 2 Select a folder with b/B on the control button. 3 [OK] t z Notes • This item is not displayed when the - Sony DSC-WX5 | Cyber-shot® Handbook - Page 122
as the next recording folder. • You can delete only empty folders. If a folder contains images, or even files that cannot be played back by the camera, first delete these images and files with a computer, and then delete the folder. Operation Search MENU/Settings Search Index 122GB - Sony DSC-WX5 | Cyber-shot® Handbook - Page 123
with sufficient free capacity into the camera. 2 MENU t (Settings) t t z on the control button (Memory Card Tool) t [Copy] t [OK] Notes • Use a fully charged battery pack. If you attempt to copy image files using a battery pack with little remaining charge, the battery pack may run out, causing - Sony DSC-WX5 | Cyber-shot® Handbook - Page 124
a file with a number higher than the last assigned number, a number one higher than the largest number is assigned.) Starts from 0001 each time the folder is changed. (When the recording folder contains a file, a number one higher than the largest number is assigned.) Operation Search MENU - Sony DSC-WX5 | Cyber-shot® Handbook - Page 125
] t desired setting t z on the control button Home Destination You use the camera in your area. When the currently set area differs from your home area, you must make the Area Setting. You use the camera set to the time at your destination. Set the destination area. zChanging Area Setting Setting - Sony DSC-WX5 | Cyber-shot® Handbook - Page 126
value and desired settings with v/V/b/B. 3 [OK] t z Date & Time Format Daylight Savings Date & Time You can select the date and time display format. You can select Daylight Savings [On]/[Off]. You can set the date and time. Note • The camera does not have a feature for superimposing dates on - Sony DSC-WX5 | Cyber-shot® Handbook - Page 127
camera in standard picture quality by connecting the camera to a Standard Definition (SD) TV. Refer also to the operating instructions supplied with the TV. 1 Turn off both the camera and the TV. 2 Connect the camera button to turn on the camera. Images shot with the camera appear on the TV. Select - Sony DSC-WX5 | Cyber-shot® Handbook - Page 128
Refer also to the operating instructions supplied with the TV. 1 Turn off both the camera and the HD TV. 2 Connect the camera to the TV using the image being shot is not displayed on the TV. z"PhotoTV HD" This camera is compatible with the "PhotoTV HD" standard. By connecting a Sony TV compatible - Sony DSC-WX5 | Cyber-shot® Handbook - Page 129
) button to turn on the camera. Images shot with the camera appear on the TV. Select the also cause trouble of the camera and/or camera end and to the TV jack. • Recording may automatically stop to protect the camera after a period of time when you shoot movies in the condition where the camera - Sony DSC-WX5 | Cyber-shot® Handbook - Page 130
HD Output Adaptor Cable (sold separately). 2 Turn on the TV and set the input. 3 Press the (Playback) button to turn on the camera. Images shot with the camera appear on the TV. Select the desired image with the control button. Note • Before you use this function, select MENU t [HD(1080i)] for - Sony DSC-WX5 | Cyber-shot® Handbook - Page 131
with SYNC MENU) support, you can operate the playback functions of the camera using the remote controller supplied with the TV by connecting the camera to the TV a single image at a time. Displays multiple images at the same time. Plays back 3D images recorded in 3D shooting mode. Deletes recorded - Sony DSC-WX5 | Cyber-shot® Handbook - Page 132
can operate are limited. • You can perform the operation of the camera with the remote controller of your TV by connecting your camera to a "BRAVIA" Sync-compatible TV. For details, see the operating instructions of the TV. • If the camera functions in an undesired manner when you are controlling it - Sony DSC-WX5 | Cyber-shot® Handbook - Page 133
shot with your Cyber-shot camera. Recommended computer environment (Windows) The following computer environment is recommended when using the supplied software or more *1 64-bit editions and Starter (Edition) are not supported. Windows Image Mastering API (IMAPI) Ver.2.0 or later is required - Sony DSC-WX5 | Cyber-shot® Handbook - Page 134
instructions on the screen to complete the installation. • For the installation, connect the camera software. • To start up "PMB," click (PMB) on the desktop. For the detailed operation method, see the following PMB support page (English only): http://www.sony for the first time, the confirmation - Sony DSC-WX5 | Cyber-shot® Handbook - Page 135
software before you install "Music Transfer". • For installation, you need to log on as Administrator. zIntroduction to "PMB" • "PMB" allows you to import images shot with the camera DVD-Video disc for the first time.) • You can upload images to a network service. (An internet connection environment - Sony DSC-WX5 | Cyber-shot® Handbook - Page 136
Index Connecting the camera to a computer 1 Insert a sufficiently charged battery pack into the camera, or connect the camera to a wall on the camera's memory card from a PC. Sony bears no responsibility for the result of operations of this type. • The camera creates a 3D image by combining - Sony DSC-WX5 | Cyber-shot® Handbook - Page 137
a computer (Macintosh) 1 Connect the camera to your Macintosh computer first. Double- a memory card into the camera after copying images from the internal memory. • Turning off the camera. 1 Double-click the computer, and the camera is disconnected from the computer. • When performing operations such - Sony DSC-WX5 | Cyber-shot® Handbook - Page 138
the office. • You can easily register the media services (such as blogs) you use frequently. For time you use "PMB Portable". 1 Make a USB connection between the camera and a computer. When you connect the camera /Area], and then click [OK]. The User Agreement screen appears. 5 Read the agreement - Sony DSC-WX5 | Cyber-shot® Handbook - Page 139
for any trouble occurring between the users and third parties or any inconvenience caused to users relating to the utilization of the services inclusive of the termination of or changes to such services. • To view a website, you will be redirected to it by the Sony server. There may be times when - Sony DSC-WX5 | Cyber-shot® Handbook - Page 140
can create a disc from AVCHD movies that have been recorded with this camera. Selecting the method for creating a disc of movies Select the method definition image quality (STD) disc Notes • If you create a disc using Sony DVDirect (DVD Writer), use the memory card slot of the DVD Writer or - Sony DSC-WX5 | Cyber-shot® Handbook - Page 141
The following 12-cm discs can imported to a PC using supplied "PMB" software. 1 Turn on the power of the PC 5 Create the disc by following the on-screen instructions. Notes • Be sure that "PMB" has already AVCHD disc. • Disc creation may take time. zPlaying an AVCHD disc on a PC AVCHD discs - Sony DSC-WX5 | Cyber-shot® Handbook - Page 142
standard definition image quality (STD) can be created using supplied "PMB" software and selecting an AVCHD movie imported to the PC. 1 Turn on the instructions. Notes • Be sure that "PMB" has already been installed (page 134). • Discs cannot be created for MP4 movies. • Disc creation may take time - Sony DSC-WX5 | Cyber-shot® Handbook - Page 143
instructions supplied with the printer. • Printing using a computer You can import images to a computer using the supplied "PMB" software and memory card containing images shot with the camera to a photo printing service shop. As long as the shop supports photo printing services conforming to DPOF, - Sony DSC-WX5 | Cyber-shot® Handbook - Page 144
off suddenly. • Depending on the camera and battery temperature, the power may turn off automatically to protect the camera. In this case, a message is displayed on the LCD screen before the power turns off. • If you do not operate the camera for a certain period of time while the power is on and - Sony DSC-WX5 | Cyber-shot® Handbook - Page 145
battery pack that has not been used for a long time. • The CHARGE lamp (on the supplied battery charger a memory card has been inserted into the camera, make sure that the memory card has ). Smile Shutter function does not work. • No image is shot if a smiling face is not detected. • Set [Demo Mode - Sony DSC-WX5 | Cyber-shot® Handbook - Page 146
images in dark locations, the camera automatically reduces the image noise. This function is called NR (noise reduction) slow shutter and the shooting time takes longer. The image is out of focus. • The subject is too close. When shooting, make sure to position the lens farther away from the subject - Sony DSC-WX5 | Cyber-shot® Handbook - Page 147
image when you view the screen in a dark place. • The camera is attempting to increase the visibility of the screen by temporarily brightening the images (pages 45, 90). • The battery level is low. Insert charged battery pack. The same image is shot several times. • Set [Burst Settings] to [Single - Sony DSC-WX5 | Cyber-shot® Handbook - Page 148
back, on this camera, files containing images which were processed on a computer or images which were shot using other cameras. • The camera is in USB mode 3D images consist of a JPEG file and an MPO file. If either file is deleted on the PC, the camera may not operate correctly. The date and time - Sony DSC-WX5 | Cyber-shot® Handbook - Page 149
Sony should contact those manufacturers. • If a "Memory Stick PRO Duo" media is not supported, connect the camera to the computer (page 136). The computer recognizes the "Memory Stick PRO Duo" media. Your computer does not recognize the camera. • When the battery computer or software manufacturer. - Sony DSC-WX5 | Cyber-shot® Handbook - Page 150
manual software. • If you use a photo printing service, ask them to superimpose the dates on images. Cannot print the 3D images as they are displayed on the camera's LCD screen. • The 3D images displayed on the camera are MPO files, but the images to be printed are JPEG files, so in some cases - Sony DSC-WX5 | Cyber-shot® Handbook - Page 151
to force the lens that has stopped moving. The camera becomes warm when you use it for a long time. • This is not a malfunction. The Clock Set screen appears when you turn on the camera. • Set the date and time again (page 126). • The internal rechargeable backup battery has discharged. Insert - Sony DSC-WX5 | Cyber-shot® Handbook - Page 152
two digits (indicated by ss) will differ depending on the state of the camera. If you cannot solve the problem even after trying the following corrective actions a few times, the camera may need repair. Contact your Sony dealer or local authorized Sony service facility. C:32:ss • There is trouble - Sony DSC-WX5 | Cyber-shot® Handbook - Page 153
the switch to the recording position. Read only memory card • The camera cannot record or delete images on this memory card. Writing to the not completed correctly Recover data • Reinsert the memory card, and follow the instructions on the screen. No images • No images that can be played back - Sony DSC-WX5 | Cyber-shot® Handbook - Page 154
occurred while the image was playing back. No guarantees are made for playing back, on this camera, files containing images which were processed on a computer or images which were shot using other cameras. Read only folder • You have selected a folder that cannot be set as a recording folder on the - Sony DSC-WX5 | Cyber-shot® Handbook - Page 155
12M is not supported with this memory card MP4 6M is not supported with this memory ). Turn the power off and on again • The lens malfunction. Maximum number of images already selected • Up cameras. Preparing Image Database File Please wait • The camera restores the date information, etc., in cases - Sony DSC-WX5 | Cyber-shot® Handbook - Page 156
in temperature while recording a movie. Please wait until the temperature goes down. • When you record movies for a long time, the camera temperature rises. In this case, stop recording movies. Connection failed • Check the TransferJet reception port and transfer data correctly (page 16). Some files - Sony DSC-WX5 | Cyber-shot® Handbook - Page 157
Index Using the camera abroad You can use the battery charger (supplied), and the TV color systems To view movies shot using this camera on a television, the camera and television must use the same Kong, Hungary, Indonesia, Italy, Kuwait, Malaysia, New Zealand, Norway, Poland, Portugal, Rumania - Sony DSC-WX5 | Cyber-shot® Handbook - Page 158
• Data may be corrupted in the following cases: - When the memory card is removed or the camera is turned off during a read or write Memory Stick other than a "Memory Stick PRO Duo" media. *4 This camera does not support 8-bit parallel data transfer. It performs the same 4-bit parallel data transfer - Sony DSC-WX5 | Cyber-shot® Handbook - Page 159
is compatible with "Memory Stick Micro" media ("M2"). "M2" is an abbreviation for "Memory Stick Micro" media. • To use a "Memory Stick Micro" media with the camera, be sure to insert the "Memory Stick Micro" media into an "M2" Adaptor as large as of Duo size. If you insert a "Memory Stick Micro - Sony DSC-WX5 | Cyber-shot® Handbook - Page 160
is probably time to replace it with a new one. • The battery life varies according to how it is stored and the operating conditions and environment in which each battery pack is used. Compatible battery pack • The NP-BN1 battery pack (supplied) can be used only in N type compatible Cyber-shot models - Sony DSC-WX5 | Cyber-shot® Handbook - Page 161
a risk of injury from electrocution and burns. • Remove the charged battery pack from the battery charger. If you leave the charged battery pack in the charger, battery life may be shortened. • The CHARGE lamp of the supplied battery charger flashes in either way: - Fast flashing: Turns the light on - Sony DSC-WX5 | Cyber-shot® Handbook - Page 162
(sold separately) allows you to take pictures, by having the camera detect people's faces. For details, see the operating instructions supplied with Intelligent Pantilter. Notes • DSC-WX5C digital still camera does not support the Intelligent Pantilter (IPT-DS1/IPT-DS1C). • The Intelligent Pantilter - Sony DSC-WX5 | Cyber-shot® Handbook - Page 163
for high-definition digital video cameras when recording an HD (High-Definition) signal at the 1080i*1 or 720p*2 specification using high-efficiency The MPEG-4 AVC/H.264 format enables a high definition video signal shot on a digital video camera recorder to be recorded on 8 cm DVD discs, hard disk - Sony DSC-WX5 | Cyber-shot® Handbook - Page 164
TransferJet communications conform to the standard given below. TransferJet standard: Conforms to PCL Spec. Rev. 1.0 Protocol Class Name (communication type): SCSI Block Device Target OBEX Push (sold separately). Or, use the "OBEX" communication protocol when sharing data between cameras. 164GB - Sony DSC-WX5 | Cyber-shot® Handbook - Page 165
Number of still images and recordable time of movies The number of still images and recordable time may vary depending on the shooting , the ">99999" indicator appears. • When an image shot with other cameras is played back on this camera, the image may not appear in the actual image size - Sony DSC-WX5 | Cyber-shot® Handbook - Page 166
files. Continuous shooting is possible for approximately 29 minutes at one time. The maximum size of an MP4-format movie file is up to approximately 2GB. (Units: hour : minute : second) Capacity Internal memory Memory card formatted with this camera Quality/Size AVC HD 17M FH AVC HD 9M HQ MP4 - Sony DSC-WX5 | Cyber-shot® Handbook - Page 167
about one month it becomes completely discharged. In this case, be sure to charge this rechargeable battery before using the camera. However, even if this rechargeable battery is not charged, you can still use the camera, but the date and time will not be indicated. Charging method of the internal - Sony DSC-WX5 | Cyber-shot® Handbook - Page 168
3D Functions 51 3D Shooting 53 3D Sweep Panorama 53 3D Viewing 84 A AF Illuminator 96 AF range finder frame 71 Anti Blink 80 Anti Motion Blur 26 Area Setting 125 Auto Orientation 99 AVCHD format 163 B Background Defocus 24 Backlight Correction HDR 26 Battery charger 161 Battery - Sony DSC-WX5 | Cyber-shot® Handbook - Page 169
112 M Macintosh computer 133 Mass Storage 111 Memory card 3, 158 MENU 12 Metering Mode 73 Mode dial 20 MOVIE (Movie) button 41 Movie format Pixel 64 Playback 3D images 55 Movies 49 Still images 42 Playback zoom 43 PMB 134 PMB Portable 138 Power Save 115 Precision digital zoom 98 Print - Sony DSC-WX5 | Cyber-shot® Handbook - Page 170
38 Self-Timer 38 Send by TransferJet 85 Settings 14 Shooting 3D images 53 Movie 31 Still Image 21 Shooting Direction 60 164 Trimming (Resize 89 Troubleshooting 144 TV 56, 127, 128 Twilight 26 Twilight Portrait 26 U Unsharp masking 89 USB Connect 111 Using the camera abroad 157 V VGA - Sony DSC-WX5 | Cyber-shot® Handbook - Page 171
", "dtoa", "pcre" and "libjpeg" software are provided in the camera. We provide this software based on license agreements with their owners of software programs under the conditions of the supplied GPL/LGPL. Source code is provided on the web. Use the following URL to download it. http://www.sony.
-
 1
1 -
 2
2 -
 3
3 -
 4
4 -
 5
5 -
 6
6 -
 7
7 -
8
-
9
-
10
-
11
-
12
-
13
-
14
-
15
-
16
-
17
-
18
-
19
-
20
-
21
-
22
-
23
-
24
-
25
-
26
-
27
-
28
-
29
-
30
-
31
-
32
-
33
-
34
-
35
-
36
-
37
-
38
-
39
-
40
-
41
-
42
-
43
-
44
-
45
-
46
-
47
-
48
-
49
-
50
-
51
-
52
-
53
-
54
-
55
-
56
-
57
-
58
-
59
-
60
-
61
-
62
-
63
-
64
-
65
-
66
-
67
-
68
-
69
-
70
-
71
-
72
-
73
-
74
-
75
-
76
-
77
-
78
-
79
-
80
-
81
-
82
-
83
-
84
-
85
-
86
-
87
-
88
-
89
-
90
-
91
-
92
-
93
-
94
-
95
-
96
-
97
-
98
-
99
-
100
-
101
-
102
-
103
-
104
-
105
-
106
-
107
-
108
-
109
-
110
-
111
-
112
-
113
-
114
-
115
-
116
-
117
-
118
-
119
-
120
-
121
-
122
-
123
-
124
-
125
-
126
-
127
-
128
-
129
-
130
-
131
-
132
-
133
-
134
-
135
-
136
-
137
-
138
-
139
-
140
-
141
-
142
-
143
-
144
-
145
-
146
-
147
-
148
-
149
-
150
-
151
-
152
-
153
-
154
-
155
-
156
-
157
-
158
-
159
-
160
-
161
-
162
-
163
-
164
-
165
-
166
-
167
-
168
-
169
-
170
-
171
 |
 |

© 2010 Sony Corporation
4-194-687-
11
(1)
GB
Cyber-shot Handbook
DSC-WX5/WX5C
Table of
contents
Operation
Search
MENU/Settings
Search
Index