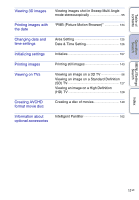
Sony DSC-WX5 Cyber-shot® Handbook - Page 12
MENU/Settings Search
 |
UPC - 027242792975
View all Sony DSC-WX5 manuals
Add to My Manuals
Save this manual to your list of manuals |
Page 12 highlights
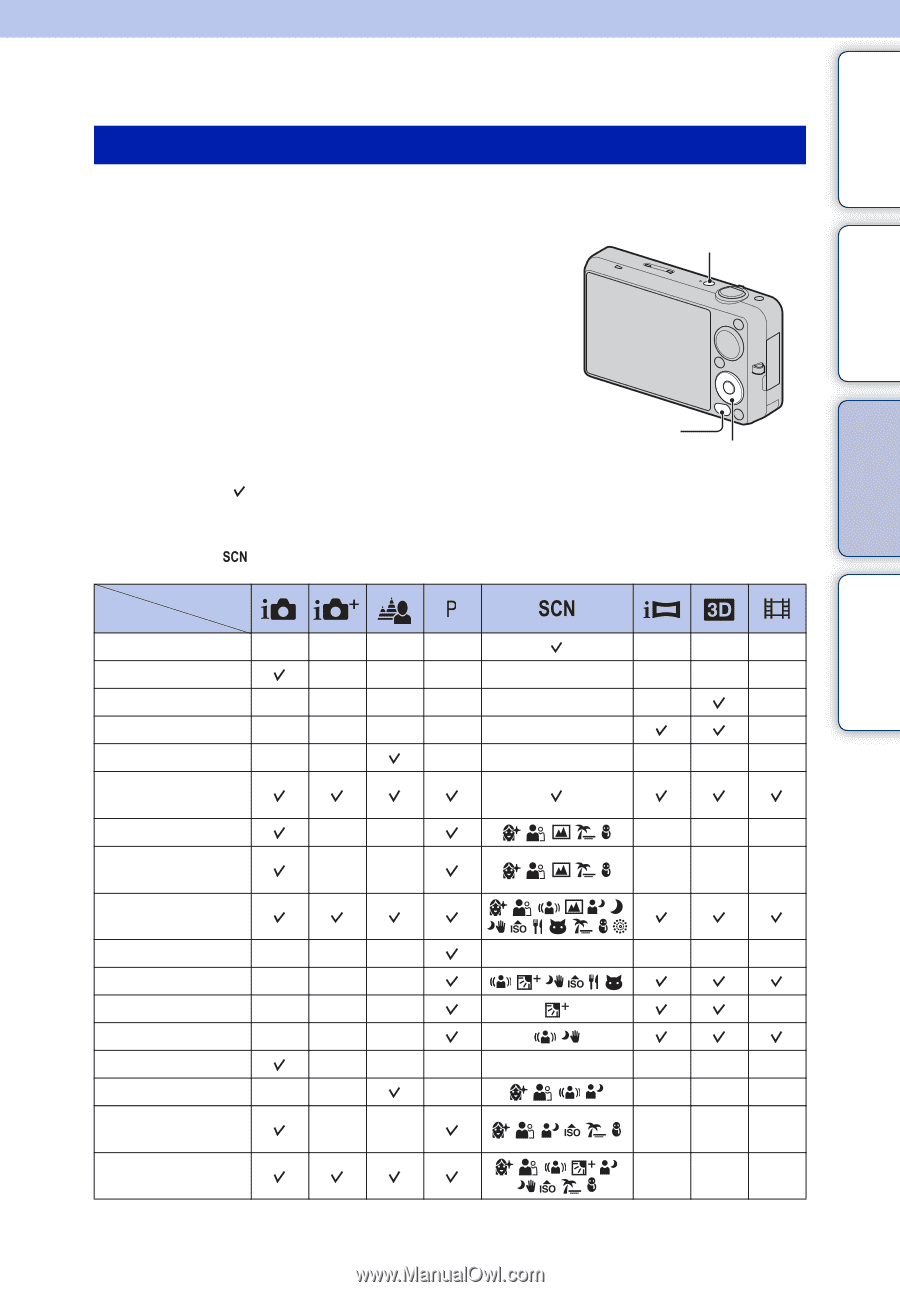
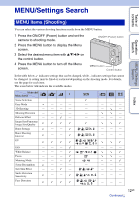
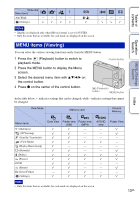
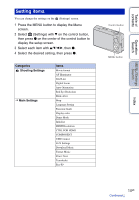
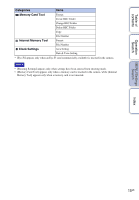
MENU/Settings Search Table of contents Operation Search MENU/Settings Search Index MENU items (Shooting) You can select the various shooting functions easily from the MENU button. 1 Press the ON/OFF (Power) button and set the camera to shooting mode. 2 Press the MENU button to display the Menu screen. 3 Select the desired menu item with v/V/b/B on the control button. 4 Press the MENU button to turn off the Menu screen. ON/OFF (Power) button MENU button Control button In the table below, indicates settings that can be changed, while - indicates settings that cannot be changed. A setting may be fixed or restricted depending on the shooting mode. For details, see the page for each item. The icons below indicate the available modes. Mode dial Menu items Scene Selection - - - - - - - Easy Mode - - - - - - - 3D Shooting - - - - - - - Shooting Direction - - - - - - Defocus Effect - - - - - - - Image Size/Panorama Image Size/Quality Burst Settings - - - - - Burst Shooting Interval - - - - - EV ISO - - - - - - - White Balance - - - Focus - - - - Metering Mode - - - Scene Recognition - - - - - - - Soft Skin Effect - - - - - - Smile Detection Sensitivity - - - - - Face Detection - - - 12GB Continued r
-
 1
1 -
2
-
3
-
4
-
5
-
6
-
 7
7 -
 8
8 -
 9
9 -
 10
10 -
 11
11 -
 12
12 -
 13
13 -
 14
14 -
 15
15 -
 16
16 -
 17
17 -
18
-
19
-
20
-
21
-
22
-
23
-
24
-
25
-
26
-
27
-
28
-
29
-
30
-
31
-
32
-
33
-
34
-
35
-
36
-
37
-
38
-
39
-
40
-
41
-
42
-
43
-
44
-
45
-
46
-
47
-
48
-
49
-
50
-
51
-
52
-
53
-
54
-
55
-
56
-
57
-
58
-
59
-
60
-
61
-
62
-
63
-
64
-
65
-
66
-
67
-
68
-
69
-
70
-
71
-
72
-
73
-
74
-
75
-
76
-
77
-
78
-
79
-
80
-
81
-
82
-
83
-
84
-
85
-
86
-
87
-
88
-
89
-
90
-
91
-
92
-
93
-
94
-
95
-
96
-
97
-
98
-
99
-
100
-
101
-
102
-
103
-
104
-
105
-
106
-
107
-
108
-
109
-
110
-
111
-
112
-
113
-
114
-
115
-
116
-
117
-
118
-
119
-
120
-
121
-
122
-
123
-
124
-
125
-
126
-
127
-
128
-
129
-
130
-
131
-
132
-
133
-
134
-
135
-
136
-
137
-
138
-
139
-
140
-
141
-
142
-
143
-
144
-
145
-
146
-
147
-
148
-
149
-
150
-
151
-
152
-
153
-
154
-
155
-
156
-
157
-
158
-
159
-
160
-
161
-
162
-
163
-
164
-
165
-
166
-
167
-
168
-
169
-
170
-
171
 |
 |