Sony DSC-WX5 Cyber-shot® Handbook - Page 87
View Mode, Viewing images taken with a different camera
 |
UPC - 027242792975
View all Sony DSC-WX5 manuals
Add to My Manuals
Save this manual to your list of manuals |
Page 87 highlights
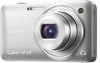
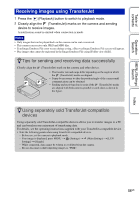
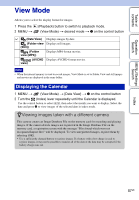
Table of contents Operation Search MENU/Settings Search View Mode Allows you to select the display format for images. 1 Press the 2 MENU t (Playback) button to switch to playback mode. (View Mode) t desired mode t z on the control button (Date View) (Folder view (Still)) (Folder view (MP4)) (AVCHD view) Displays images by date. Displays still images. Displays MP4-format movies. Displays AVCHD-format movies. Note • When the internal memory is used to record images, View Mode is set to Folder View and still images and movies are displayed in the same folder. Displaying the Calendar 1 MENU t (View Mode) t [Date View] t z on the control button 2 Turn the (Index) lever repeatedly until the Calendar is displayed. Use the control button to select / , then select the month you want to display. Select the date and press z to view images of the selected date in index mode. zViewing images taken with a different camera This camera creates an Image Database File on the memory card for recording and playing images. If the camera detects images not registered in the Image Database File on the memory card, a registration screen with the message "Files found which were not recognized Import files" will be displayed. To view unregistered images, register them by selecting [OK]. • Use a sufficiently charged battery to register images. If a battery with a low charge is used to register images, it may not be possible to transfer all of the data or the data may be corrupted if the battery charge runs out. Index 87GB
-
 1
1 -
2
-
3
-
4
-
5
-
6
-
7
-
8
-
9
-
10
-
11
-
12
-
13
-
14
-
15
-
16
-
17
-
18
-
19
-
20
-
21
-
22
-
23
-
24
-
25
-
26
-
27
-
28
-
29
-
30
-
31
-
32
-
33
-
34
-
35
-
36
-
37
-
38
-
39
-
40
-
41
-
42
-
43
-
44
-
45
-
46
-
47
-
48
-
49
-
50
-
51
-
52
-
53
-
54
-
55
-
56
-
57
-
58
-
59
-
60
-
61
-
62
-
63
-
64
-
65
-
66
-
67
-
68
-
69
-
70
-
71
-
72
-
73
-
74
-
75
-
76
-
77
-
78
-
79
-
80
-
81
-
 82
82 -
 83
83 -
 84
84 -
 85
85 -
 86
86 -
 87
87 -
 88
88 -
 89
89 -
 90
90 -
 91
91 -
 92
92 -
93
-
94
-
95
-
96
-
97
-
98
-
99
-
100
-
101
-
102
-
103
-
104
-
105
-
106
-
107
-
108
-
109
-
110
-
111
-
112
-
113
-
114
-
115
-
116
-
117
-
118
-
119
-
120
-
121
-
122
-
123
-
124
-
125
-
126
-
127
-
128
-
129
-
130
-
131
-
132
-
133
-
134
-
135
-
136
-
137
-
138
-
139
-
140
-
141
-
142
-
143
-
144
-
145
-
146
-
147
-
148
-
149
-
150
-
151
-
152
-
153
-
154
-
155
-
156
-
157
-
158
-
159
-
160
-
161
-
162
-
163
-
164
-
165
-
166
-
167
-
168
-
169
-
170
-
171
 |
 |