Sony ICF-SW7600GR Operating Instructions - Page 20
Searching the station, automatically
 |
UPC - 027242580084
View all Sony ICF-SW7600GR manuals
Add to My Manuals
Save this manual to your list of manuals |
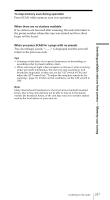
Page 20 highlights
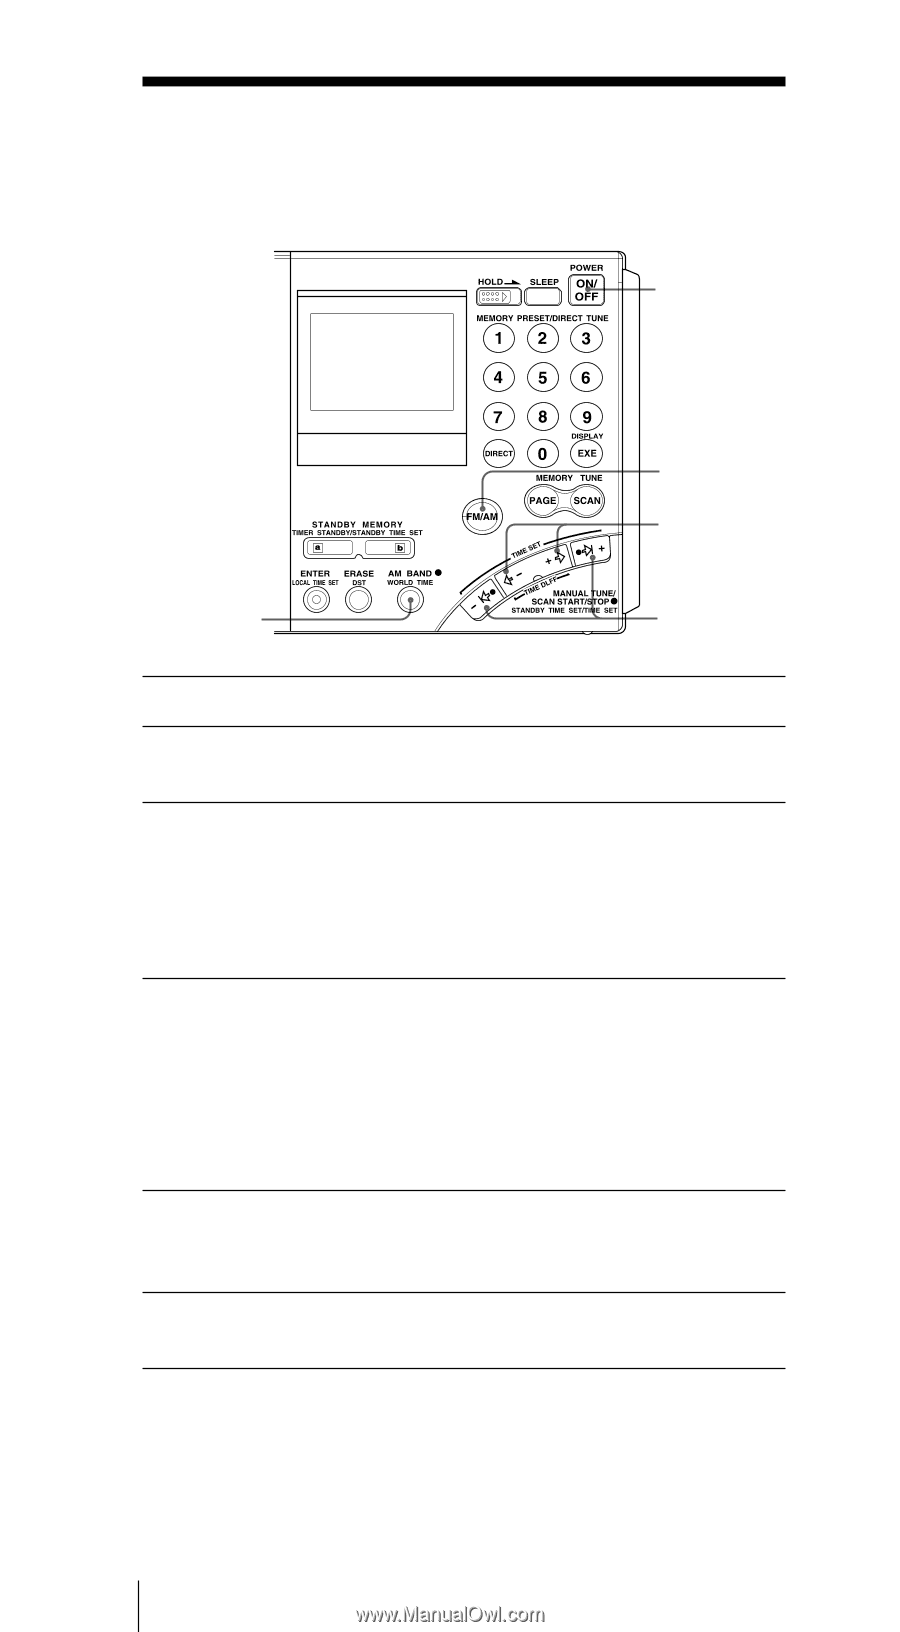
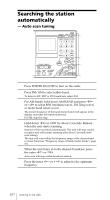
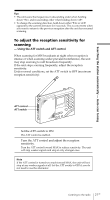
Searching the station automatically - Auto scan tuning 1 2 6 3 3, 4, 5 1 Press POWER ON/OFF to turn on the radio. 2 Press FM/AM to select either band. To listen to SW, MW or LW broadcasts, select AM. 3 For AM bands, hold down AM BAND and press -?K or k?+ to select MW (medium wave), LW (long wave) or meter band (short wave). The lowest frequency of the band (meter band) will appear in the display each time the button is pressed. For FM, skip this step. 4 Hold down -?K or k?+ for about 2 seconds. Release when the unit starts scanning. Stations will be searched automatically. The unit will stop at each reception and will resume scanning after about 3 seconds (auto scan tuning). The unit will scan within the frequency range of the chosen band or meter band (see "Frequency range of bands/meter bands", page 19). 5 When the unit tunes in to the desired broadcast, press the outer -?K or k?+. Auto scan will stop at that broadcast station. 6 Press the inner K - or + k to adjust to the optimum frequency. 20GB Listening to the radio
-
 1
1 -
2
-
3
-
4
-
5
-
6
-
7
-
8
-
9
-
10
-
11
-
12
-
13
-
14
-
 15
15 -
 16
16 -
 17
17 -
 18
18 -
 19
19 -
 20
20 -
 21
21 -
 22
22 -
 23
23 -
 24
24 -
 25
25 -
26
-
27
-
28
-
29
-
30
-
31
-
32
-
33
-
34
-
35
-
36
-
37
-
38
-
39
-
40
-
41
-
42
-
43
-
44
-
45
-
46
-
47
-
48
-
49
-
50
-
51
-
52
-
53
-
54
-
55
-
56
-
57
-
58
-
59
-
60
-
61
-
62
-
63
-
64
-
65
-
66
-
67
-
68
-
69
-
70
-
71
-
72
-
73
-
74
-
75
-
76
-
77
-
78
-
79
-
80
-
81
-
82
-
83
-
84
-
85
-
86
-
87
-
88
-
89
-
90
-
91
-
92
-
93
-
94
-
95
-
96
-
97
-
98
-
99
-
100
-
101
-
102
-
103
-
104
-
105
-
106
-
107
-
108
-
109
-
110
-
111
-
112
-
113
-
114
-
115
-
116
-
117
-
118
-
119
-
120
-
121
-
122
-
123
-
124
-
125
-
126
-
127
-
128
-
129
-
130
-
131
-
132
-
133
-
134
-
135
-
136
-
137
-
138
-
139
-
140
-
141
-
142
-
143
-
144
-
145
-
146
-
147
-
148
-
149
-
150
-
151
-
152
-
153
-
154
-
155
-
156
-
157
-
158
-
159
-
160
-
161
-
162
-
163
-
164
-
165
-
166
-
167
-
168
-
169
-
170
-
171
-
172
-
173
-
174
-
175
-
176
-
177
-
178
-
179
-
180
-
181
-
182
-
183
-
184
-
185
-
186
-
187
-
188
-
189
-
190
-
191
-
192
-
193
-
194
-
195
-
196
-
197
-
198
-
199
-
200
-
201
-
202
-
203
-
204
-
205
-
206
-
207
-
208
-
209
-
210
-
211
-
212
-
213
-
214
-
215
-
216
-
217
-
218
-
219
-
220
-
221
-
222
-
223
-
224
-
225
-
226
-
227
-
228
-
229
-
230
-
231
-
232
-
233
-
234
-
235
-
236
-
237
-
238
-
239
-
240
-
241
-
242
 |
 |