Sony MZ-NH900 Operating Instructions - Page 71
Dividing a track directly, Adjusting the dividing point, before dividing a track, Divide Rehearsal
 |
View all Sony MZ-NH900 manuals
Add to My Manuals
Save this manual to your list of manuals |
Page 71 highlights
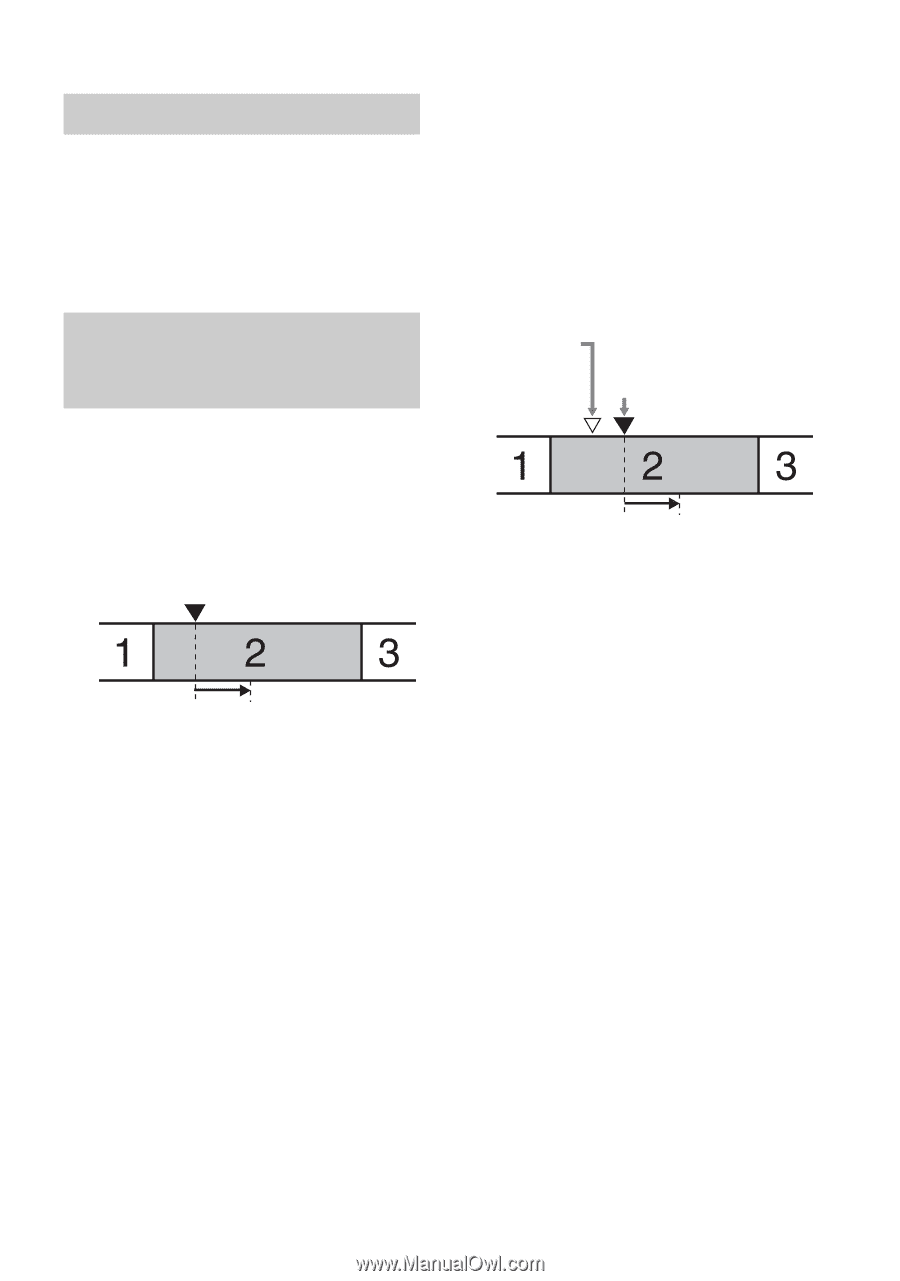
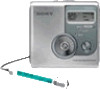
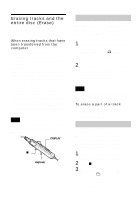
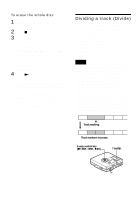
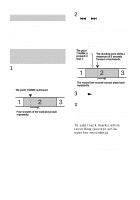
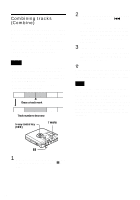
Dividing a track directly While playing or pausing, press T MARK on the recorder at the point you want to mark. "MARK ON" appears in the display, and a track mark is added. The track number will increase by one. Adjusting the dividing point before dividing a track (Divide Rehearsal) 1 While playing, press T MARK for 2 seconds or more. Four seconds of the track from the point T MARK is pressed is played back repeatedly. The point T MARK is pressed. Four seconds of the track plays back repeatedly. 2 Press the 5-way control key towards . or > to adjust the point to divide. Pressing the control key moves the dividing point forward or backwards. The dividing point can be moved up to a maximum of 8 seconds forward or backwards from the point T MARK was pressed in step 1. The point T MARK is pressed in step 1. The dividing point shifts a maximum of 8 seconds forward or backwards. The moved four-second interval plays back repeatedly. 3 Press NENT to enter the dividing point. z You can use the Speed Control function during the Divide Rehearsal function. This allows you to reduce the playback speed (page 56) to carry out the division more accurately. To add track marks while recording (except while synchro-recording) Press T MARK on the recorder at the point you want to add a track mark. You can use Time Mark to add track marks automatically at specified intervals (except while digital recording) (page 39). 71
-
 1
1 -
2
-
3
-
4
-
5
-
6
-
7
-
8
-
9
-
10
-
11
-
12
-
13
-
14
-
15
-
16
-
17
-
18
-
19
-
20
-
21
-
22
-
23
-
24
-
25
-
26
-
27
-
28
-
29
-
30
-
31
-
32
-
33
-
34
-
35
-
36
-
37
-
38
-
39
-
40
-
41
-
42
-
43
-
44
-
45
-
46
-
47
-
48
-
49
-
50
-
51
-
52
-
53
-
54
-
55
-
56
-
57
-
58
-
59
-
60
-
61
-
62
-
63
-
64
-
65
-
 66
66 -
 67
67 -
 68
68 -
 69
69 -
 70
70 -
 71
71 -
 72
72 -
 73
73 -
 74
74 -
 75
75 -
 76
76 -
77
-
78
-
79
-
80
-
81
-
82
-
83
-
84
-
85
-
86
-
87
-
88
-
89
-
90
-
91
-
92
-
93
-
94
-
95
-
96
-
97
-
98
-
99
-
100
-
101
-
102
-
103
-
104
-
105
-
106
-
107
-
108
-
109
-
110
-
111
-
112
-
113
-
114
-
115
-
116
-
117
-
118
-
119
-
120
-
121
-
122
-
123
-
124
-
125
-
126
-
127
-
128
-
129
-
130
-
131
-
132
-
133
-
134
-
135
-
136
 |
 |