Sony SLV-D380P Instruction Manual - Page 39
Basic Operations, To stop recording, Daily/weekly recording, SPEED position. For details
 |
UPC - 027242708945
View all Sony SLV-D380P manuals
Add to My Manuals
Save this manual to your list of manuals |
Page 39 highlights
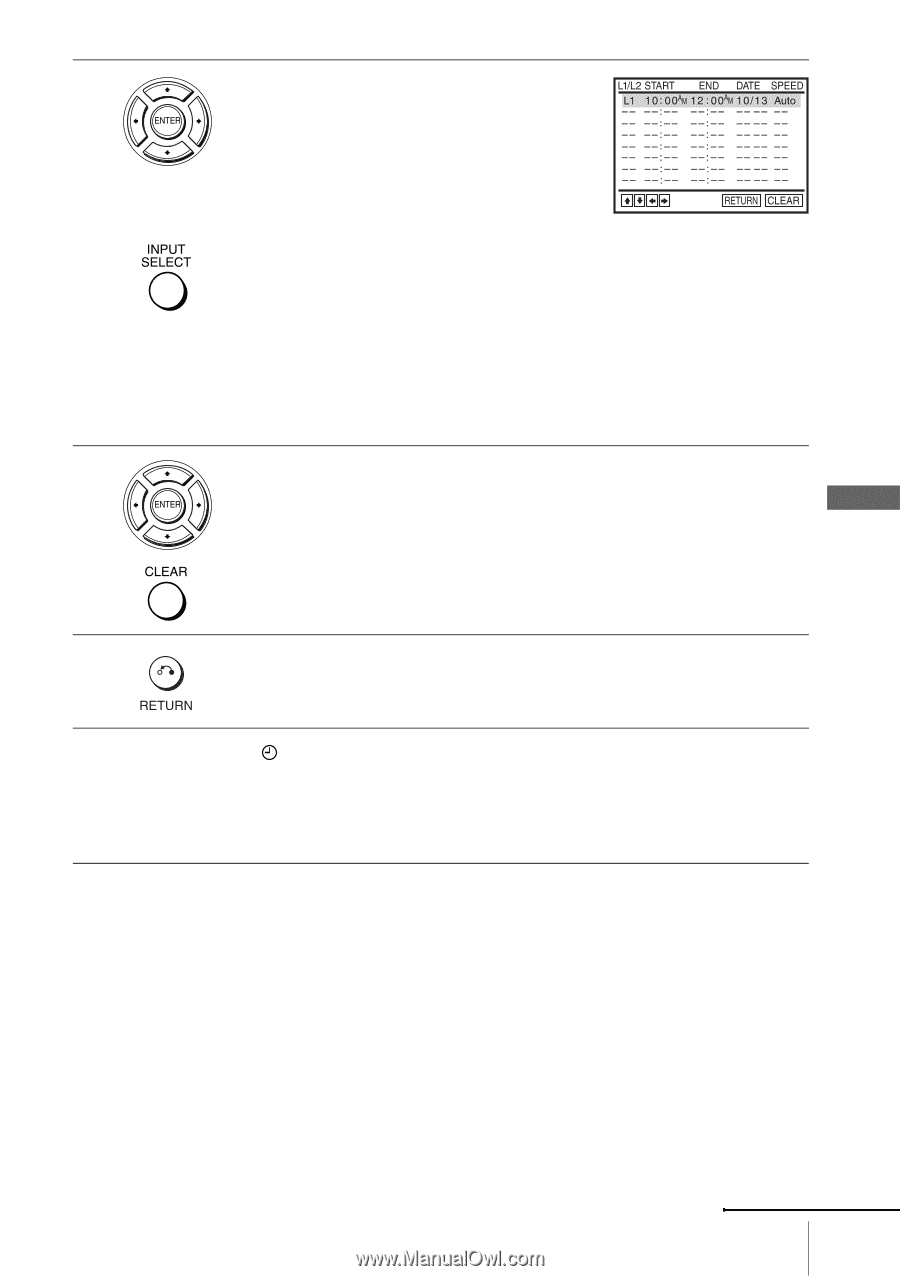
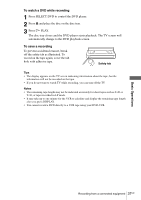
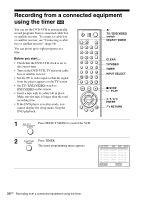
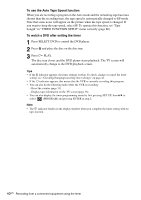
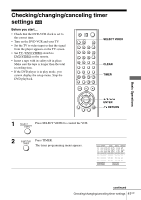
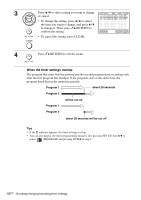
3 Set the line input (L1 or L2), start and stop times, date, and tape speed: 1 Press b to select each item in turn. 2 Press V/v to set each item. To correct a setting, press B to return to that setting and reset. • To select a source connected to the LINE IN 1 or LINE-2 IN jacks, press INPUT SELECT or V/v to display "L1" or "L2" in the "L1/L2" position. • To record the same program every day or the same day every week, press v while the date is flashing. For details, see "Daily/weekly recording" on page 39. • To use the Auto Tape Speed function, press v to display "Auto" in the "SPEED" position. For details, see "To use the Auto Tape Speed function" on page 40. 4 Press b to confirm the setting. To enter another setting, press V/v to select the next row and repeat step 3. Press CLEAR to cancel the setting. Basic Operations 5 Press O RETURN to exit the menu. 6 The indicator appears in the display window and the VCR stands by for recording. While recording, the connected cable box or satellite receiver turned on and do not change their channel you want to record. Timer recording will operate properly regardless if the DVD-VCR power is on or off. To stop recording To stop the DVD-VCR while recording, press SELECT VIDEO and then press x STOP. Daily/weekly recording In step 3, press v to select the recording pattern. Each time you press v, the indication changes as shown below. Press V to change the indication in reverse order. the current date t Daily t Mo~Sa t Mo~Fr tSun's t Mon's t ..... t Sat's t 1 month later t (dates count down) t the current date continued Recording from a connected equipment using the timer 39US
-
 1
1 -
2
-
3
-
4
-
5
-
6
-
7
-
8
-
9
-
10
-
11
-
12
-
13
-
14
-
15
-
16
-
17
-
18
-
19
-
20
-
21
-
22
-
23
-
24
-
25
-
26
-
27
-
28
-
29
-
30
-
31
-
32
-
33
-
 34
34 -
 35
35 -
 36
36 -
 37
37 -
 38
38 -
 39
39 -
 40
40 -
 41
41 -
 42
42 -
 43
43 -
 44
44 -
45
-
46
-
47
-
48
-
49
-
50
-
51
-
52
-
53
-
54
-
55
-
56
-
57
-
58
-
59
-
60
-
61
-
62
-
63
-
64
-
65
-
66
-
67
-
68
-
69
-
70
-
71
-
72
-
73
-
74
-
75
-
76
-
77
-
78
-
79
-
80
-
81
-
82
-
83
-
84
-
85
-
86
-
87
-
88
-
89
-
90
-
91
-
92
-
93
-
94
-
95
-
96
-
97
-
98
-
99
-
100
-
101
-
102
-
103
-
104
-
105
-
106
-
107
-
108
-
109
-
110
-
111
-
112
-
113
-
114
-
115
-
116
 |
 |