Sony STR-DA2100ES Operating Instructions for STRDA2100ES - Page 17
: Connecting the AC power cord, continued
 |
View all Sony STR-DA2100ES manuals
Add to My Manuals
Save this manual to your list of manuals |
Page 17 highlights
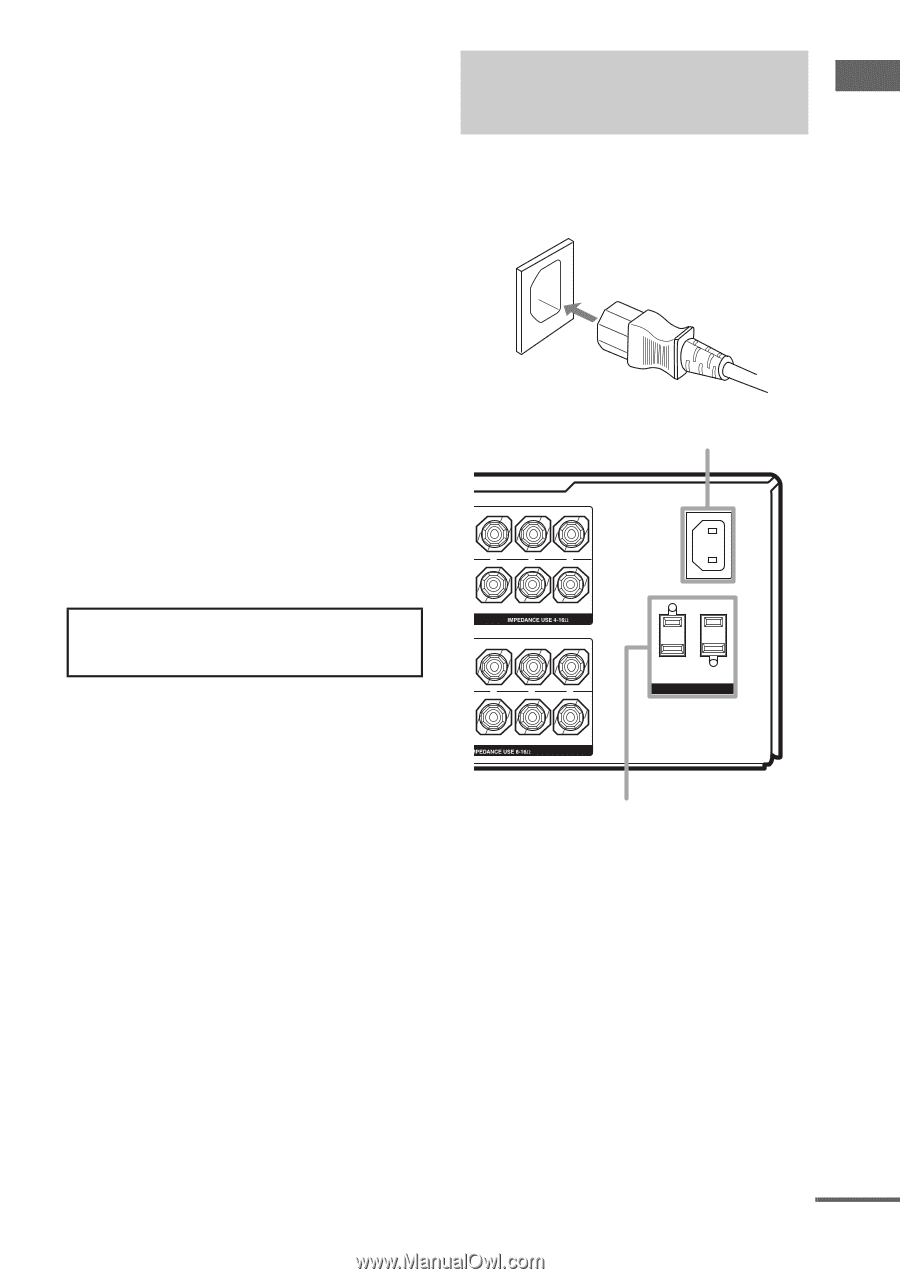
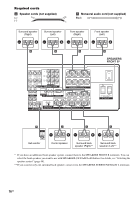
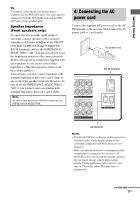
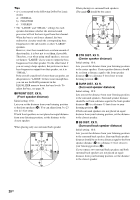
Getting Started Tip To connect certain speakers to another power amplifier, use the PRE OUT jacks. The same signal is output from both the SPEAKER jacks and the PRE OUT jacks (front speakers only). Speaker impedance (Front speakers only) To enjoy the best possible multi channel surround, connect speakers with a nominal impedance of 8 ohms or higher to the FRONT, CENTER, SURROUND and SURROUND BACK terminals, and set the IMPEDANCE SELECTOR to "8Ω". Use the screwdriver to set the impedance selector to the correct position. Refer to the operating instructions supplied with your speakers if you are not sure of their impedance. (This information is often on the back of the speaker.) Alternatively, you may connect speakers with nominal impedances between 4 and 8 ohms to any or all of the speaker terminals. However, be sure to set the IMPEDANCE SELECTOR to "4Ω" if you connect even one speaker with nominal impedance between 4 and 8 ohms. Note Be sure to turn the power off before adjusting the IMPEDANCE SELECTOR. 4: Connecting the AC power cord Connect the supplied AC power cord to the AC IN terminal on the receiver, then connect the AC power cord to a wall outlet. AC power cord FRONT A R - L - + R L FRONT B AKERS SURROUND R - L - + R L URROUND BACK (2ND ZONE) AC IN terminal SWITCHED 120W/1A MAX AC 120V 60Hz AC OUTLET AC OUTLET Notes • The AC OUTLET(s) on the rear of the receiver is a switched outlet, which supplies power to the connected component only while the receiver is turned on. • Make sure that the total power consumption of the component(s) connected to the receiver's AC OUTLET(s) does not exceed the wattage stated on the rear panel. Do not connect high-wattage electrical home appliances such as electric irons, fans, or TVs to this outlet. This may cause a malfunction. continued 17US
-
 1
1 -
2
-
3
-
4
-
5
-
6
-
7
-
8
-
9
-
10
-
11
-
 12
12 -
 13
13 -
 14
14 -
 15
15 -
 16
16 -
 17
17 -
 18
18 -
 19
19 -
 20
20 -
 21
21 -
 22
22 -
23
-
24
-
25
-
26
-
27
-
28
-
29
-
30
-
31
-
32
-
33
-
34
-
35
-
36
-
37
-
38
-
39
-
40
-
41
-
42
-
43
-
44
-
45
-
46
-
47
-
48
-
49
-
50
-
51
-
52
-
53
-
54
-
55
-
56
-
57
-
58
-
59
-
60
-
61
-
62
-
63
-
64
-
65
-
66
-
67
-
68
 |
 |