Sony STR-DA2100ES Operating Instructions for STRDA2100ES - Page 43
Custom install mode, INST. MODE RS232C control - remote manual
 |
View all Sony STR-DA2100ES manuals
Add to My Manuals
Save this manual to your list of manuals |
Page 43 highlights
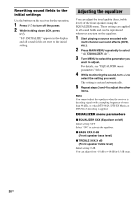
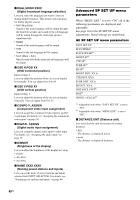
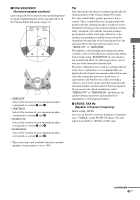
Advanced Adjustments and Settings Custom install mode This receiver features the custom install modes described below. Depending on how you intend to use these features, use of these modes may require additional equipment (available separately) or modification of your listening environment. Please consult the retailer where you purchased this receiver for more information. 1 Press MAIN MENU to select " CIS ". 2 Turn MENU to select the parameter. For details, see "CIS menu parameters" below. 3 Turn -/+ to select the setting you want. 4 Repeat steps 2 and 3 to adjust the other items. CIS menu parameters Initial settings are underlined. x ZONE-2 (2nd zone source) Lets you select the source signals (analog audio signals) you want to output in the 2nd zone (audio inputs except PHONO). When you select "SOURCE", the signals of the current input is output. Tips • Only signals from components connected to the analog input jacks are output through the 2ND ZONE jacks. No signal is output from components connected to only the digital input jacks. • When "SOURCE" is selected, the signals input to the MULTI CH IN jacks are not output from the 2ND ZONE jacks even when MULTI CH IN function is used. The 2 channel analog audio signals of the current input is output. x INST. MODE (RS232C control) • ON The receiver can receive commands from the RS232C port even when the power is off (standby mode). • OFF The receiver does not receive commands from the RS232C port when the power is off (standby mode). x 12V TRIG (12 V trigger) Lets you turn on or off the external equipment by outputting 12V trigger when the receiver is turned on or off. For example, you can automatically unroll your video screen when you turn on the receiver. • OFF Lets you turn off output of 12V triggers even when the main receiver is turned on. • CTRL Lets you turn on or off the output of 12V triggers manually by the CIS command of the IR remote or RS232C control. • ZONE Lets you turn on output of 12V triggers when the main receiver is turned on. • INPUT Lets you turn on output of 12V triggers when the main receiver is turned on, depending on the setting of each input. See "To set the 12V trigger setting for each input". To set the 12V trigger setting for each input The initial setting is "ON" for VIDEO 1, VIDEO 2, VIDEO 3, DVD, and TV/SAT, and "OFF" for other inputs. To set this setting, you can use only the controls on the front panel. 1 Select "INPUT" in "12V TRIG". 2 Press MEMORY/ENTER. 3 Turn MENU to select the input. 4 Turn -/+ to select "ON" to activate 12V trigger or select "OFF" to disactivate. 5 Press MEMORY/ENTER. 43US
-
 1
1 -
2
-
3
-
4
-
5
-
6
-
7
-
8
-
9
-
10
-
11
-
12
-
13
-
14
-
15
-
16
-
17
-
18
-
19
-
20
-
21
-
22
-
23
-
24
-
25
-
26
-
27
-
28
-
29
-
30
-
31
-
32
-
33
-
34
-
35
-
36
-
37
-
 38
38 -
 39
39 -
 40
40 -
 41
41 -
 42
42 -
 43
43 -
 44
44 -
 45
45 -
 46
46 -
 47
47 -
 48
48 -
49
-
50
-
51
-
52
-
53
-
54
-
55
-
56
-
57
-
58
-
59
-
60
-
61
-
62
-
63
-
64
-
65
-
66
-
67
-
68
 |
 |
