Sony XAV-622 Operating Instructions - Page 44
Optimizing sound for the listening position - Intelligent Time Alignment
 |
View all Sony XAV-622 manuals
Add to My Manuals
Save this manual to your list of manuals |
Page 44 highlights
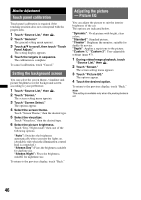
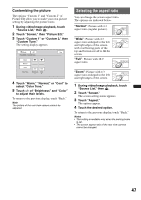
Optimizing sound for the listening position - Intelligent Time Alignment The unit can change the localization of sound by delaying the sound output from each speaker to suit your position, and simulate a natural sound field with the feeling of being in the center of it wherever you sit in the car. The options for "Listening Position" are indicated below. "Front L" (1): Front left "Front R" (2): Front right "Front" (3): Center front "All" (4): In the center of your car "Custom": Precisely calibrated position (page 44) "OFF": No position set 132 4 You can also set the approximate subwoofer position from your listening position if: - the subwoofer is connected and "Rear/Sub Out" is set to "Sub" (page 52). - the listening position is set to "Front L," "Front R," "Front," or "All." 1 During reception/playback, touch "Source List," then . 2 Touch "Sound." The sound setting menu appears. 3 Touch "Listening Position." The setting display appears. 4 Set the listening position. Touch "Front L," "Front R," "Front," "All," or "Custom." 5 Set the subwoofer position. If "Rear/Sub Out" is set to "Sub" (page 52) and you select "Front L," "Front R," "Front," or "All" in step 4 above, you can set the subwoofer position. Touch "Near," "Normal," or "Far." The setting is complete. To cancel Intelligent Time Alignment, select "OFF." To return to the previous display, touch "Back." Calibrating the listening position - Intelligent Time Alignment Tune You can precisely calibrate your listening position from each speaker so that the sound delay reaches the listener more correctly. Before starting, measure the distance between your listening position and each speaker. 1 During reception/playback, touch "Source List," then . 2 Touch "Sound," then "Listening Position." 3 Touch "Custom," then "Custom Tune." The setting display appears. Back ATT Top Position Tune 100 100 100 100 100 (cm) Reset OK Note The subwoofer appears and the subwoofer custom setting keys are available only when "Rear/Sub Out" is set to "Sub" (page 52). 4 Touch +/- of each speaker to set the distance between your listening position and the speakers. The distance is adjustable in 2 cm (13/16 in) steps, between 0 and 400 cm (0 and 13 1/10 ft). To restore the default setting, touch "Reset." 5 Touch "OK." The setting is complete. To return to the previous display, touch "Back." Note The setting is applied only after "OK" is touched. 44
-
 1
1 -
2
-
3
-
4
-
5
-
6
-
7
-
8
-
9
-
10
-
11
-
12
-
13
-
14
-
15
-
16
-
17
-
18
-
19
-
20
-
21
-
22
-
23
-
24
-
25
-
26
-
27
-
28
-
29
-
30
-
31
-
32
-
33
-
34
-
35
-
36
-
37
-
38
-
 39
39 -
 40
40 -
 41
41 -
 42
42 -
 43
43 -
 44
44 -
 45
45 -
 46
46 -
 47
47 -
 48
48 -
 49
49 -
50
-
51
-
52
-
53
-
54
-
55
-
56
-
57
-
58
-
59
-
60
-
61
-
62
-
63
-
64
-
65
-
66
-
67
-
68
-
69
-
70
-
71
-
72
-
73
-
74
-
75
-
76
-
77
-
78
-
79
-
80
-
81
-
82
-
83
-
84
-
85
-
86
-
87
-
88
-
89
-
90
-
91
-
92
-
93
-
94
-
95
-
96
-
97
-
98
-
99
-
100
-
101
-
102
-
103
-
104
-
105
-
106
-
107
-
108
-
109
-
110
-
111
-
112
-
113
-
114
-
115
-
116
-
117
-
118
-
119
-
120
-
121
-
122
-
123
-
124
-
125
-
126
-
127
-
128
-
129
-
130
-
131
-
132
-
133
-
134
-
135
-
136
-
137
-
138
-
139
-
140
-
141
-
142
-
143
-
144
-
145
-
146
-
147
-
148
-
149
-
150
-
151
-
152
-
153
-
154
-
155
-
156
-
157
-
158
-
159
-
160
-
161
-
162
-
163
-
164
-
165
-
166
-
167
-
168
-
169
-
170
-
171
-
172
-
173
-
174
-
175
-
176
-
177
-
178
-
179
-
180
-
181
-
182
-
183
-
184
-
185
-
186
-
187
-
188
-
189
-
190
-
191
-
192
-
193
-
194
-
195
-
196
-
197
-
198
-
199
-
200
-
201
-
202
-
203
-
204
-
205
-
206
-
207
-
208
-
209
-
210
-
211
-
212
-
213
-
214
-
215
-
216
-
217
-
218
-
219
-
220
-
221
-
222
-
223
-
224
-
225
-
226
-
227
-
228
 |
 |
