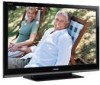
Toshiba 46XV645U Owner's Manual - English - Page 54
Using the Expert Mode, Using the ClearFrame™ feature, Using the MPEG NR feature, Using the DNR
 |
UPC - 022265002520
View all Toshiba 46XV645U manuals
Add to My Manuals
Save this manual to your list of manuals |
Page 54 highlights
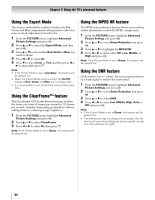
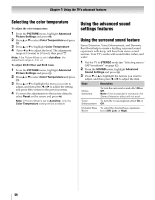
Chapter 7: Using the TV's advanced features Using the Expert Mode This feature individually enables/disables the Red, Green, and Blue components of the picture to allow for more accurate adjustment of each color. 1 From the PICTURE menu, highlight Advanced Picture Settings and press T. 2 Press B or b to select the Expert Mode, and then press T. 3 Press B or b to select either Red, Green or Blue you want to adjust. 4 Press C or c to select On. 5 Press b to select Color or Tint, and then press C or c to adjust then press O. Note: • If the Picture Mode is set to AutoView, this feature will be grayed out. • When the Expert Mode menu is exited, the On/Off modes of Red, Green and Blue are no longer valid. • It is not possible to turn off all three colors at the same time. Using the ClearFrame™ feature The ClearFrame 120 Hz anti-blur technology doubles the frame rate from 60 frames per second to 120 frames per second, virtually eliminating motion blur without adding flicker or reducing image brightness. 1 From the PICTURE menu, highlight Advanced Picture Settings and press T. 2 Press B or b to select ClearFrame. 3 Press C or c to select On, then press O. Note: If the Picture Mode is set to Game, this feature will be grayed out. Using the MPEG NR feature The MPEG noise reduction feature allows you to reduce visible interference caused by MPEG compression. 1 From the PICTURE menu, highlight Advanced Picture Setings and press T. 2 Press B or b to select Noise Reduction and press T. 3 Press B or b to highlight the MPEG NR. 4 Press C or c to select either Off, Low, Middle, or High and press T. Note: If the Picture Mode is set to Game, this feature will be grayed out. Using the DNR feature DNR enables you to "soften" the screen representation of a weak signal to reduce the noise effect. 1 From the PICTURE menu, highlight Advanced Picture Settings and press T. 2 Press B or b to select Noise Reduction and press T. 3 Press B or b to select DNR. 4 Press C or c to select Low, Middle, High, Auto or Off and press T. Note: • If the Picture Mode is set to Game, this feature will be grayed out. • The differences may not always be noticeable (for the best result use lower settings as picture quality can be lost if the setting is too high) 54
-
 1
1 -
2
-
3
-
4
-
5
-
6
-
7
-
8
-
9
-
10
-
11
-
12
-
13
-
14
-
15
-
16
-
17
-
18
-
19
-
20
-
21
-
22
-
23
-
24
-
25
-
26
-
27
-
28
-
29
-
30
-
31
-
32
-
33
-
34
-
35
-
36
-
37
-
38
-
39
-
40
-
41
-
42
-
43
-
44
-
45
-
46
-
47
-
48
-
 49
49 -
 50
50 -
 51
51 -
 52
52 -
 53
53 -
 54
54 -
 55
55 -
 56
56 -
 57
57 -
 58
58 -
 59
59 -
60
-
61
-
62
-
63
-
64
-
65
-
66
-
67
-
68
-
69
-
70
 |
 |