Toshiba D-R410 Owner's Manual - English - Page 63
Adjusting Black Level
 |
UPC - 022265001356
View all Toshiba D-R410 manuals
Add to My Manuals
Save this manual to your list of manuals |
Page 63 highlights
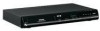
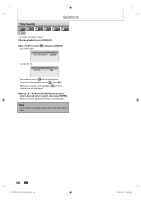
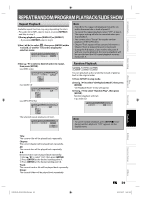
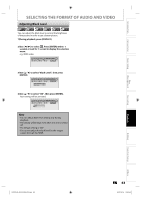
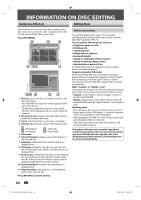
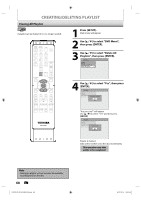
Introduction Connections Basic Setup SELECTING THE FORMAT OF AUDIO AND VIDEO Adjusting Black Level You can adjust the black level to control the brightness of the picture in order to get a better picture. 1)During playback, press [DISPLAY]. 2) Use [{ / B] to select . Press [ENTER] within 1 second, or wait for 1 second to display the selection menu. e.g.) DVD-video 1/ 5 1/ 5 0:01:00 / 1:23:45 DVD Video 3) Use [K / L] to select "Black Level", then press [ENTER]. 1/ 5 1/ 5 0:01:00 / 1:23:45 DVD Video Noise Reduction OFF Black Level OFF 4) Use [K / L] to select "ON", then press [ENTER]. Your setting will be activated. 1/ 5 1/ 5 OFF ON 0:01:00 / 1:23:45 DVD Video Note • You can adjust black level setting only during playback. • The setting will be kept even when the unit is turned off. • The default setting is "ON". • You cannot adjust the black level for the images output through the HDMI. Disc Management Recording Playback Editing Function Setup Others E7K7AUD_D-R410KU_EN.indd 63 EN 63 2007/12/14 15:03:40
-
 1
1 -
2
-
3
-
4
-
5
-
6
-
7
-
8
-
9
-
10
-
11
-
12
-
13
-
14
-
15
-
16
-
17
-
18
-
19
-
20
-
21
-
22
-
23
-
24
-
25
-
26
-
27
-
28
-
29
-
30
-
31
-
32
-
33
-
34
-
35
-
36
-
37
-
38
-
39
-
40
-
41
-
42
-
43
-
44
-
45
-
46
-
47
-
48
-
49
-
50
-
51
-
52
-
53
-
54
-
55
-
56
-
57
-
 58
58 -
 59
59 -
 60
60 -
 61
61 -
 62
62 -
 63
63 -
 64
64 -
 65
65 -
 66
66 -
 67
67 -
 68
68 -
69
-
70
-
71
-
72
-
73
-
74
-
75
-
76
-
77
-
78
-
79
-
80
-
81
-
82
-
83
-
84
-
85
-
86
-
87
-
88
-
89
-
90
-
91
-
92
-
93
-
94
-
95
-
96
-
97
-
98
-
99
-
100
-
101
 |
 |