Vizio E551VA E551VA User Manual - Page 18
Completing the First-Time Setup
 |
View all Vizio E551VA manuals
Add to My Manuals
Save this manual to your list of manuals |
Page 18 highlights
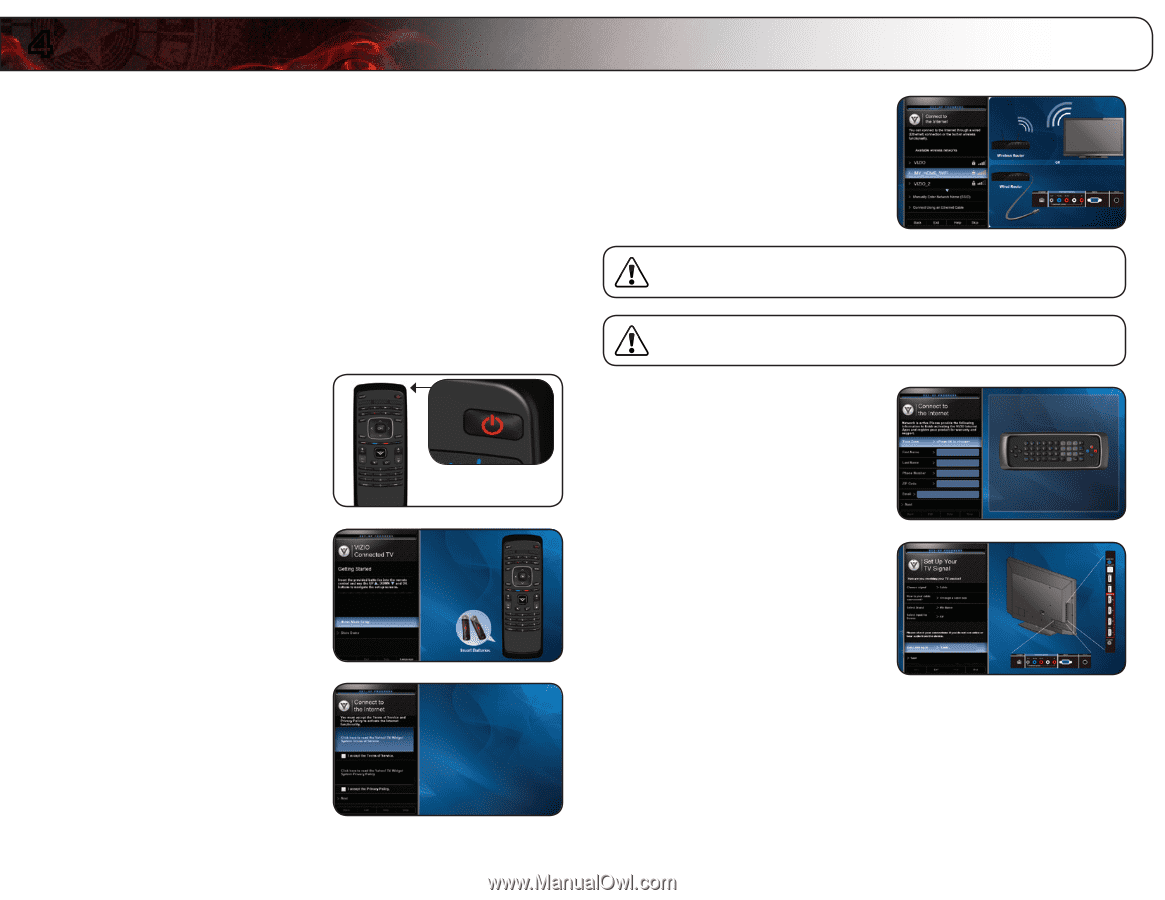
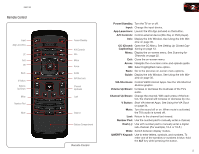
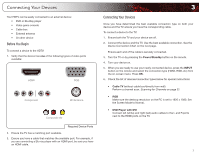
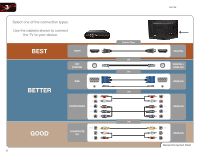
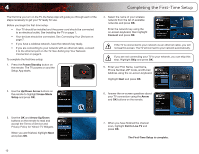
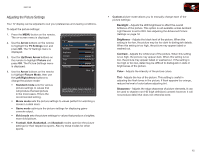
4 Completing the First-Time Setup The first time you turn on the TV, the Setup App will guide you through each of the steps necessary to get your TV ready for use. Before you begin the first-time setup: • Your TV should be installed and the power cord should be connected to an electrical outlet. See Installing the TV on page 1. • Your devices should be connected. See Connecting Your Devices on page 7. • If you have a wireless network, have the network key ready. • If you are connecting to your network with an ethernet cable, connect it to the ethernet port on the TV. See Setting Up Your Network Connection on page 9. To complete the first-time setup: 1. Press the Power/Standby button on the remote. The TV powers on and the Setup App starts. 4. Select the name of your wireless network from the list of available networks and press OK. Enter the network key using the on-screen keyboard, then highlight Connect and press OK. If the TV is connected to your network via an ethernet cable, you will not see this screen. The TV will connect to your network automatically. If you are not connecting your TV to your network, you can skip this step. Highlight Skip and press OK. 5. Enter your First Name, Last Name, Phone Number, ZIP Code, and E-mail Address using the on-screen keyboard. Highlight Next and press OK. 2. Use the Up/Down Arrow buttons on the remote to highlight Home Mode Setup and press OK. 6. Answer the on-screen questions about your TV connection using the Arrow and OK buttons on the remote. 3. Use the OK and Arrow Up/Down buttons on the remote to read and accept the Terms of Service and Privacy Policy for Yahoo! TV Widgets. When you are finished, highlight Next and press OK. 10 7. When you have finished the channel scan, highlight Exit to Live TV and press OK. The First-Time Setup is complete.
-
 1
1 -
2
-
3
-
4
-
5
-
6
-
7
-
8
-
9
-
10
-
11
-
12
-
 13
13 -
 14
14 -
 15
15 -
 16
16 -
 17
17 -
 18
18 -
 19
19 -
 20
20 -
 21
21 -
 22
22 -
 23
23 -
24
-
25
-
26
-
27
-
28
-
29
-
30
-
31
-
32
-
33
-
34
-
35
-
36
-
37
-
38
-
39
-
40
-
41
-
42
-
43
-
44
-
45
-
46
-
47
-
48
-
49
-
50
-
51
-
52
 |
 |