Vizio E551VA E551VA User Manual - Page 25
Arrow, Size & Position, Left/Right Arrow, Reset Picture Mode
 |
View all Vizio E551VA manuals
Add to My Manuals
Save this manual to your list of manuals |
Page 25 highlights
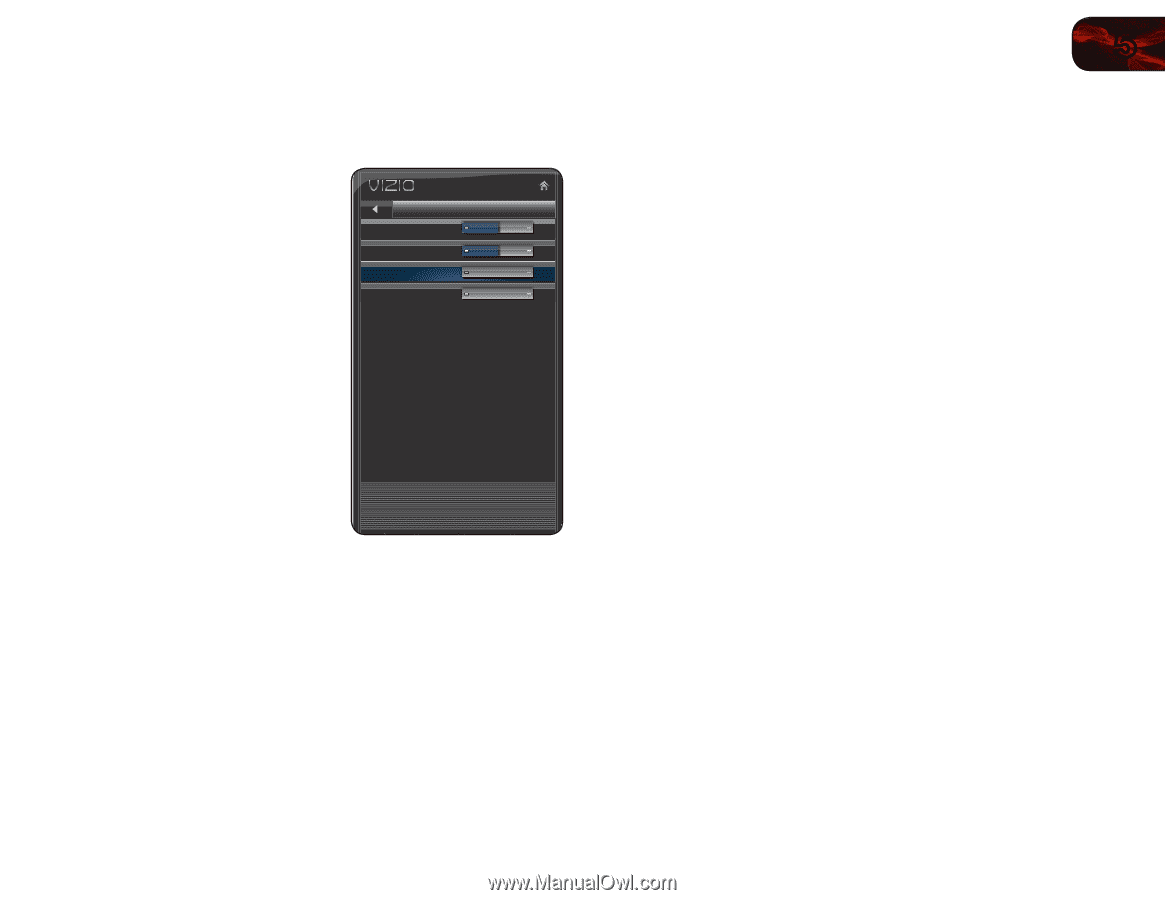
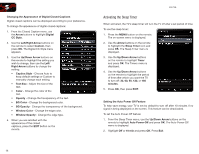
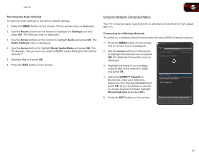
E551VA Adjusting the Picture Size and Position When displaying an image from the HDMI or RGB input, the size and position of the display image can be adjusted. To adjust the picture size and position: 1. Ensure the input is set to HDMI or Size & Position RGB. Horiz. Position 0 2. From the Picture Settings menu, use Vertical Position 0 the Arrow buttons on the remote to Horizontal Size 0 highlight More, then press OK. Vertical Size 0 3. Use the Arrow buttons on the remote to highlight Size & Position, then press OK. The Size & Position menu is displayed. 4. Use the Arrow buttons to highlight the setting you wish to adjust, then press Left/Right Arrow to change the setting: • Auto Adjust - Automatically adjusts display image to optimal size and position. (RGB input only.) Adjust the horizontal locaton of the displayed image • Horiz. Position - Adjusts the horizontal (left/right) position of the display image. • Vertical Position - Adjusts the vertical (up/down) position of the display image. • Horizontal Size - Adjusts the width of the display image. • Vertical Size - Adjusts the height of the display image. • Fine Tune - Adjusts the height of the display image. (RGB input only.) 5. When you have finished adjusting the color temperature, press the EXIT button on the remote. 5 Resetting the Picture Settings To reset the picture settings to the factory default settings: 1. From the Picture Settings menu, use the Arrow buttons to highlight More, then press OK. 2. Use the Arrow buttons on the remote to highlight Reset Picture Mode, then press OK. The TV displays, "Are you sure you want to RESET Picture Settings to the factory defaults?" 3. Highlight OK and press OK. 4. Press the EXIT button on the remote. 17
-
 1
1 -
2
-
3
-
4
-
5
-
6
-
7
-
8
-
9
-
10
-
11
-
12
-
13
-
14
-
15
-
16
-
17
-
18
-
19
-
 20
20 -
 21
21 -
 22
22 -
 23
23 -
 24
24 -
 25
25 -
 26
26 -
 27
27 -
 28
28 -
 29
29 -
 30
30 -
31
-
32
-
33
-
34
-
35
-
36
-
37
-
38
-
39
-
40
-
41
-
42
-
43
-
44
-
45
-
46
-
47
-
48
-
49
-
50
-
51
-
52
 |
 |