Vizio E551VA E551VA User Manual - Page 35
Arrow, Settings, Time & Local Settings, Time Zone, Daylight Savings, Postal Code, CEC Settings
 |
View all Vizio E551VA manuals
Add to My Manuals
Save this manual to your list of manuals |
Page 35 highlights
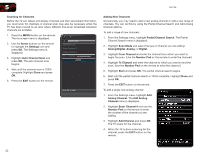
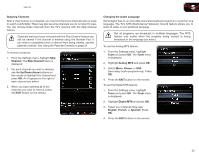
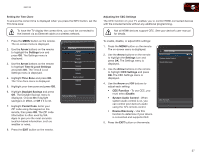
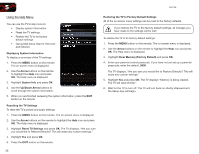
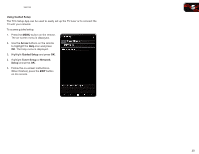
E551VA Setting the Time Zone To ensure the correct time is displayed when you press the INFO button, set the TV's time zone: To have the TV display the correct time, you must be connected to the internet via an Ethernet cable or a wireless network. 1. Press the MENU button on the remote. The on-screen menu is displayed. 2. Use the Arrow buttons on the remote to highlight the Settings icon and press OK. The Settings menu is displayed. 3. Use the Arrow buttons on the remote to highlight Time & Local Settings and press OK. The Time & Local Settings menu is displayed. 4. Highlight Time Zone and press OK. The Time Zone menu is displayed. 5. Highlight your time zone and press OK. 6. Highlight Daylight Savings and press OK. The Daylight Savings menu is displayed. Choose On if daylight savings is in effect, or Off if it is not. 7. Highlight Postal Code. Enter your ZIP code using the keypad on the remote, then press OK. The ZIP code information is often used by VIA Apps to give you the most accurate location-based information, such as weather or news. 8. Press the EXIT button on the remote. Time Zone Alaska Hawaii Pacific Mountain Central Eastern Atlantic Newfoundland Indiana Arizona Set your time zone 5 Adjusting the CEC Settings The CEC function on your TV enables you to control HDMI-connected devices with the included remote without any additional programming. Not all HDMI devices support CEC. See your device's user manual for details. To enable, disable, or adjust CEC settings: 1. Press the MENU button on the remote. The on-screen menu is displayed. CEC Settings 2. Use the Arrow buttons on the remote CEC Function On to highlight the Settings icon and press OK. The Settings menu is displayed. System Audio Control Off Device Discovery 3. Use the Arrow buttons on the remote to highlight CEC Settings and press OK. The CEC Settings menu is displayed. 4. Use the Arrow and OK buttons to adjust each setting: • CEC Function - To use CEC, you must select Enable. • System Audio Control - When system audio control is on, you can control your device's audio using the TV's remote control. • Device Discovery - Use this function to determine if your device is connected and supports CEC. CEC Function 5. Press the EXIT button on the remote. 27
-
 1
1 -
2
-
3
-
4
-
5
-
6
-
7
-
8
-
9
-
10
-
11
-
12
-
13
-
14
-
15
-
16
-
17
-
18
-
19
-
20
-
21
-
22
-
23
-
24
-
25
-
26
-
27
-
28
-
29
-
 30
30 -
 31
31 -
 32
32 -
 33
33 -
 34
34 -
 35
35 -
 36
36 -
 37
37 -
 38
38 -
 39
39 -
 40
40 -
41
-
42
-
43
-
44
-
45
-
46
-
47
-
48
-
49
-
50
-
51
-
52
 |
 |