Yamaha AW2816 Tutorial - Page 10
Mixdown, Step 1. Listen to the recorded tracks and make your plans, Step 1. Listen to the recorded
 |
View all Yamaha AW2816 manuals
Add to My Manuals
Save this manual to your list of manuals |
Page 10 highlights
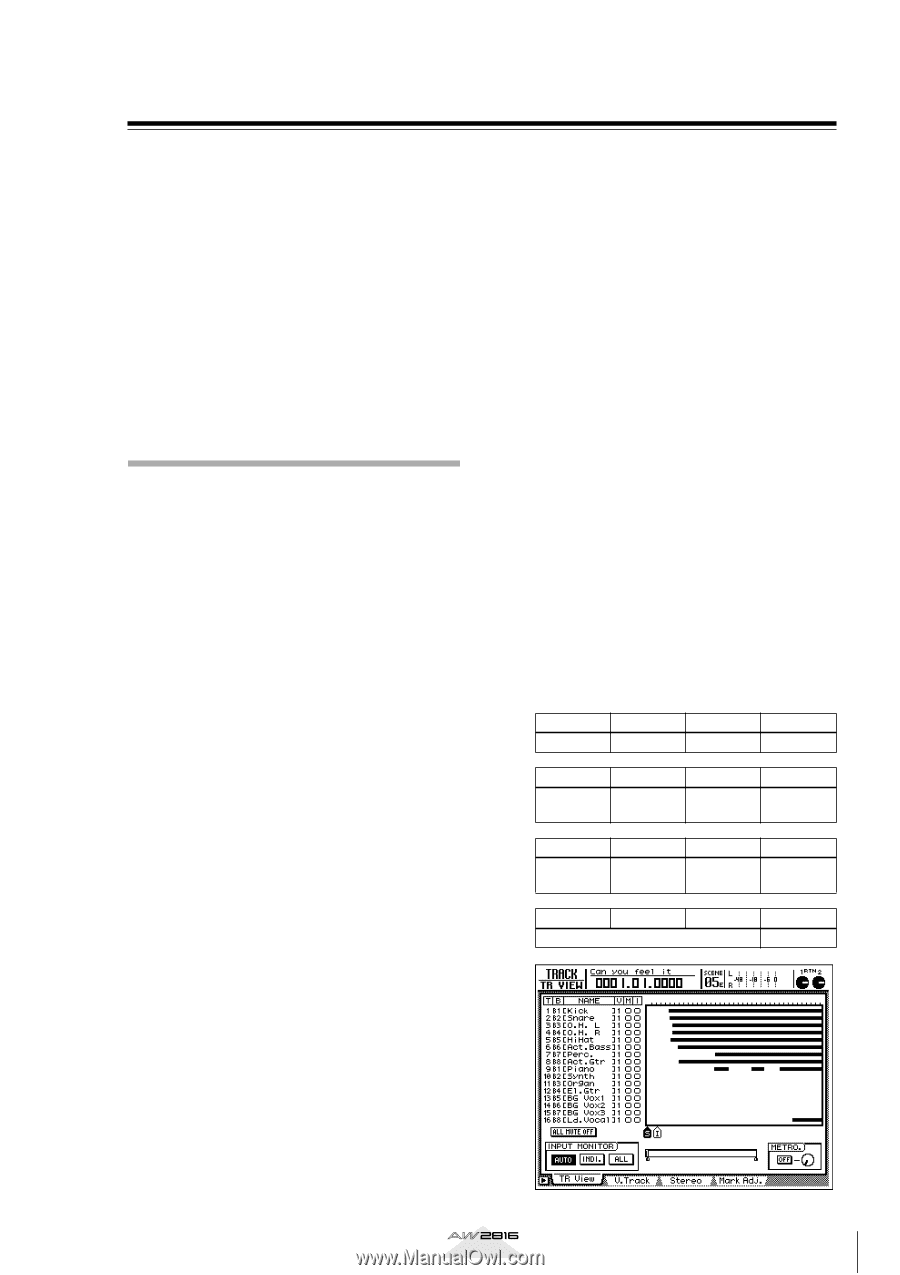
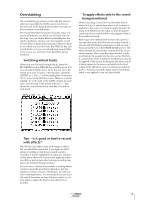
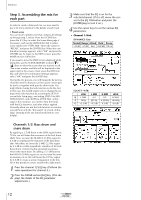
Mixdown "Mixdown" sounds like it refers to a single operation, but in reality, it is a sequence that consists of numerous processes. As you become more experienced, the various steps will blend together into one big process. It is important to keep this in mind, because you must be aware of the effect that even the smallest operation will have on the overall sound. For example if you use the equalizer to slightly modify the tonal character of one instrument, it will affect the way in which other instruments are heard. Through experience, you will gain the ability to predict the result of such changes. As you create more mixes, you will become better at it. Step 1. Listen to the recorded tracks and make your plans The most important step in mixing is to make plans in your mind before you actually begin mixing. Consider the following points. • Think about the music you intend to produce. What is the lyric content? What is the atmosphere you want to convey? How can you create a mix that enhances the music itself? • What is the defining characteristic of the song? The lyrics? The voice of the singer? The rhythm? A specific instrument or sound? You should emphasize the element that is most important. For example if the lyrics are important, you should avoid letting the vocal be buried in the background, or obscured by excessive reverb. • How are the instruments placed in the stereo field? Are you going to recreate the sound field of a life performance? Or are you trying to create a more abstract impression? • In what type of space do you want to place the music? An open and dry space? A spacious and reverberant space? Narrow and tight? Distant? Nearby? • Are there any instruments that share a similar frequency range and might conflict with each other? Distorted electric guitar and organ are good examples of this. Such instruments might be separated by being panned to left and right, or you might use the equalizer to give each instrument its own distinct identity, skillfully bringing out the unique character of each instrument. • Will you need to change moods or scenes to create significant shifts in level, equalizer, or effects during the mix? By using automation, even such complex mixes can be easily performed. These are just a few examples, but as you gain experience, you will learn how to make a good mixing plan for each song. s Let's begin Now that the song has been restored to the hard disk, let's listen to the "unmixed" song. Before you proceed, you must be sure to turn AUTOMIX off. In the AUTOMATION section, press the [AUTOMIX] key. In the AUTOMIX area, move the cursor to the ENABLE button and press the [ENTER] key to set AUTOMIX to DISABLE (off). 1 Make sure that in the MIXING LAYER section, "1-8" or "9-16" is selected. 2 Recall scene number 01 "FADERS NOMINAL" to set faders 1-16 to the nominal level. (Press the [SCENE] key, and use the [DATA/JOG] dial to select scene number 01 "FADER NOMINAL," move the cursor to the RECALL button, and press the [ENTER] key. Then select "OK" and press the [ENTER] key to confirm.) 3 Press the MIXER section [VIEW] key to access the parameters for the selected monitor channel. Press [F1] to access the CH View page. 4 Press the [PLAY] key, and listen to the tracks. The following table shows the track contents of the included demo song. 1 2 3 4 Kick Snare Overhead (L) Overhead (R) 5 Hi-hat 6 Acoustic bass 7 Percussion 8 Acoustic guitar 9 Piano 10 Synth 11 Organ 12 Electric guitar 13 14 15 16 (Chorus) 16 Vocal Tutorial 9
-
 1
1 -
2
-
3
-
4
-
 5
5 -
 6
6 -
 7
7 -
 8
8 -
 9
9 -
 10
10 -
 11
11 -
 12
12 -
 13
13 -
 14
14 -
 15
15 -
16
-
17
-
18
-
19
-
20
-
21
-
22
-
23
-
24
-
25
-
26
-
27
-
28
-
29
-
30
-
31
 |
 |