Acer S520 User Manual - Page 40
AcerCloud options, PicStream, Make this PC the Cloud PC, Important, AcerCloud Docs Upload
 |
View all Acer S520 manuals
Add to My Manuals
Save this manual to your list of manuals |
Page 40 highlights
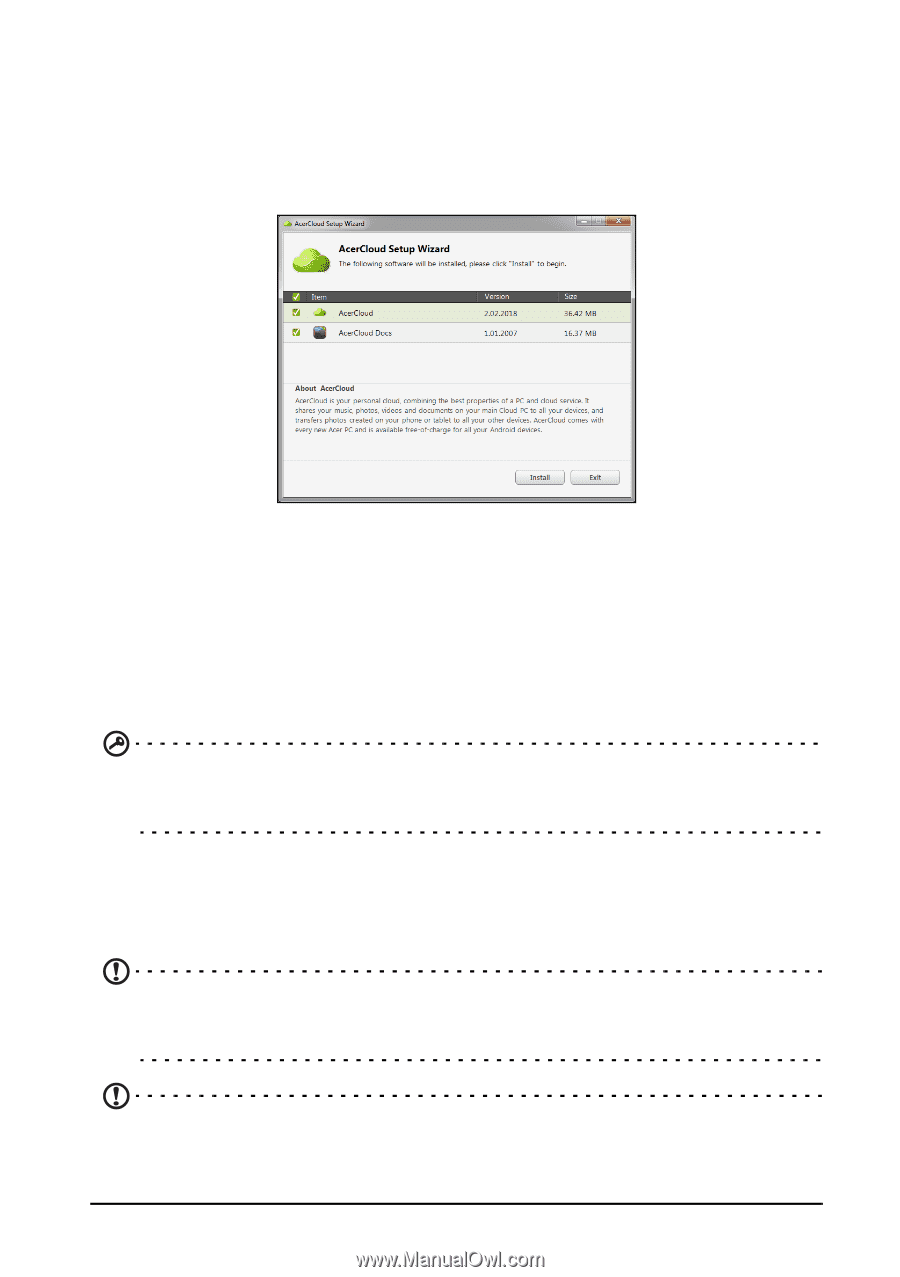
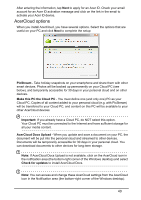
After entering the information, tap Next to apply for an Acer ID. Check your email account for an Acer ID activation message and click on the link in the email to activate your Acer ID device. AcerCloud options When you install AcerCloud, you have several options. Select the options that are useful on your PC and click Next to complete the setup: PicStream - Take holiday snapshots on your smartphone and share them with other smart devices. Photos will be backed up permanently on your Cloud PC (see below), and temporarily accessible for 30 days in your personal cloud and on other devices. Make this PC the Cloud PC - You must define one (and only one) PC as your Cloud PC. Copies of all content added to your personal cloud (e.g. with PicStream) will be transfered to your Cloud PC, and content on this PC will be available to your other AcerCloud devices. Important: If you already have a Cloud PC, do NOT select this option. Your Cloud PC must be connected to the Internet and have sufficient storage for all your media content. AcerCloud Docs Upload - When you update and save a document on your PC, the document will be put into the personal cloud and streamed to other devices. Documents will be temporarily accessible for 30 days in your personal cloud. You can download documents to other devices for long-term storage. Note: If AcerCloud Docs Upload is not available, click on the AcerCloud icon in the notification area (the bottom-right corner of the Windows desktop) and select Check for updates to install AcerCloud Docs. Note: You can access and change these AcerCloud settings from the AcerCloud icon in the Notification area (the bottom-right corner of the Windows desktop). 40
-
 1
1 -
2
-
3
-
4
-
5
-
6
-
7
-
8
-
9
-
10
-
11
-
12
-
13
-
14
-
15
-
16
-
17
-
18
-
19
-
20
-
21
-
22
-
23
-
24
-
25
-
26
-
27
-
28
-
29
-
30
-
31
-
32
-
33
-
34
-
 35
35 -
 36
36 -
 37
37 -
 38
38 -
 39
39 -
 40
40 -
 41
41 -
 42
42 -
 43
43 -
 44
44 -
 45
45 -
46
-
47
-
48
-
49
-
50
-
51
-
52
-
53
-
54
-
55
-
56
-
57
-
58
-
59
-
60
-
61
-
62
-
63
-
64
-
65
-
66
-
67
-
68
-
69
-
70
 |
 |