Adobe 23101335 User Guide - Page 372

Saving files in Photoshop PDF format, Photoshop, Choose File > Save As and choose Photoshop

Page 372 highlights

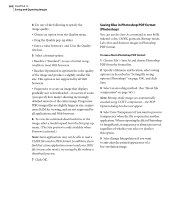
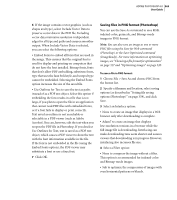
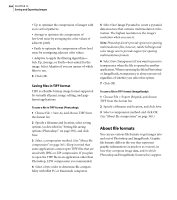
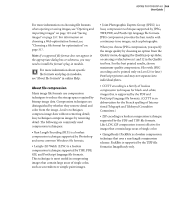
362 CHAPTER 13 Saving and Exporting Images 4 Do one of the following to specify the image quality: • Choose an option from the Quality menu. • Drag the Quality pop-up slider. • Enter a value between 1 and 12 in the Quality text box. 5 Select a format option: • Baseline ("Standard") to use a format recognizable to most Web browsers. • Baseline Optimized to optimize the color quality of the image and produce a slightly smaller file size. This option is not supported by all Web browsers. • Progressive to create an image that displays gradually as it is downloaded-in a series of scans (you specify how many) showing increasingly detailed versions of the entire image. Progressive JPEG images files are slightly larger in size, require more RAM for viewing, and are not supported by all applications and Web browsers. 6 To view the estimated download time of the image, select a modem speed from the Size pop-up menu. (The Size preview is only available when Preview is selected.) Note: Some applications may not be able to read a CMYK file saved in JPEG format. In addition, if you find that a Java application cannot read your JPEG file (in any color mode), try saving the file without a thumbnail preview. 7 Click OK. Saving files in Photoshop PDF format (Photoshop) You can use the Save As command to save RGB, indexed-color, CMYK, grayscale, Bitmap-mode, Lab color, and duotone images in Photoshop PDF format. To save a file in Photoshop PDF format: 1 Choose File > Save As and choose Photoshop PDF from the format list. 2 Specify a filename and location, select saving options (as described in "Setting file saving options (Photoshop)" on page 358), and click Save. 3 Select an encoding method. (See "About file compression" on page 365.) Note: Bitmap-mode images are automatically encoded using CCITT compression-the PDF Options dialog box does not appear. 4 Select Save Transparency if you want to preserve transparency when the file is opened in another application. When reopening the file in Photoshop or ImageReady, transparency is always preserved, regardless of whether you select or deselect this option. 5 Select Image Interpolation if you want to anti-alias the printed appearance of a low-resolution image.

  • 1
  • 2
  • 3
  • 4
  • 5
  • 6
  • 7
  • 8
  • 9
  • 10
  • 11
  • 12
  • 13
  • 14
  • 15
  • 16
  • 17
  • 18
  • 19
  • 20
  • 21
  • 22
  • 23
  • 24
  • 25
  • 26
  • 27
  • 28
  • 29
  • 30
  • 31
  • 32
  • 33
  • 34
  • 35
  • 36
  • 37
  • 38
  • 39
  • 40
  • 41
  • 42
  • 43
  • 44
  • 45
  • 46
  • 47
  • 48
  • 49
  • 50
  • 51
  • 52
  • 53
  • 54
  • 55
  • 56
  • 57
  • 58
  • 59
  • 60
  • 61
  • 62
  • 63
  • 64
  • 65
  • 66
  • 67
  • 68
  • 69
  • 70
  • 71
  • 72
  • 73
  • 74
  • 75
  • 76
  • 77
  • 78
  • 79
  • 80
  • 81
  • 82
  • 83
  • 84
  • 85
  • 86
  • 87
  • 88
  • 89
  • 90
  • 91
  • 92
  • 93
  • 94
  • 95
  • 96
  • 97
  • 98
  • 99
  • 100
  • 101
  • 102
  • 103
  • 104
  • 105
  • 106
  • 107
  • 108
  • 109
  • 110
  • 111
  • 112
  • 113
  • 114
  • 115
  • 116
  • 117
  • 118
  • 119
  • 120
  • 121
  • 122
  • 123
  • 124
  • 125
  • 126
  • 127
  • 128
  • 129
  • 130
  • 131
  • 132
  • 133
  • 134
  • 135
  • 136
  • 137
  • 138
  • 139
  • 140
  • 141
  • 142
  • 143
  • 144
  • 145
  • 146
  • 147
  • 148
  • 149
  • 150
  • 151
  • 152
  • 153
  • 154
  • 155
  • 156
  • 157
  • 158
  • 159
  • 160
  • 161
  • 162
  • 163
  • 164
  • 165
  • 166
  • 167
  • 168
  • 169
  • 170
  • 171
  • 172
  • 173
  • 174
  • 175
  • 176
  • 177
  • 178
  • 179
  • 180
  • 181
  • 182
  • 183
  • 184
  • 185
  • 186
  • 187
  • 188
  • 189
  • 190
  • 191
  • 192
  • 193
  • 194
  • 195
  • 196
  • 197
  • 198
  • 199
  • 200
  • 201
  • 202
  • 203
  • 204
  • 205
  • 206
  • 207
  • 208
  • 209
  • 210
  • 211
  • 212
  • 213
  • 214
  • 215
  • 216
  • 217
  • 218
  • 219
  • 220
  • 221
  • 222
  • 223
  • 224
  • 225
  • 226
  • 227
  • 228
  • 229
  • 230
  • 231
  • 232
  • 233
  • 234
  • 235
  • 236
  • 237
  • 238
  • 239
  • 240
  • 241
  • 242
  • 243
  • 244
  • 245
  • 246
  • 247
  • 248
  • 249
  • 250
  • 251
  • 252
  • 253
  • 254
  • 255
  • 256
  • 257
  • 258
  • 259
  • 260
  • 261
  • 262
  • 263
  • 264
  • 265
  • 266
  • 267
  • 268
  • 269
  • 270
  • 271
  • 272
  • 273
  • 274
  • 275
  • 276
  • 277
  • 278
  • 279
  • 280
  • 281
  • 282
  • 283
  • 284
  • 285
  • 286
  • 287
  • 288
  • 289
  • 290
  • 291
  • 292
  • 293
  • 294
  • 295
  • 296
  • 297
  • 298
  • 299
  • 300
  • 301
  • 302
  • 303
  • 304
  • 305
  • 306
  • 307
  • 308
  • 309
  • 310
  • 311
  • 312
  • 313
  • 314
  • 315
  • 316
  • 317
  • 318
  • 319
  • 320
  • 321
  • 322
  • 323
  • 324
  • 325
  • 326
  • 327
  • 328
  • 329
  • 330
  • 331
  • 332
  • 333
  • 334
  • 335
  • 336
  • 337
  • 338
  • 339
  • 340
  • 341
  • 342
  • 343
  • 344
  • 345
  • 346
  • 347
  • 348
  • 349
  • 350
  • 351
  • 352
  • 353
  • 354
  • 355
  • 356
  • 357
  • 358
  • 359
  • 360
  • 361
  • 362
  • 363
  • 364
  • 365
  • 366
  • 367
  • 368
  • 369
  • 370
  • 371
  • 372
  • 373
  • 374
  • 375
  • 376
  • 377
  • 378
  • 379
  • 380
  • 381
  • 382
  • 383
  • 384
  • 385
  • 386
  • 387
  • 388
  • 389
  • 390
  • 391
  • 392
  • 393
  • 394
  • 395
  • 396
  • 397
  • 398
  • 399
  • 400
  • 401
  • 402
  • 403
  • 404
  • 405
  • 406
  • 407
  • 408
  • 409
  • 410
  • 411
  • 412
  • 413
  • 414
  • 415
  • 416
  • 417
  • 418
  • 419
  • 420
  • 421
  • 422
  • 423
  • 424
  • 425
  • 426
  • 427
  • 428
  • 429
  • 430
  • 431
  • 432
  • 433
  • 434
  • 435
  • 436
  • 437
  • 438
  • 439
  • 440
  • 441
  • 442
  • 443
  • 444
  • 445
  • 446
  • 447
  • 448

CHAPTER 13
362
Saving and Exporting Images
4
Do one of the following to specify the
image quality:
Choose an option from the Quality menu.
Drag the Quality pop-up slider.
Enter a value between 1 and 12 in the Quality
text box.
5
Select a format option:
Baseline (“Standard”) to use a format recog-
nizable to most Web browsers.
Baseline Optimized to optimize the color quality
of the image and produce a slightly smaller file
size. This option is not supported by all Web
browsers.
Progressive to create an image that displays
gradually as it is downloaded—in a series of scans
(you specify how many) showing increasingly
detailed versions of the entire image. Progressive
JPEG images files are slightly larger in size, require
more RAM for viewing, and are not supported by
all applications and Web browsers.
6
To view the estimated download time of the
image, select a modem speed from the Size pop-up
menu. (The Size preview is only available when
Preview is selected.)
Note:
Some applications may not be able to read a
CMYK
le saved in JPEG format. In addition, if you
nd that a Java application cannot read your JPEG
le (in any color mode), try saving the
le without a
thumbnail preview.
7
Click OK.
Saving files in Photoshop PDF format
(Photoshop)
You can use the Save As command to save RGB,
indexed-color, CMYK, grayscale, Bitmap-mode,
Lab color, and duotone images in Photoshop
PDF format.
To save a file in Photoshop PDF format:
1
Choose File > Save As and choose Photoshop
PDF from the format list.
2
Specify a filename and location, select saving
options (as described in “Setting file saving
options (Photoshop)” on page 358), and click
Save.
3
Select an encoding method. (See “About file
compression” on page 365.)
Note:
Bitmap-mode images are automatically
encoded using CCITT compression
the PDF
Options dialog box does not appear.
4
Select Save Transparency if you want to preserve
transparency when the file is opened in another
application. When reopening the file in Photoshop
or ImageReady, transparency is always preserved,
regardless of whether you select or deselect
this option.
5
Select Image Interpolation if you want
to anti-alias the printed appearance of a
low-resolution image.