Adobe 23101335 User Guide - Page 379
Placing Photoshop images in other applications (Photoshop), Using image clipping paths
 |
UPC - 718659152833
View all Adobe 23101335 manuals
Add to My Manuals
Save this manual to your list of manuals |
Page 379 highlights
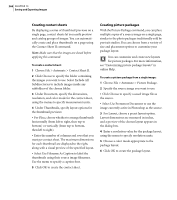
ADOBE PHOTOSHOP 6.0 369 User Guide Placing Photoshop images in other applications (Photoshop) Photoshop provides a number of features to help you use images in other applications. You can use image clipping paths to define transparent areas in images you place in page-layout applications. In addition, Mac OS users can embed Photoshop images in many word-processor files. For assistance with image clipping paths, choose Help > Export Transparent Image. This interactive wizard helps you prepare images with transparency for export to a page-layout application. Using image clipping paths When printing a Photoshop image or placing it in another application, you may want only part of the image to appear. For example, you may want to print or show a foreground object and exclude its rectangular background. An image clipping path lets you isolate the foreground object and make everything outside the object transparent when the image is printed or placed in another application. This lets you place an image into another file without obscuring the other file's background. To save a path as an image clipping path: 1 Draw and save a path or convert an existing selection into a path. 2 Choose Clipping Path from the Paths palette menu. 3 For Path, choose the path you want to save. 4 For good results with most images, leave the flatness value blank to print the image using the printer's default value. If you experience printing errors, enter a new flatness value. Values can range from 0.2 to 100. In general, a flatness setting from 8 to 10 is recommended for high-resolution printing (1200 dpi to 2400 dpi), a setting from 1 to 3 for low-resolution printing (300 dpi to 600 dpi). The PostScript interpreter creates curved segments by linking a series of straight line segments. The flatness setting for a clipping path determines how closely the straight line segments approximate the curve. The lower the flatness value, the greater is the number of straight lines used to draw the curve and the more accurate the curve. 5 Click OK. If you plan to print the file using process colors, convert the file to CMYK mode. (See "Converting between color modes (Photoshop)" on page 117.) Image imported into Illustrator without image clipping path, and with image clipping path
-
 1
1 -
2
-
3
-
4
-
5
-
6
-
7
-
8
-
9
-
10
-
11
-
12
-
13
-
14
-
15
-
16
-
17
-
18
-
19
-
20
-
21
-
22
-
23
-
24
-
25
-
26
-
27
-
28
-
29
-
30
-
31
-
32
-
33
-
34
-
35
-
36
-
37
-
38
-
39
-
40
-
41
-
42
-
43
-
44
-
45
-
46
-
47
-
48
-
49
-
50
-
51
-
52
-
53
-
54
-
55
-
56
-
57
-
58
-
59
-
60
-
61
-
62
-
63
-
64
-
65
-
66
-
67
-
68
-
69
-
70
-
71
-
72
-
73
-
74
-
75
-
76
-
77
-
78
-
79
-
80
-
81
-
82
-
83
-
84
-
85
-
86
-
87
-
88
-
89
-
90
-
91
-
92
-
93
-
94
-
95
-
96
-
97
-
98
-
99
-
100
-
101
-
102
-
103
-
104
-
105
-
106
-
107
-
108
-
109
-
110
-
111
-
112
-
113
-
114
-
115
-
116
-
117
-
118
-
119
-
120
-
121
-
122
-
123
-
124
-
125
-
126
-
127
-
128
-
129
-
130
-
131
-
132
-
133
-
134
-
135
-
136
-
137
-
138
-
139
-
140
-
141
-
142
-
143
-
144
-
145
-
146
-
147
-
148
-
149
-
150
-
151
-
152
-
153
-
154
-
155
-
156
-
157
-
158
-
159
-
160
-
161
-
162
-
163
-
164
-
165
-
166
-
167
-
168
-
169
-
170
-
171
-
172
-
173
-
174
-
175
-
176
-
177
-
178
-
179
-
180
-
181
-
182
-
183
-
184
-
185
-
186
-
187
-
188
-
189
-
190
-
191
-
192
-
193
-
194
-
195
-
196
-
197
-
198
-
199
-
200
-
201
-
202
-
203
-
204
-
205
-
206
-
207
-
208
-
209
-
210
-
211
-
212
-
213
-
214
-
215
-
216
-
217
-
218
-
219
-
220
-
221
-
222
-
223
-
224
-
225
-
226
-
227
-
228
-
229
-
230
-
231
-
232
-
233
-
234
-
235
-
236
-
237
-
238
-
239
-
240
-
241
-
242
-
243
-
244
-
245
-
246
-
247
-
248
-
249
-
250
-
251
-
252
-
253
-
254
-
255
-
256
-
257
-
258
-
259
-
260
-
261
-
262
-
263
-
264
-
265
-
266
-
267
-
268
-
269
-
270
-
271
-
272
-
273
-
274
-
275
-
276
-
277
-
278
-
279
-
280
-
281
-
282
-
283
-
284
-
285
-
286
-
287
-
288
-
289
-
290
-
291
-
292
-
293
-
294
-
295
-
296
-
297
-
298
-
299
-
300
-
301
-
302
-
303
-
304
-
305
-
306
-
307
-
308
-
309
-
310
-
311
-
312
-
313
-
314
-
315
-
316
-
317
-
318
-
319
-
320
-
321
-
322
-
323
-
324
-
325
-
326
-
327
-
328
-
329
-
330
-
331
-
332
-
333
-
334
-
335
-
336
-
337
-
338
-
339
-
340
-
341
-
342
-
343
-
344
-
345
-
346
-
347
-
348
-
349
-
350
-
351
-
352
-
353
-
354
-
355
-
356
-
357
-
358
-
359
-
360
-
361
-
362
-
363
-
364
-
365
-
366
-
367
-
368
-
369
-
370
-
371
-
372
-
373
-
 374
374 -
 375
375 -
 376
376 -
 377
377 -
 378
378 -
 379
379 -
 380
380 -
 381
381 -
 382
382 -
 383
383 -
 384
384 -
385
-
386
-
387
-
388
-
389
-
390
-
391
-
392
-
393
-
394
-
395
-
396
-
397
-
398
-
399
-
400
-
401
-
402
-
403
-
404
-
405
-
406
-
407
-
408
-
409
-
410
-
411
-
412
-
413
-
414
-
415
-
416
-
417
-
418
-
419
-
420
-
421
-
422
-
423
-
424
-
425
-
426
-
427
-
428
-
429
-
430
-
431
-
432
-
433
-
434
-
435
-
436
-
437
-
438
-
439
-
440
-
441
-
442
-
443
-
444
-
445
-
446
-
447
-
448
 |
 |
