Asus P2-99B P2-99B User Manual - Page 79
Using the ASUS DMI Configuration Utility, Notes
 |
View all Asus P2-99B manuals
Add to My Manuals
Save this manual to your list of manuals |
Page 79 highlights
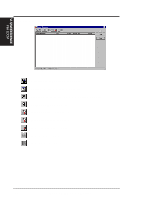
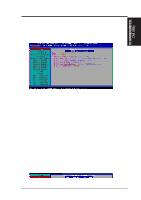
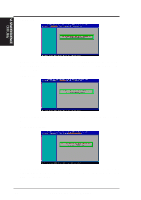
VI. S/W REFERENCE DMI Utility VI. SOFTWARE REFERENCE Using the ASUS DMI Configuration Utility NOTE: The following screen displays are provided as examples only and may not reflect the screen contents on your system. Edit DMI (or delete) Use the ←→ (left-right) cursors to move the top menu items and the ↑↓ (up-down) cursor to move between the left hand menu items. The bottom of the screen will show the available keys for each screen. Press enter at the menu item to enter the right hand screen for editing. "Edit component" appears on top. The reversed color field is the current cursor position and the blue text are available for editing. The orange text shows auto-detected information and are not available for editing. The blue text "Press [ENTER] for detail" contains a second pop-up menu is available, use the + - (plus-minus) keys to change the settings. Enter to exit and save, ESC to exit and not save. If the user has made changes, ESC will prompt you to answer Y or N. Enter Y to go back to the left-hand screen and save, enter N to go back to left-hand screen and not save. If editing has not been made, ESC will send you back to the left hand menu without any messages. Notes A heading, *** BIOS Auto Detect ***, appears on the right for each menu item on the left side that has been auto detected by the system BIOS. A heading, *** User Modified ***, will appear on the right for menu items that have been modified by the user. ASUS P2-99B User's Manual 79
-
 1
1 -
2
-
3
-
4
-
5
-
6
-
7
-
8
-
9
-
10
-
11
-
12
-
13
-
14
-
15
-
16
-
17
-
18
-
19
-
20
-
21
-
22
-
23
-
24
-
25
-
26
-
27
-
28
-
29
-
30
-
31
-
32
-
33
-
34
-
35
-
36
-
37
-
38
-
39
-
40
-
41
-
42
-
43
-
44
-
45
-
46
-
47
-
48
-
49
-
50
-
51
-
52
-
53
-
54
-
55
-
56
-
57
-
58
-
59
-
60
-
61
-
62
-
63
-
64
-
65
-
66
-
67
-
68
-
69
-
70
-
71
-
72
-
73
-
 74
74 -
 75
75 -
 76
76 -
 77
77 -
 78
78 -
 79
79 -
 80
80 -
 81
81 -
 82
82 -
 83
83 -
 84
84 -
85
-
86
-
87
-
88
-
89
-
90
-
91
-
92
-
93
-
94
-
95
-
96
 |
 |
