Asus P5W User Manual - Page 173
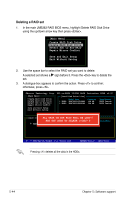
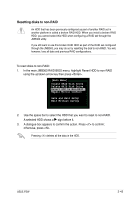
Building a RAID 1 set for the first time
 |
View all Asus P5W manuals
Add to My Manuals
Save this manual to your list of manuals |
Page 173 highlights
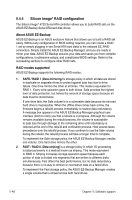
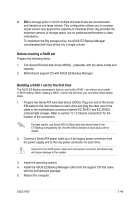
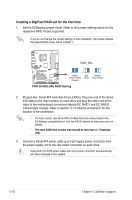
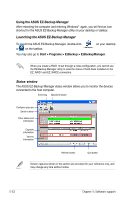
3. BIG is storage policy in which multiple physical drives are concatenated and treated as one large volume. This configuration allows you to increase virtual volume size beyond the capacity of individual drives. Big provides the maximum amount of storage space, but no additional performance or data redundancy. To implement the Big storage policy, the ASUS EZ-Backup Manager concatenates both hard drives into a single volume. . Before creating a RAID set Prepare the following items: 1. Two Serial ATA hard disk drives (HDDs)., preferably with the same model and capacity. 2. Motherboard support CD with ASUS EZ-Backup Manager Building a RAID 1 set for the first time The ASUS EZ-Backup advantage is that you can build a RAID 1 set without any jumper or BIOS setting. When creating a RAID 1 set for the first time, you can follow these simple steps. 1. Prepare two Serial ATA hard disk drives (HDDs). Plug one end of the Serial ATA cable to the rear interface on each drive and plug the other end of the cable to the motherboard connectors labeled EZ_RAID1 and EZ_RAID2 (colored light orange). Refer to section "2.7.2 Internal connectors" for the location of the connectors. For best results, use Serial ATA 3.0 Gb/s hard disk drives listed in the EZ‑Backup compatibility list. Visit the ASUS website at www.asus.com for details. 2. Connect a Serial ATA power cable or a 4-pin legacy power connector from the power supply unit to the rear power connector on each drive. Using both the SATA power cable and 4-pin power connector simultaneously will cause damage to the system. 3. Install the operating system. 4. Install the ASUS EZ-Backup Manager utility from the support CD that came with the motherboard package. 5. Reboot the computer. ASUS P5W 5-49
-
 1
1 -
2
-
3
-
4
-
5
-
6
-
7
-
8
-
9
-
10
-
11
-
12
-
13
-
14
-
15
-
16
-
17
-
18
-
19
-
20
-
21
-
22
-
23
-
24
-
25
-
26
-
27
-
28
-
29
-
30
-
31
-
32
-
33
-
34
-
35
-
36
-
37
-
38
-
39
-
40
-
41
-
42
-
43
-
44
-
45
-
46
-
47
-
48
-
49
-
50
-
51
-
52
-
53
-
54
-
55
-
56
-
57
-
58
-
59
-
60
-
61
-
62
-
63
-
64
-
65
-
66
-
67
-
68
-
69
-
70
-
71
-
72
-
73
-
74
-
75
-
76
-
77
-
78
-
79
-
80
-
81
-
82
-
83
-
84
-
85
-
86
-
87
-
88
-
89
-
90
-
91
-
92
-
93
-
94
-
95
-
96
-
97
-
98
-
99
-
100
-
101
-
102
-
103
-
104
-
105
-
106
-
107
-
108
-
109
-
110
-
111
-
112
-
113
-
114
-
115
-
116
-
117
-
118
-
119
-
120
-
121
-
122
-
123
-
124
-
125
-
126
-
127
-
128
-
129
-
130
-
131
-
132
-
133
-
134
-
135
-
136
-
137
-
138
-
139
-
140
-
141
-
142
-
143
-
144
-
145
-
146
-
147
-
148
-
149
-
150
-
151
-
152
-
153
-
154
-
155
-
156
-
157
-
158
-
159
-
160
-
161
-
162
-
163
-
164
-
165
-
166
-
167
-
 168
168 -
 169
169 -
 170
170 -
 171
171 -
 172
172 -
 173
173 -
 174
174 -
 175
175 -
 176
176 -
 177
177 -
 178
178 -
179
-
180
-
181
-
182
-
183
-
184
-
185
-
186
-
187
-
188
-
189
-
190
-
191
-
192
-
193
-
194
-
195
-
196
-
197
-
198
-
199
-
200
-
201
-
202
-
203
-
204
-
205
-
206
-
207
-
208
-
209
-
210
 |
 |